
Most paver patios in Clarkston, Georgia start failing around year four or five — not because the pavers themselves wear out, but because of what’s underneath them. Red clay soil, shallow base prep, plastic edging, and polymeric sand applied before the joints are clean. This is the honest breakdown of what it actually takes to build a paver patio in this soil that still looks this good three decades later.
We build paver patios all over the Metro Atlanta area, but Clarkston is one of the tougher clay zones we work in. The Piedmont red clay here drains slowly, expands when it’s wet, contracts when it’s dry, and pushes anything you put on top of it around — seasonally. If you’ve ever seen a paver patio with low spots that pool water, a soldier course that’s lifted off the main field by half an inch, or a seat wall that’s listing to one side, that’s the clay doing exactly what clay does.
A patio built correctly for this soil isn’t just a prettier version of a patio built incorrectly. It’s a structurally different project. Different excavation depth. Different base material. A geotextile fabric most contractors skip. Joints finished with a product most don’t bother applying twice. And paver lines that are graded for what happens in freeze-thaw cycles, not just for how they look on a sample board.
This post walks through eight real installs we’ve built in Clarkston and the surrounding clay-heavy neighborhoods, with photos pulled directly from our project library. What we used. Why we used it. And what would’ve gone wrong if we’d cut the corners we constantly see other contractors cut.
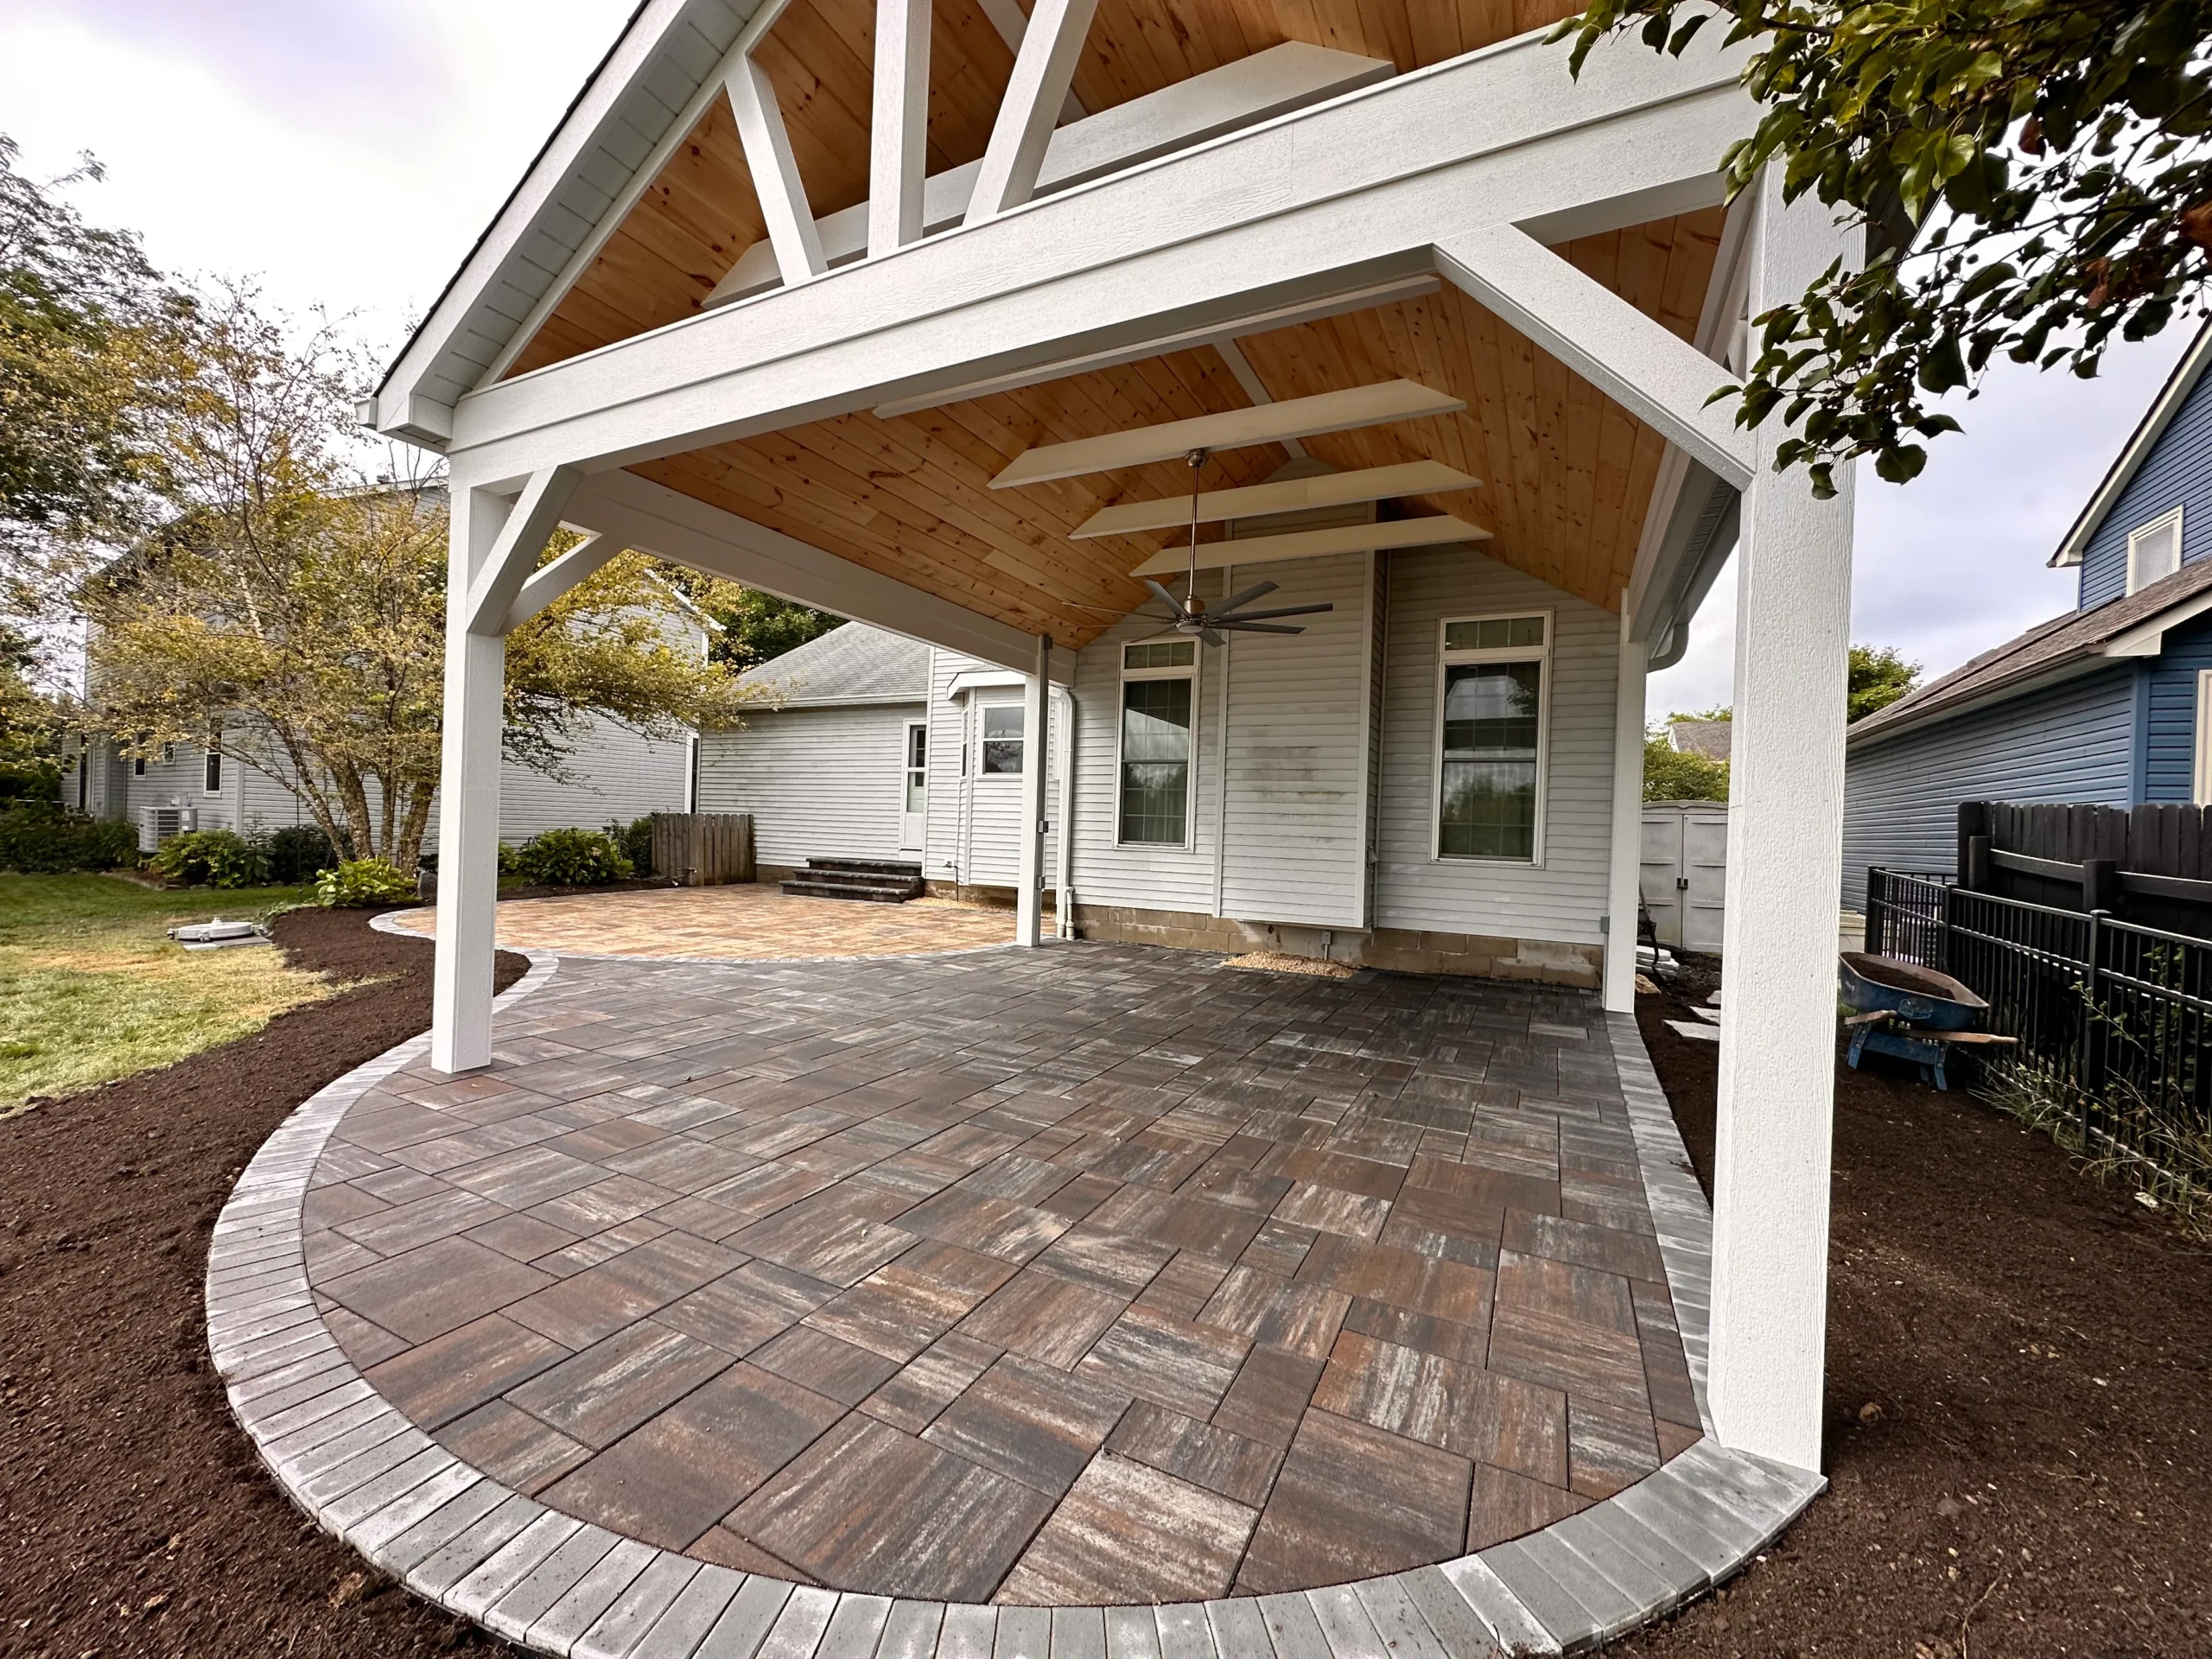
The Clarkston Clay Problem Nobody Talks About
Here’s the short version: Clarkston soil is roughly 40% clay by composition. When you pour water on clay, it doesn’t drain — it sits and swells. When the sun comes out, it shrinks and cracks. A paver base that rides directly on top of that kind of soil is going to heave, settle, and shift every season whether you want it to or not.
The standard “industry” answer to this in most residential hardscape builds is a 4-inch compacted crushed-stone base under the pavers. That’s fine for a walkway in sandy Florida soil. In Clarkston red clay, a 4-inch base is the reason your patio is going to be ugly in five years.
What we actually build in this soil:
- 8 inches of compacted open-graded base — not 4, not 6. Eight. This gives the patio a structural sponge underneath it that absorbs ground movement without telegraphing it up to the surface.
- Non-woven geotextile fabric separating the native clay from the base aggregate. If you skip this, clay migrates up into your base over time and the whole structure turns to mush.
- Compaction in 2-inch lifts, not one big pour-and-compact. Lift-by-lift compaction gets you to 95%+ density. Single-pour compaction gets you to maybe 80%, and that missing 15% is where your low spots come from.
- 1-inch bedding layer of washed concrete sand — not stone dust, not mason’s sand, not whatever was cheapest at the supply yard that week.
That’s the structure. Before a single paver gets laid. And this is the part of the job nobody gets to see when it’s done — which is exactly why it’s the part that most contractors quietly skimp on.
How to spot a skimped base before you sign: Ask your contractor to write the base depth into the contract. Not verbally. Written. “8-inch compacted open-graded base, compacted in 2-inch lifts, with a non-woven geotextile separator layer.” If they won’t put the number and the fabric in writing, they’re planning to cut it on-site.
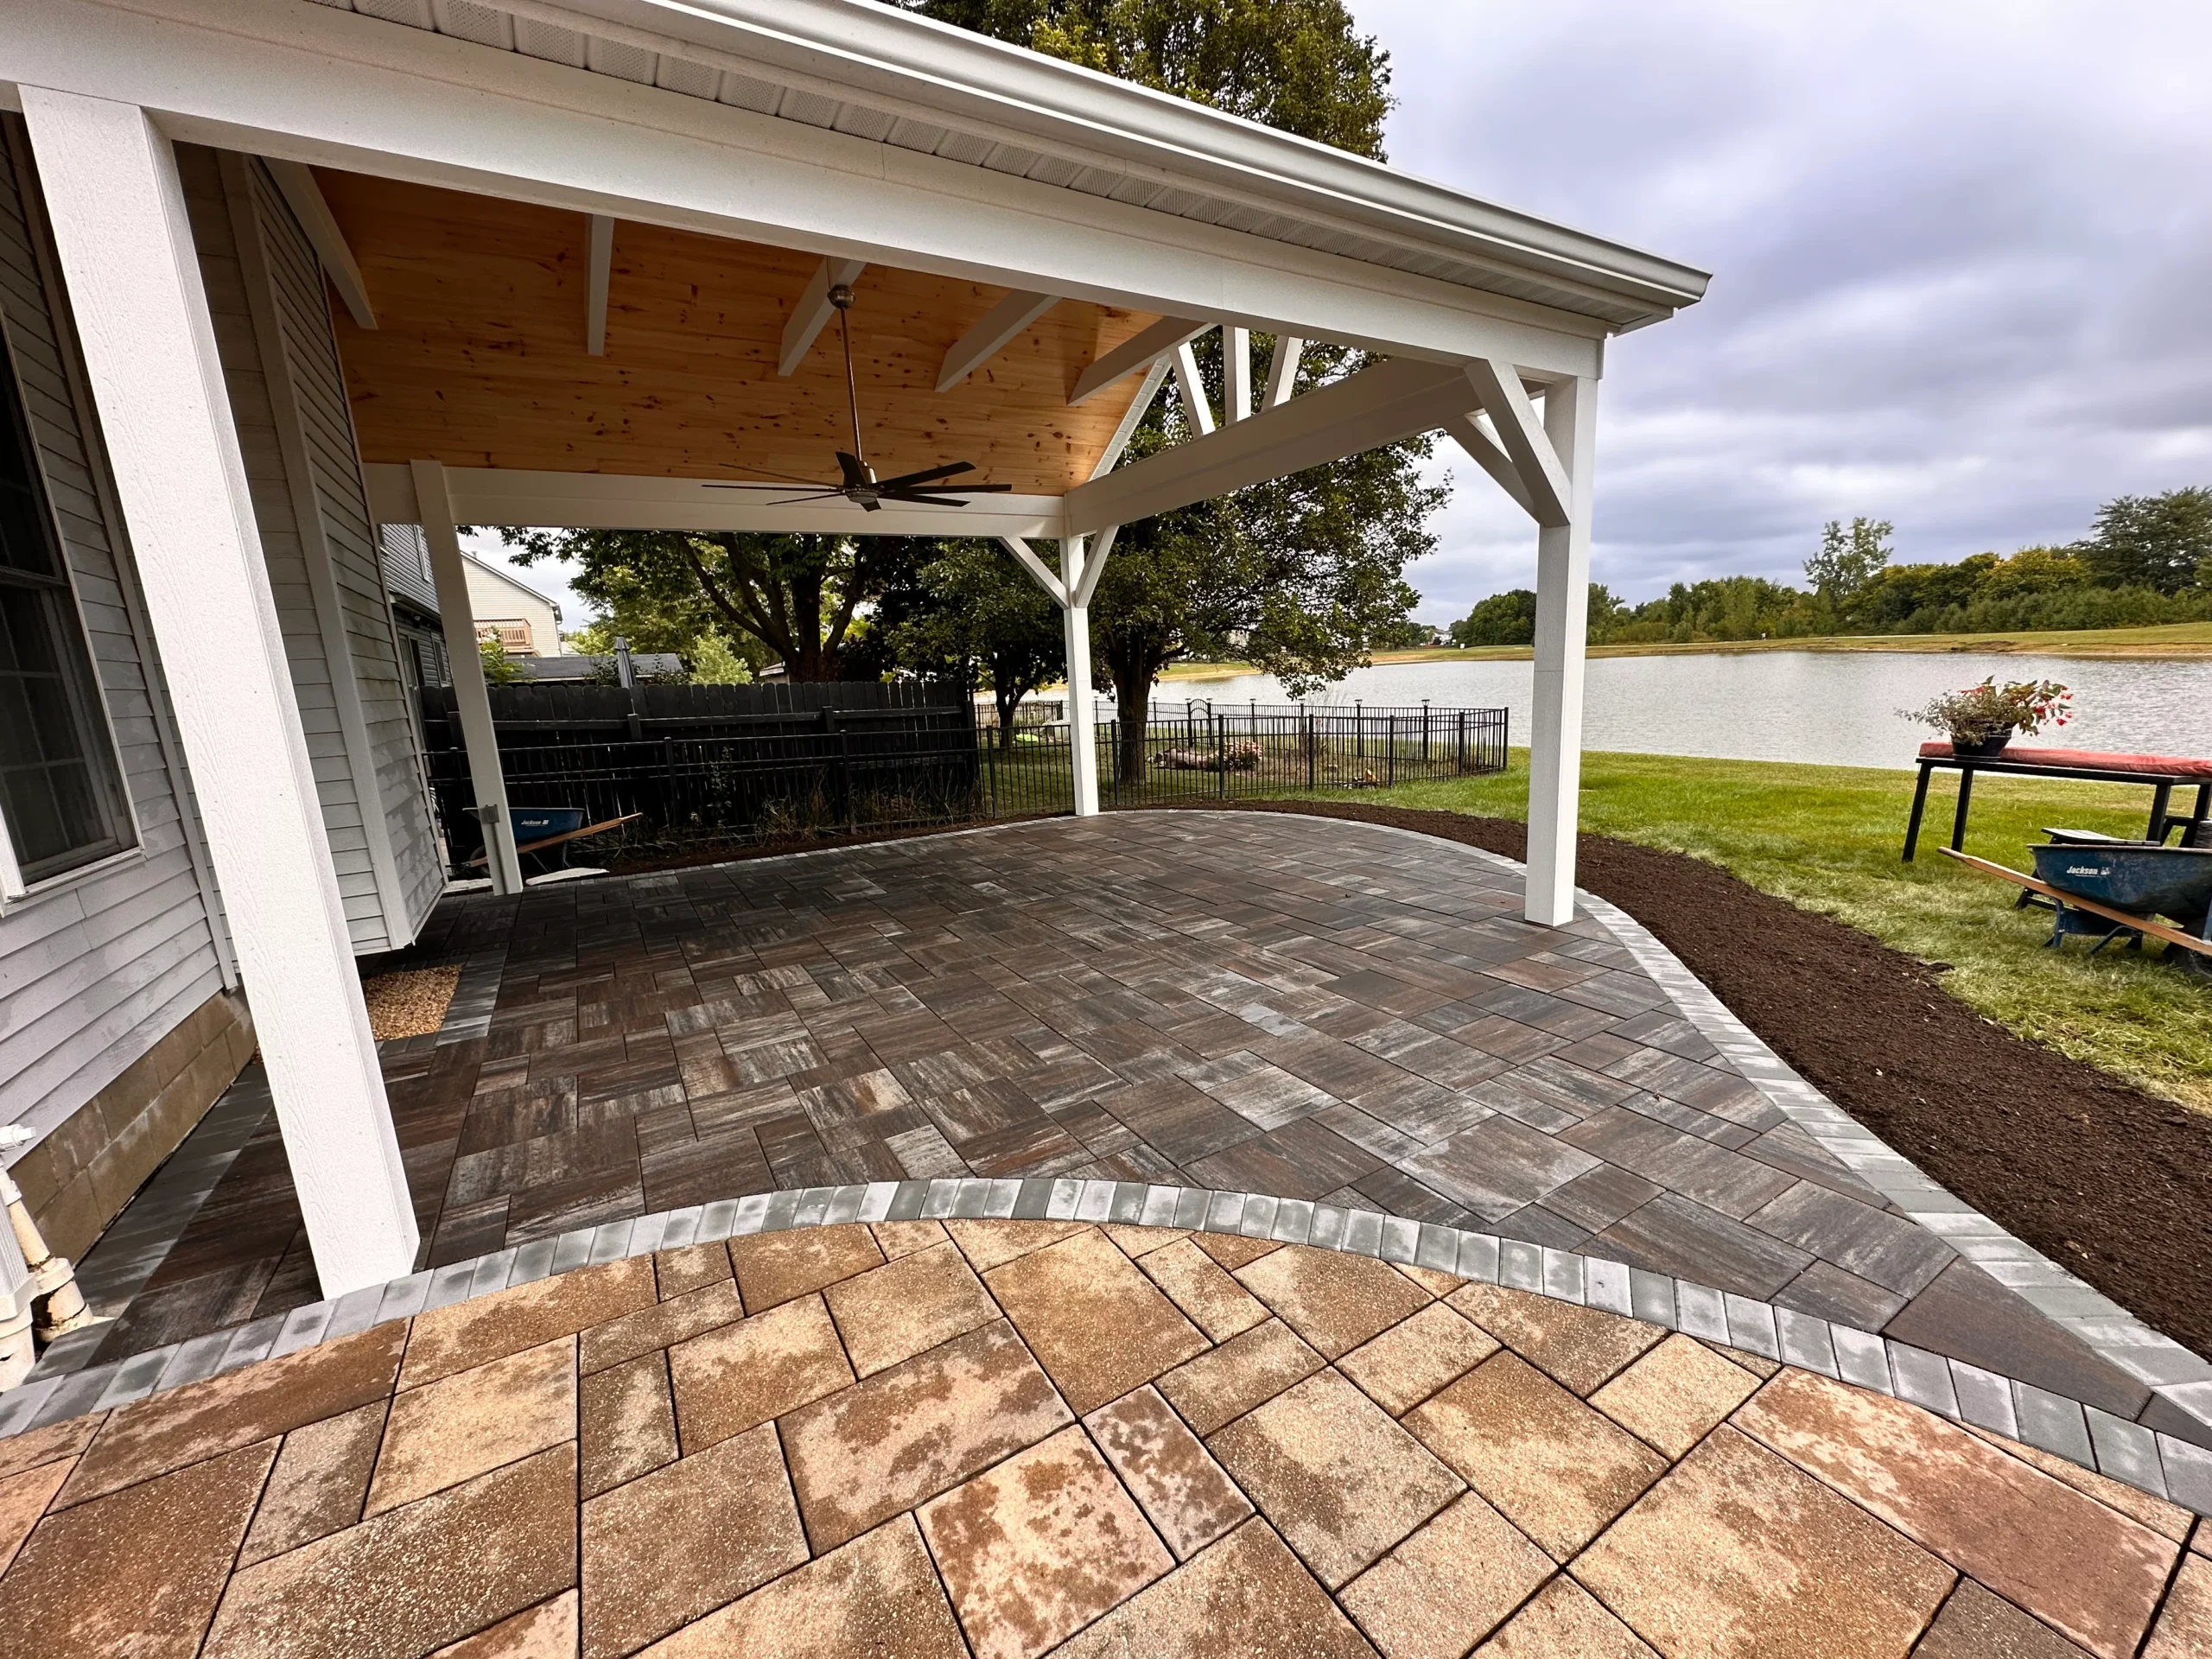
Why We Use Soldier Courses, Not Plastic Edging
Walk any suburban paver patio in Clarkston that was installed on a “value” budget and you’ll find the same failure mode: a plastic snap-edge restraint around the perimeter, held down with 10-inch spikes into clay. Two to three years in, the spikes have worked their way loose, the plastic has cracked from UV exposure, and the outer row of pavers is shifting sideways every time someone walks near the edge.
Plastic edging is a shortcut. It’s fine on a walkway that runs between two lawn beds. It is not a structural edge for a patio that you’re going to put furniture, a grill, and 12 people on for a cookout.
What we use instead is a soldier course — a perimeter row of pavers set perpendicular to the field, bonded into the base with a rigid mortar or polymer, and often finished with a contrasting color to create a deliberate design frame. It costs more. It also lasts as long as the patio does, which is the entire point.
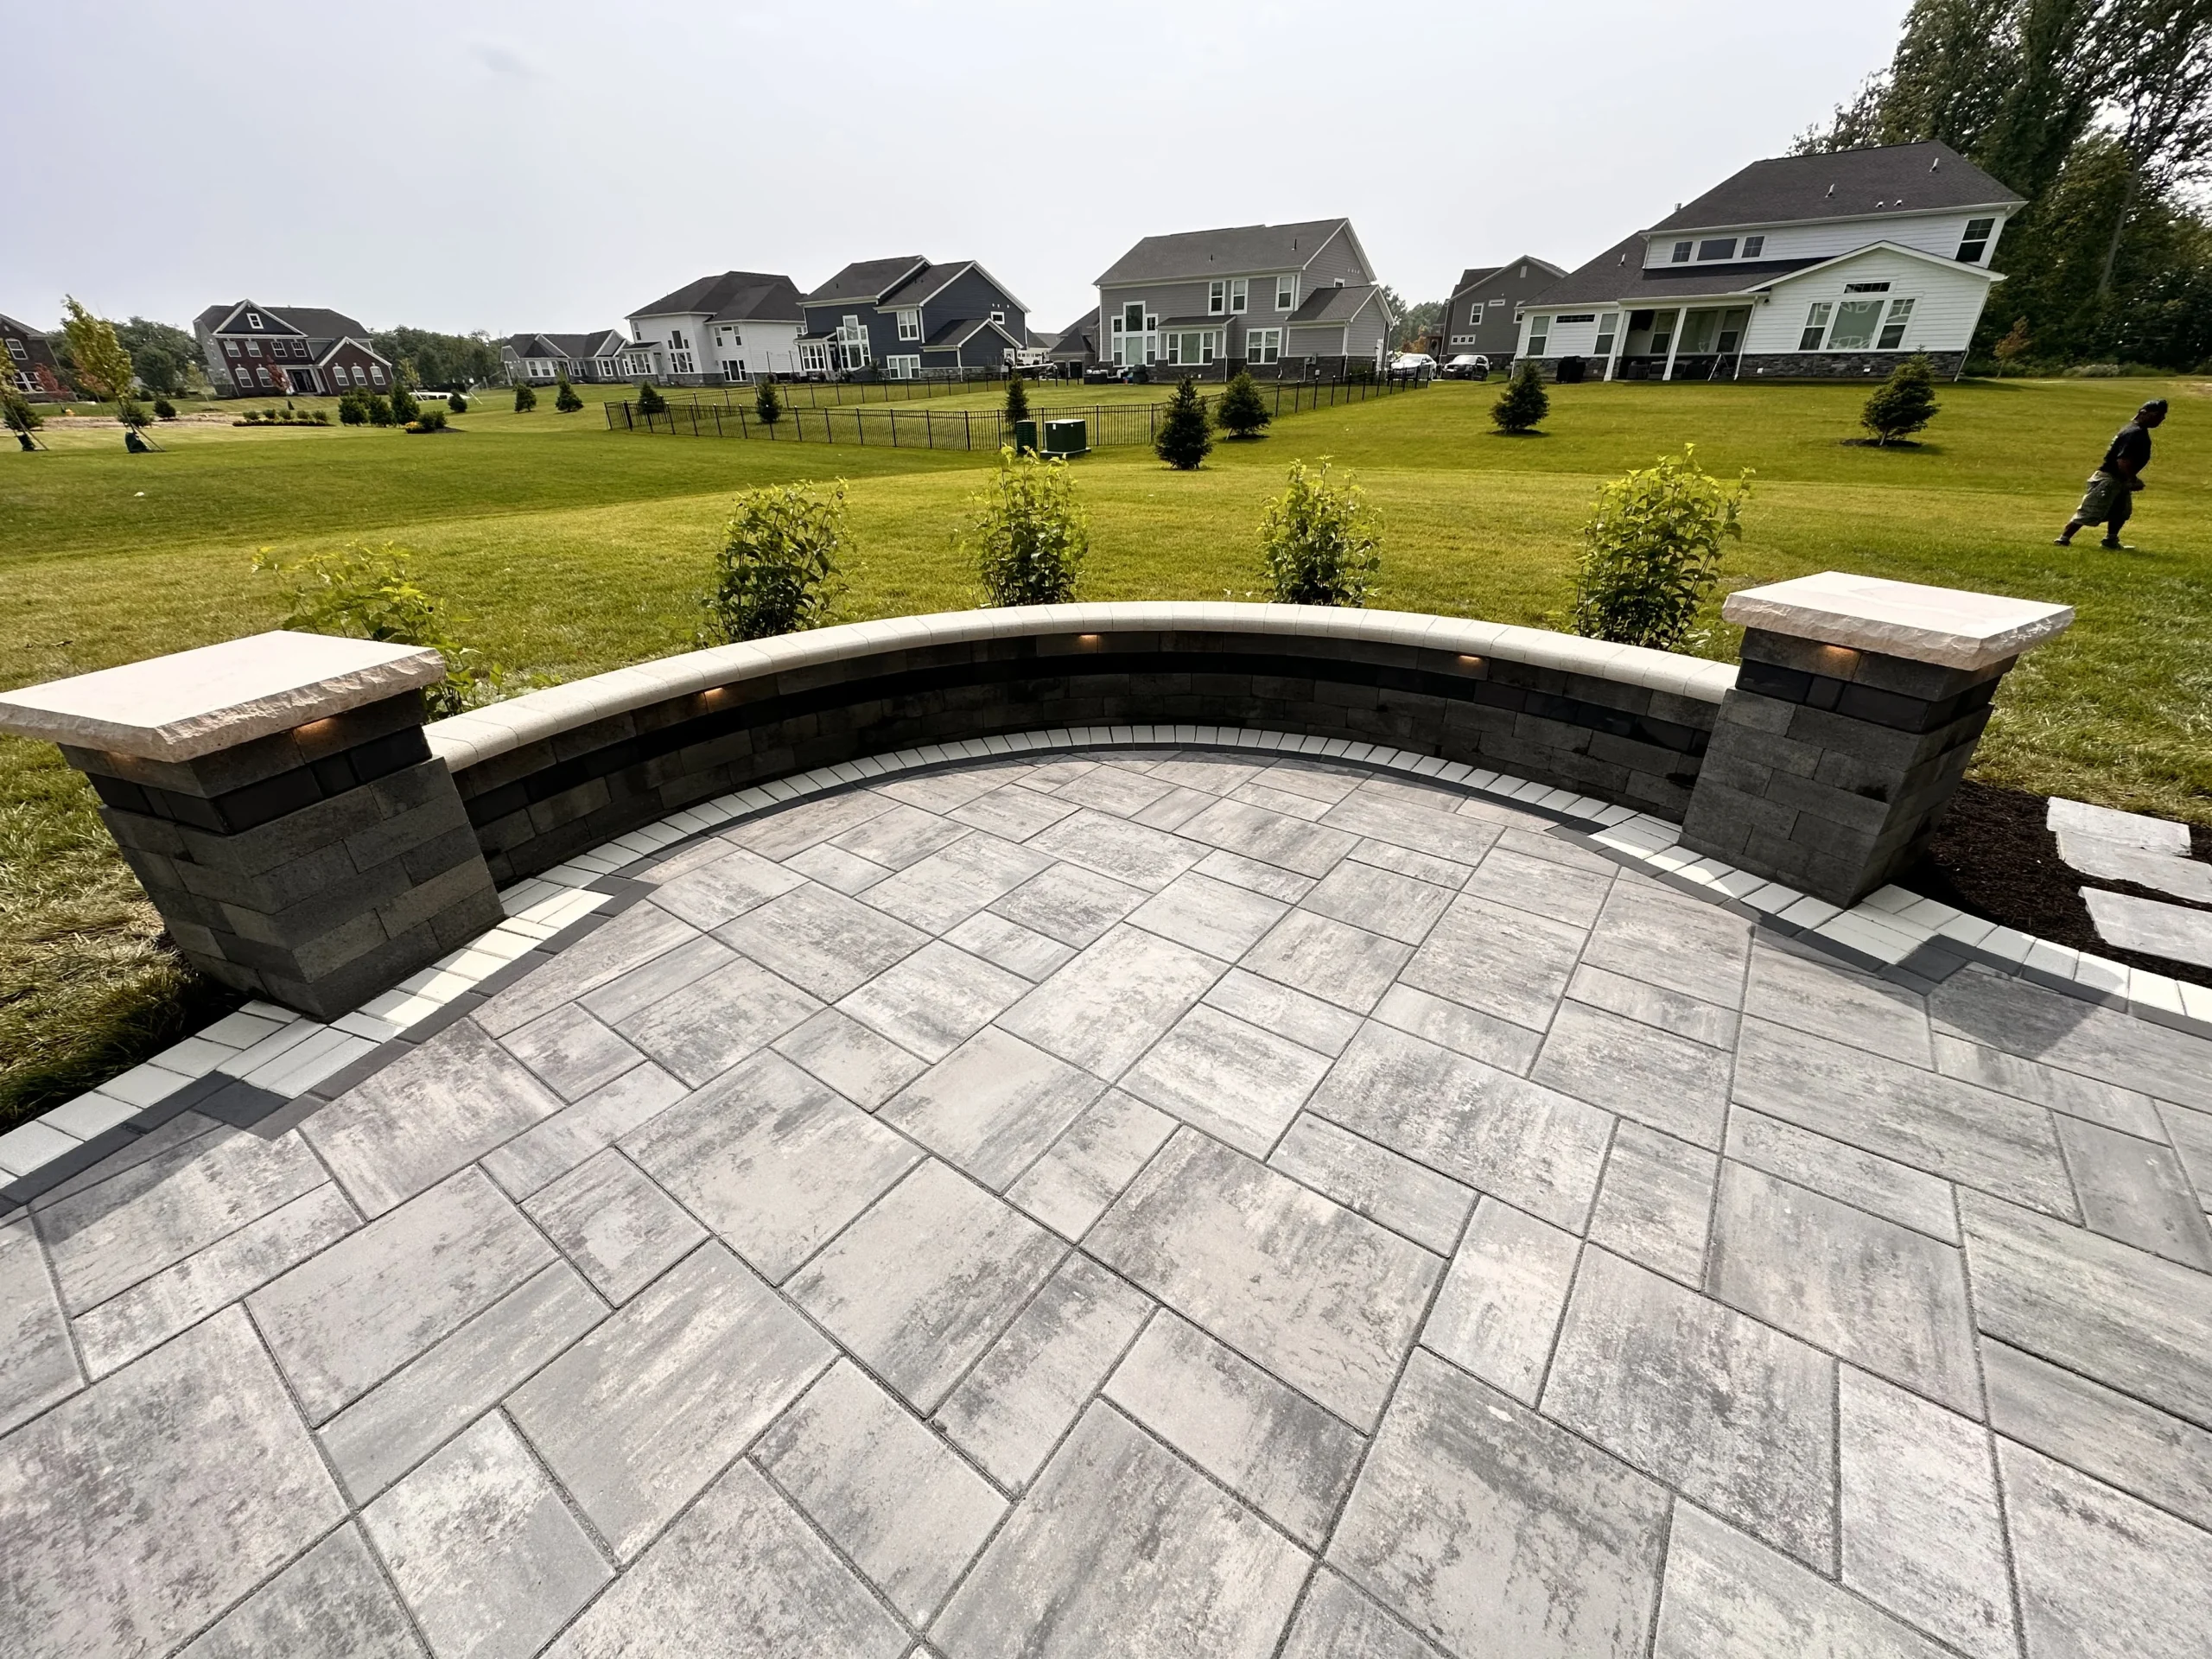
You can see the soldier course clearly in the photo above this section: the dark graphite band framing the lighter gray field. That isn’t a design flourish. It’s the structural restraint holding the whole field together laterally. Without it, the first freeze-thaw cycle that hits that patio would start pushing the outer edge outward and opening up gaps in the joint pattern.
On curved patios — like Install #5 or the radiused seat wall in Install #1 — the soldier course becomes even more important, because a curve has no natural restraining angle. Every paver along a radius is trying to pivot outward, and only the soldier course plus rigid edge bonding keeps them locked in plane.
The Paver Selection Actually Matters — 3 Lines We Use Most Often in Clarkston
There are a lot of paver manufacturers. A lot of them are fine. A few are exceptional. These are the three product lines we reach for first on almost every Clarkston project, and the reason we reach for them isn’t marketing — it’s engineering.
Techo-Bloc Blu Grande (large-format, 24″×16″)
The large-format pavers you see in Install #1, Install #4, and Install #5 are Techo-Bloc’s Blu Grande series. Two reasons we use this line so often: first, the unit size is large enough that you get fewer joints per square foot, which means less polymeric sand to maintain and fewer entry points for weeds or freeze damage. Second, the finish — called a “Chisel” or “Smooth” face depending on the colorway — is highly resistant to de-icing salt, which matters more in Clarkston winters than people expect.
Driftwood-gray (shown in Installs #1 and #5) and Onyx Black (shown in Install #4) are the two colorways we specify most often. They read as contemporary without being trendy, and the color is mineral-integral — not surface-dyed — so it doesn’t fade.
Techo-Bloc Industria / Modern pavers (multi-color plank pattern)
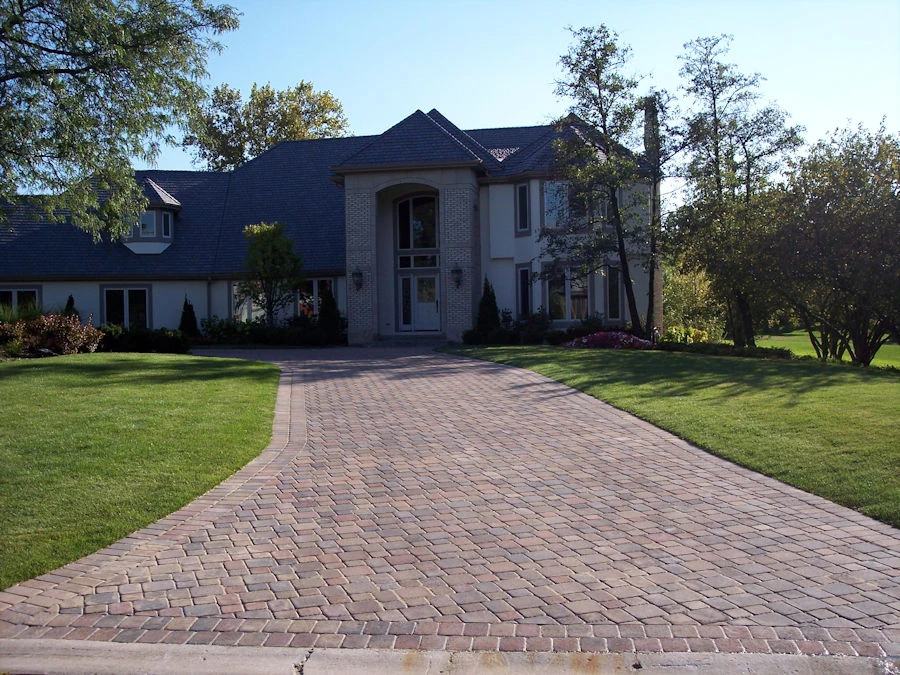
When a client wants a warmer, more textured look — the kind you see in Install #2, Install #3, and Install #6 — we pivot to the Industria or Borealis plank series. These are the multi-color tumbled pavers with copper, chestnut, and charcoal blend tones that look hand-aged rather than machine-cast.
The tumbled edge also hides minor joint movement better over time, which is a small advantage that adds up. If the patio does experience a quarter-inch of seasonal shift ten years from now, a tumbled paver will telegraph that much less visibly than a crisp-edged modern paver will.
Belgard Mega-Lafitt and Cambridge Ledgestone (blended-tone field)
For projects like Install #7 and Install #8 — where the client wants a blended cream, tan, and brown field that ties into the home’s stone or brick — we spec Belgard’s Mega-Lafitt line or Cambridge’s Ledgestone. These are the go-to products for homes with existing natural stone columns or brick facades, because the color variation in each paver unit gives you that slightly-random, hand-quarried read.
Install #7 in particular shows how well this product line pairs with stacked-stone column piers — the color variation in the pavers picks up the color variation in the stone, and the whole composition reads as a single design rather than two separate elements glued together.
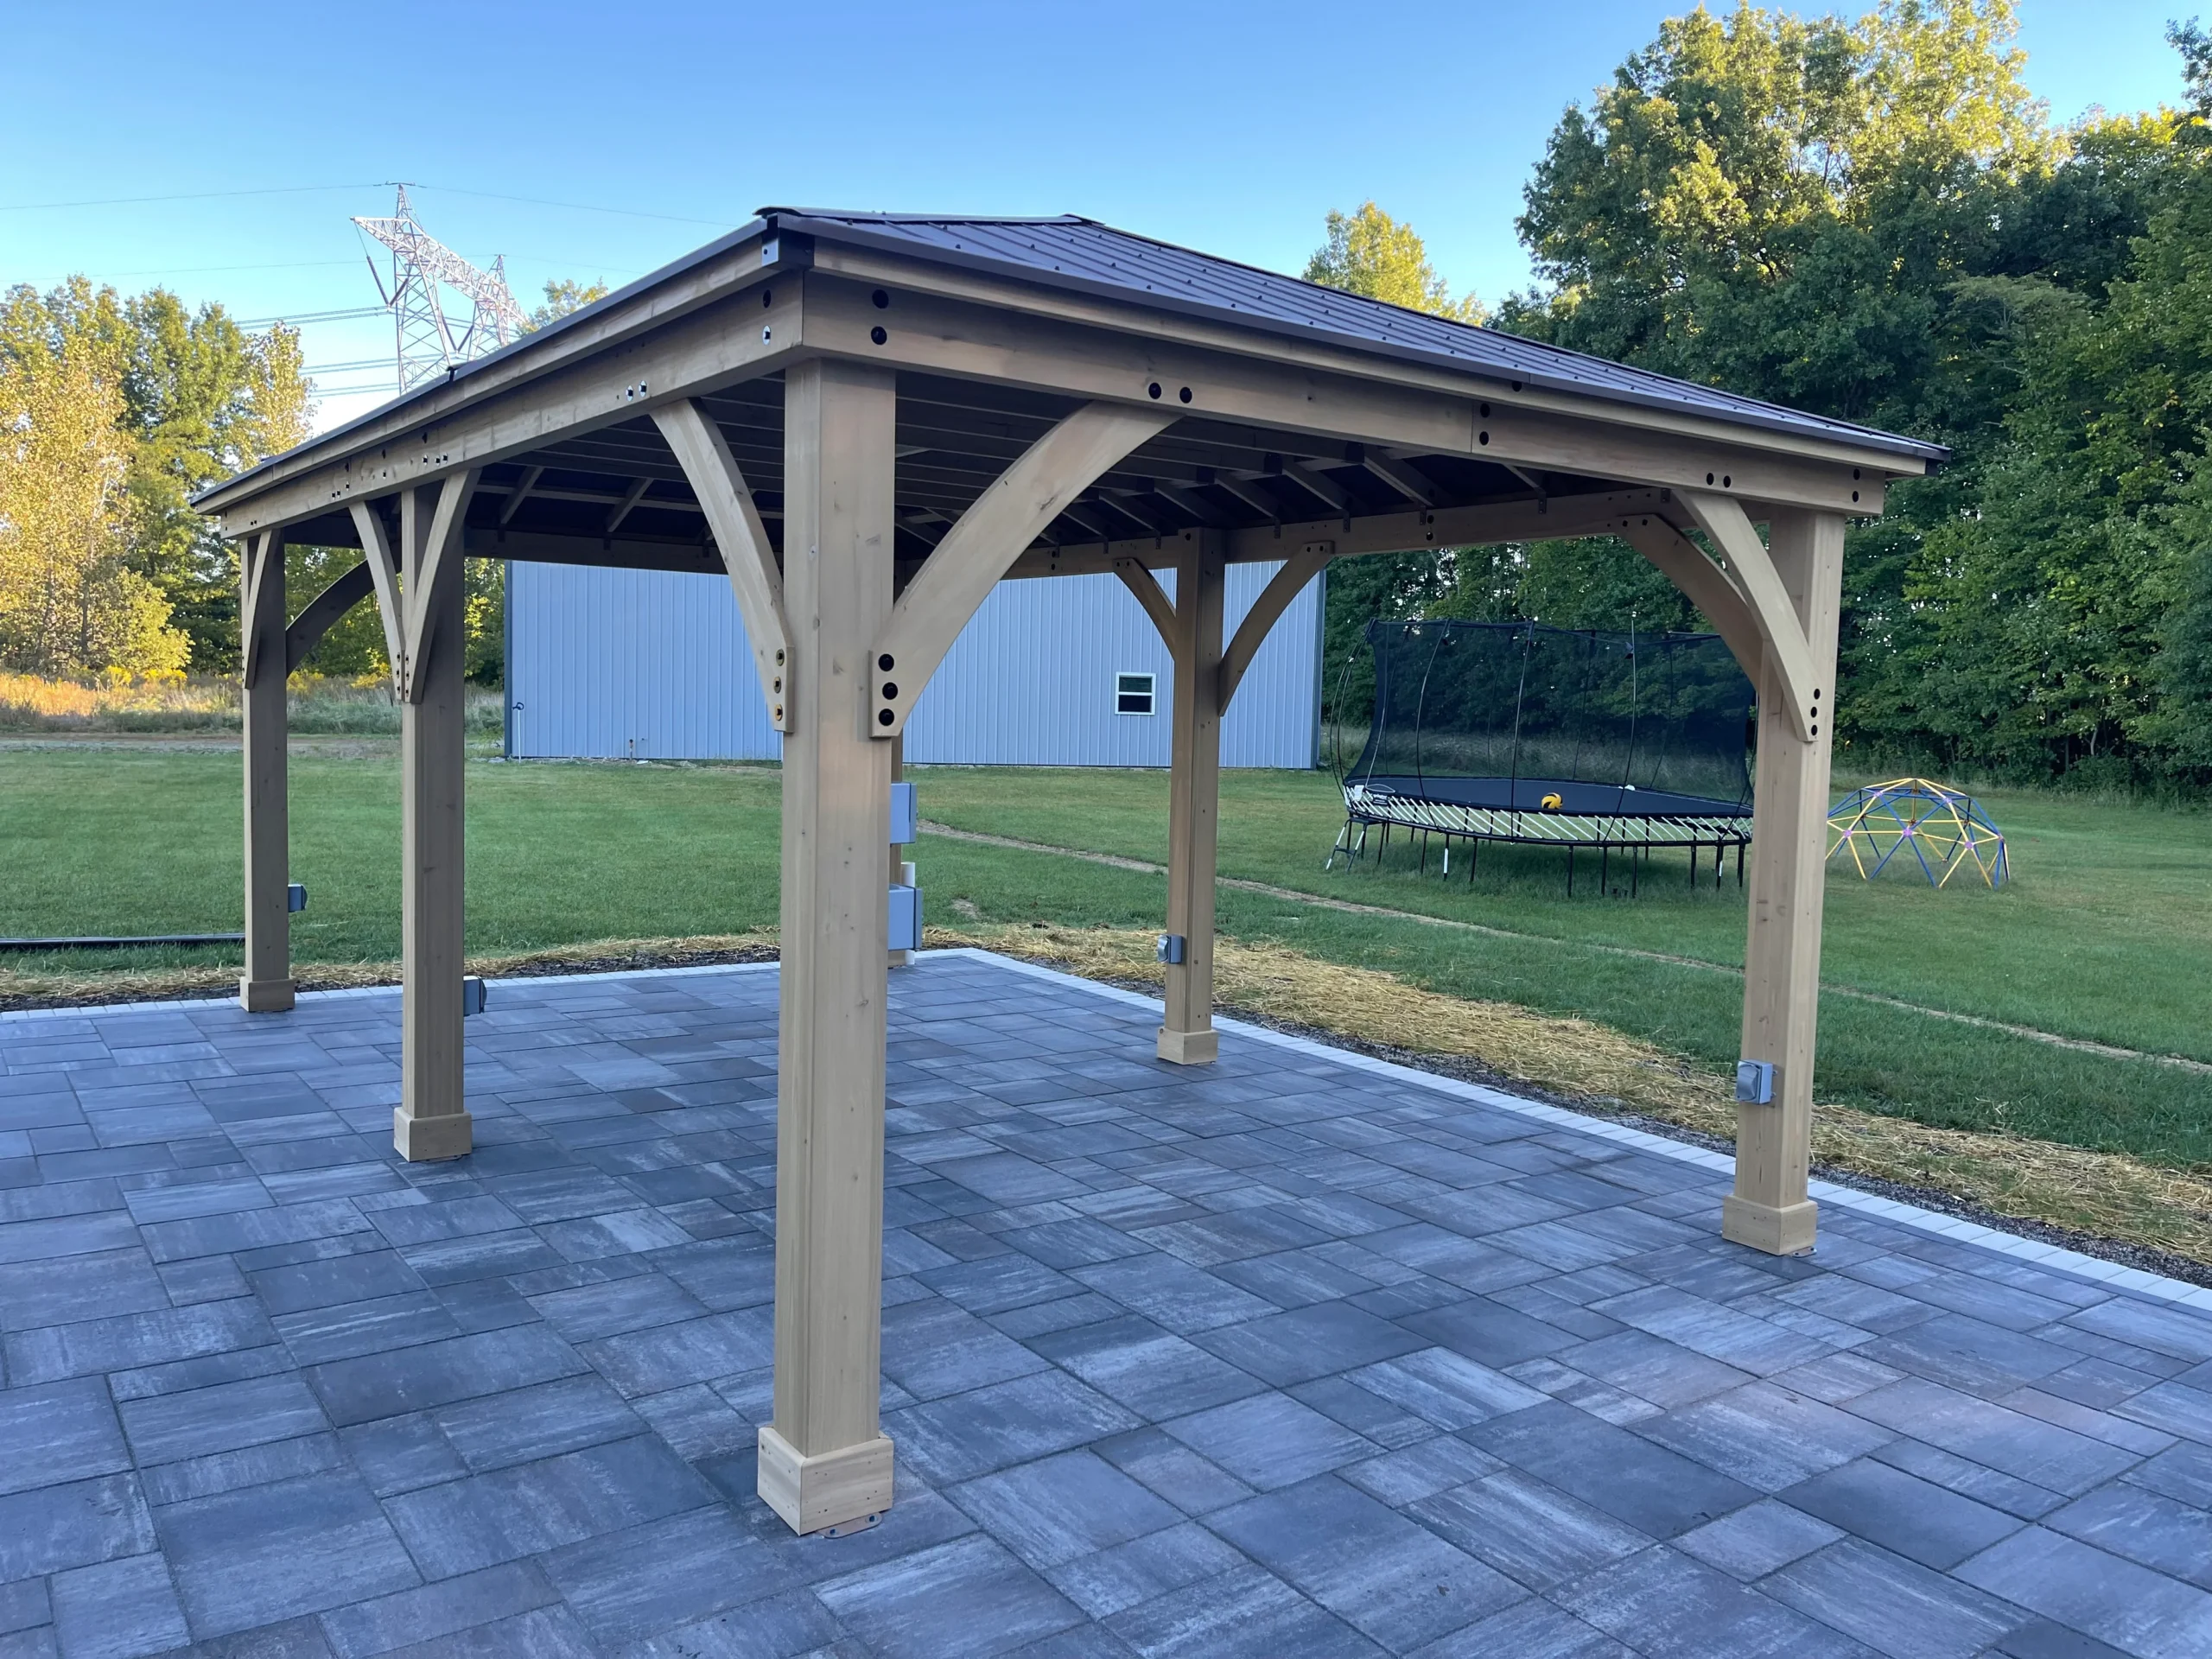
Integrated Features: Seat Walls, Column Piers, LED Lighting
A paver patio by itself is a floor. A paver patio with a seat wall, column piers, and integrated lighting is an outdoor room. The difference between those two things — in how you actually use the space and how much of the year you can use it — is massive, and it’s almost always worth spending the extra money up front rather than trying to add it later.
Let’s break down what you’re looking at in Install #1 and Install #5:
- Curved seat wall, 18″ tall. Sits on its own dedicated 8-inch compacted base, tied back into the main patio base with a shared aggregate layer. The top course is a smooth-cut cap unit in a contrasting color — structural AND comfortable to sit on.
- Column piers at the ends, 24″×24″ footprint, 30″ tall. Built from Techo-Bloc’s Monticello wall stone with a dimensional cap unit on top. These do structural work (anchoring the seat wall radius) and design work (giving the eye a visual “full stop” at each end of the curve).
- Low-voltage LED riser lights recessed into the face of the seat wall, every 4–5 feet. Plus LED cap lights in the column piers. Powered off a 12V transformer behind the patio with an astronomical timer — turns on 15 minutes before sunset every day automatically.
That lighting scheme alone is what makes the difference between a patio you use until 8 PM in summer and a patio you use until 10 PM year-round. It’s also what makes the space photograph well for anyone considering selling their house later — outdoor lighting is one of the top five appraiser-rated value adds in Metro Atlanta real estate.
What the seat wall + column piers add to the project cost: Typically $3,800 to $6,400 on top of a base patio build, depending on linear footage, cap material, and whether we’re integrating stone column piers. LED lighting adds another $1,200 to $2,200 installed — transformer, wire, fixtures, timer, and a pull to the house’s exterior outlet.
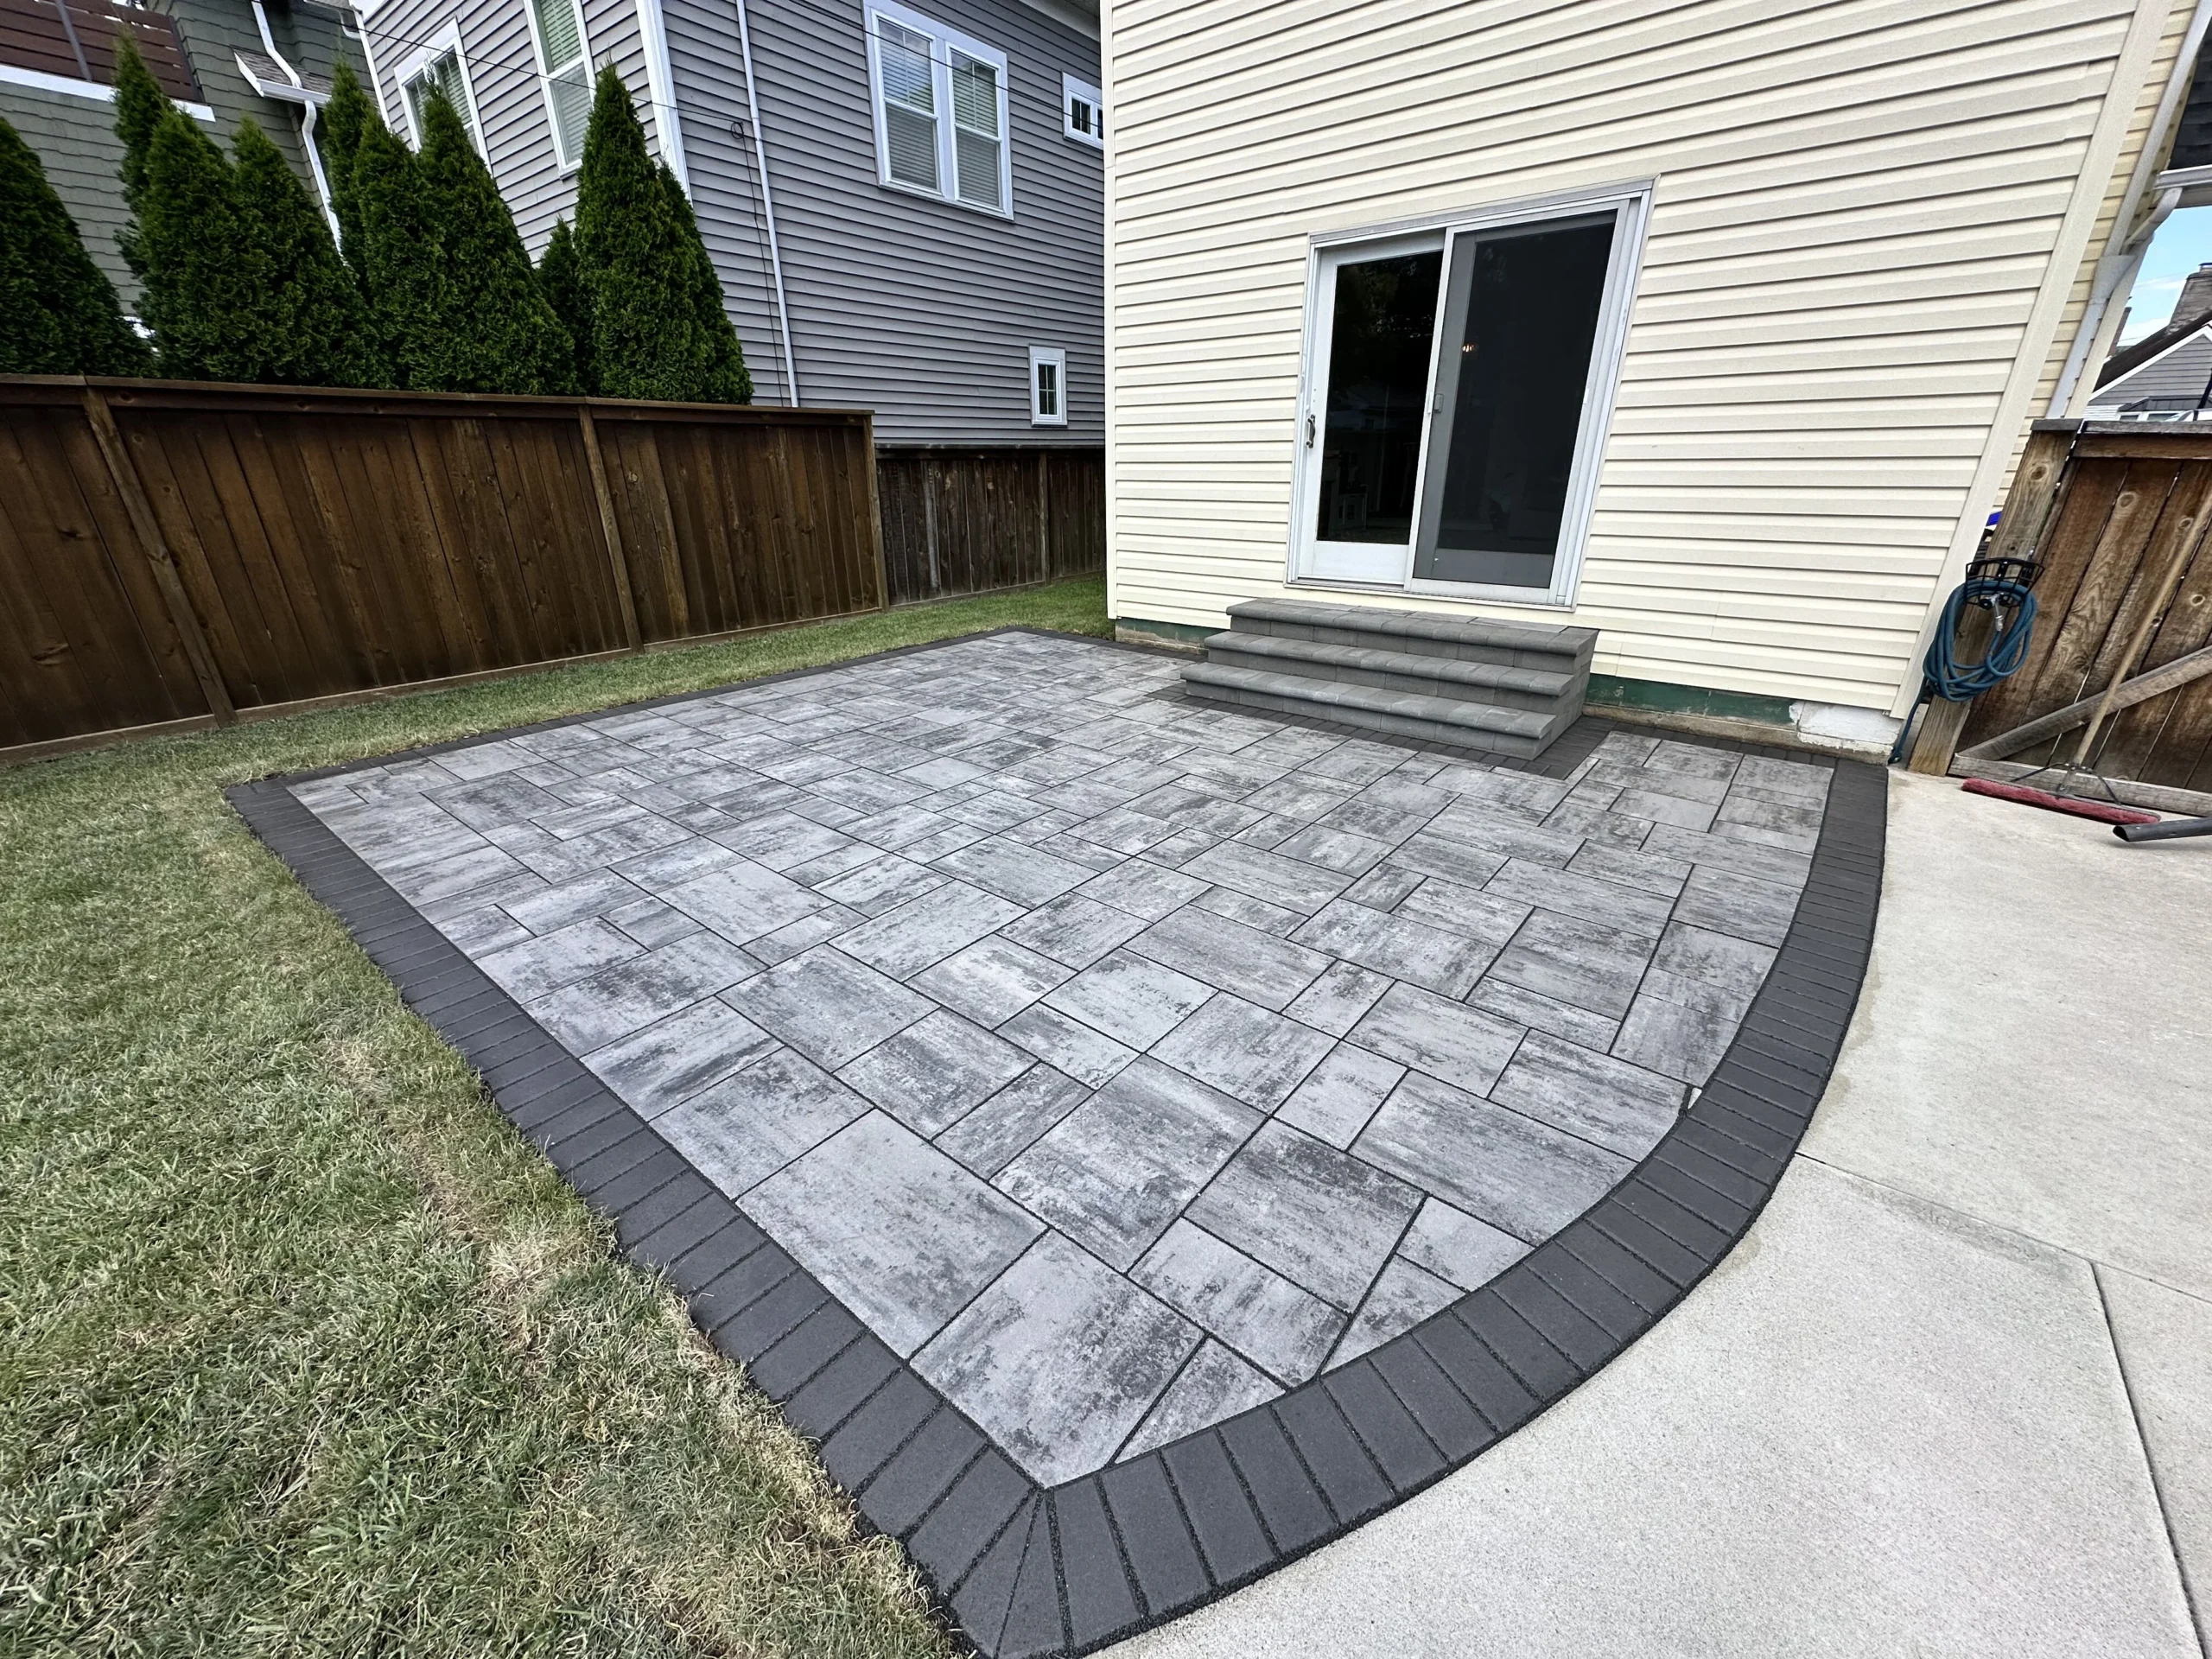
Covered Pavilion Integration — Why We Build the Patio First
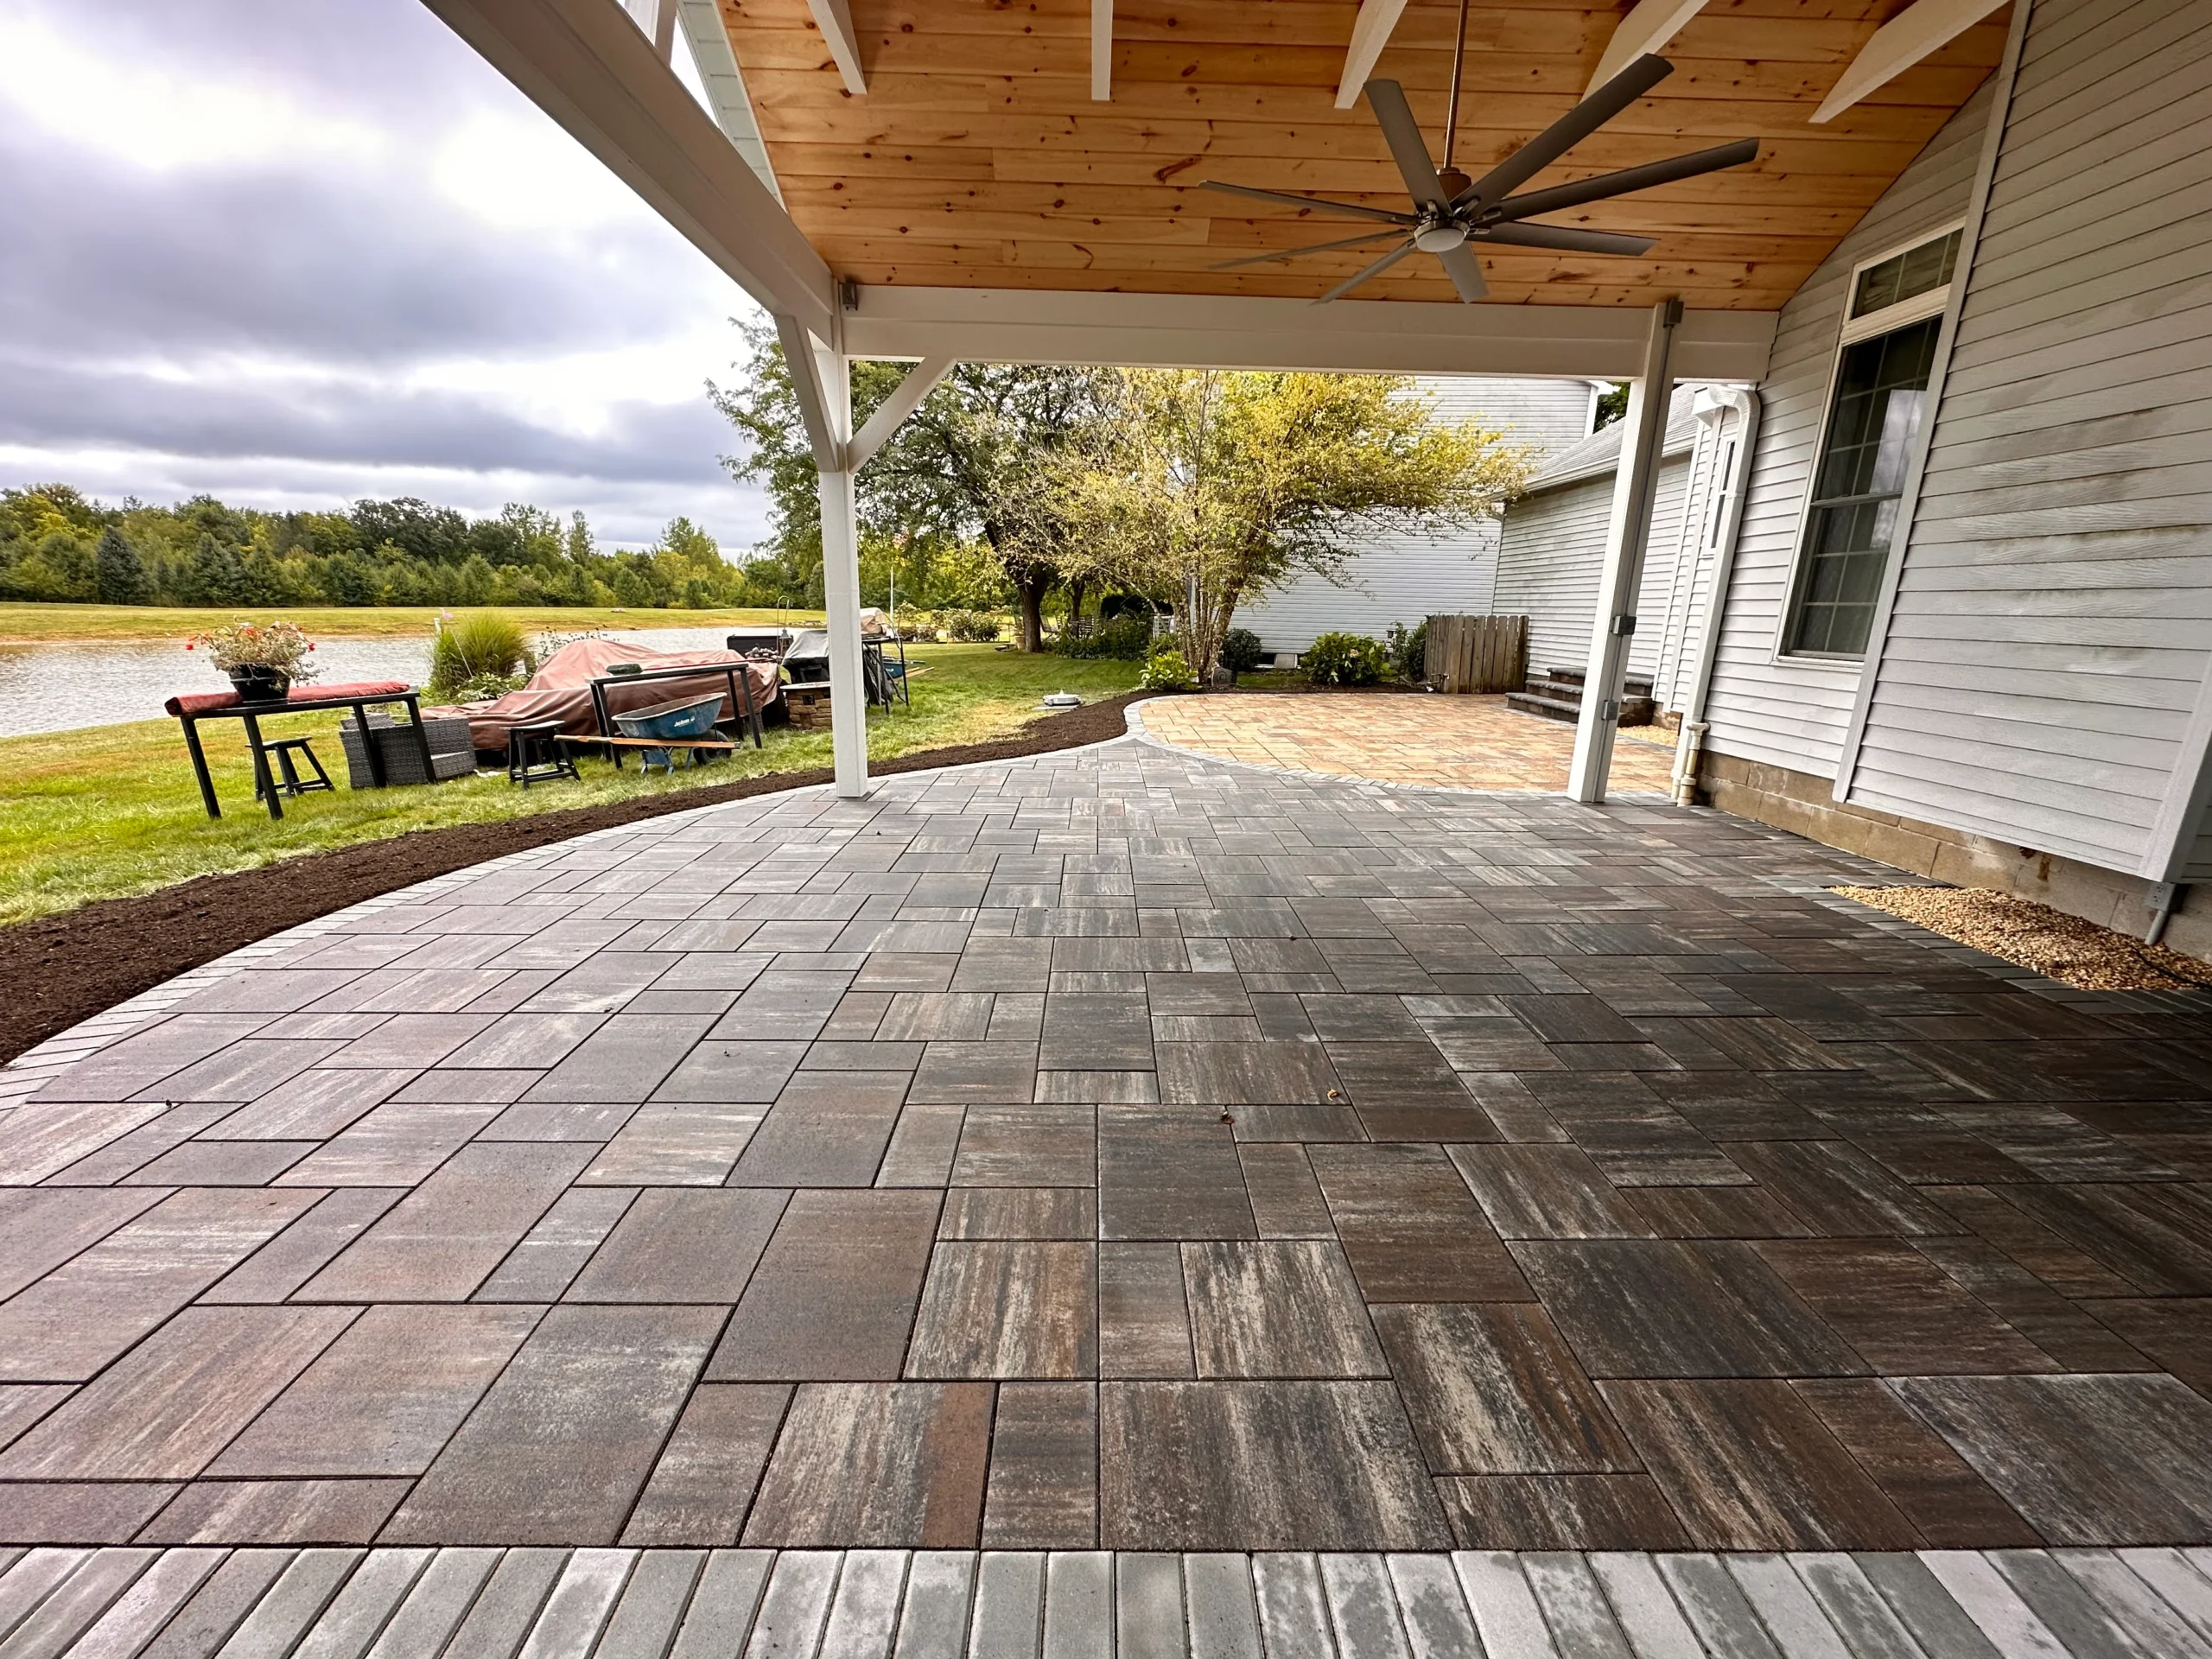
Installs #2, #3, and #6 all feature covered pavilions sitting directly on top of the paver patio. This is one of the most-requested upgrades we do in Clarkston, and it’s also one of the most commonly botched by contractors who don’t sequence the trades correctly.
Here’s the rule: the patio gets built first, with pre-poured concrete footings tied into the patio base, and THEN the pavilion columns go up on top. Not the other way around. Not both at once. Patio first.
The reason is straightforward. Pavilion columns transfer vertical load straight down through whatever they’re sitting on. If they’re sitting on a paver patio that was built over an undersized base, the columns will slowly press those pavers down over years. You end up with a pavilion that’s still square at the roof but has four permanent divots in the patio at each column base. To prevent this, we pour 24″×24″×36″ concrete footings under each column location before the patio base goes in — so the pavilion columns are landing on 3 feet of concrete, not on sand-bedded pavers.
It’s an extra step. It takes another half-day. It adds maybe $800 to $1,400 to the job. It also means the patio and the pavilion will still look identical in 20 years instead of telegraphing column compression.
Our 7-Step Process, Start to Finish
Every paver patio we build in Clarkston follows the same seven-stage process, in the same order, regardless of whether it’s a 200-square-foot sitting patio or a 1,400-square-foot entertaining zone with a pavilion, seat walls, and an outdoor kitchen. The reason is that the order matters — stages get harder, not easier, if you try to rearrange them.
- Site evaluation & grade mapping. We map the existing grade with a laser level and identify the drainage direction BEFORE we sign anything. If a patio is going to require positive drainage away from the house, we build that slope into the base, not into the paver surface.
- Excavation to -11 inches below finish grade. 8 inches of base + 1 inch of bedding + 2.375 inches of paver thickness = approximately 11 inches of depth below where the finished surface needs to sit.
- Geotextile fabric install. Non-woven, overlap 12 inches at every seam, extend 6 inches up any perimeter wall or foundation.
- Base install — compacted open-graded aggregate in 2-inch lifts. Each lift gets walked with a 15,000-pound-force plate compactor, in both directions, before the next lift goes in.
- Bedding course & screed. Screed 1 inch of washed concrete sand to a uniform thickness with screed rails.
- Paver install, starting from a 90° reference corner, working outward. Pavers set full-contact, soldier course last, curves cut on-site with a wet diamond saw.
- Polymeric sand, tamp, second polymeric pass, seal. We apply polymeric sand twice — once the day of install, again after 48 hours once the first pass has settled. Final seal coat is applied 30 days after install once efflorescence has cleared.
A well-coordinated crew finishes a 400-square-foot patio in 4 to 6 working days. A job that’s rushed to 2 days is a job that’s going to have problems. When you’re evaluating bids, the schedule is often a clearer quality signal than the price itself.
Pricing Transparency — What Clarkston Paver Patios Actually Cost
We publish our ranges because vague pricing is how contractors hide things.
Straight paver patio, base only: $22 to $34 per square foot installed. Includes full 8-inch base, geotextile, bedding, Techo-Bloc or Belgard field paver, soldier course, polymeric sand, 30-day seal.
Patio with seat wall + column piers + LED lighting: $32 to $48 per square foot of patio, depending on linear footage of wall, number of column piers, and material specification.
Patio with covered pavilion: Add $18,000 to $44,000 for the pavilion itself on top of the patio cost — range depends on span, roof material (shingled vs. metal vs. stained T&G), and ceiling fan / lighting integration.
Typical Clarkston project range for a “finished outdoor room” package — patio, seat wall, piers, lighting, optional pavilion — lands between $24,000 and $72,000. For reference, that’s what the same package costs us to build, not what we mark it up to.
Is This Build Right For You?
A well-built paver patio for the Clarkston clay conditions is a 25- to 35-year investment. It’s a good fit for homeowners who:
- Plan to stay in the home at least 7 years, or expect to sell to a buyer who values outdoor living
- Entertain outdoors, grill, or host gatherings 6+ times per year
- Have a backyard that receives at least 4 hours of direct sun per day
- Want a finished product that doesn’t require annual maintenance sealing (our spec sealing holds 5–7 years per coat)
- Care about drainage, grading, and craftsmanship as much as color and pattern
It’s not the right choice if you’re looking for a temporary outdoor surface, if your budget is under $14,000 for a full backyard transformation, or if you need the work done in under 2 weeks during peak spring season. In those cases, a concrete pad or stamped concrete is probably a better match for the project constraints.
Paver patios are not a commodity product. Two patios that look nearly identical in photos can be separated by 25 years of service life based entirely on what’s underneath them. If you’re evaluating bids in Clarkston and the numbers are within $3,000 of each other but one contractor is specifying 4 inches of base and the other is specifying 8 inches with geotextile, those aren’t competing bids for the same project. Those are bids for two completely different projects that happen to look the same on day one.
Build it right the first time. It’s always cheaper than building it twice.
Paver patio installations across 20+ cities within 30 miles of Winder, GA
Primetime Pools GA designs and builds paver patios, hardscape, retaining walls, and custom pool projects throughout these communities — each one with the same full-depth base, geotextile separator, and soldier-course edging detailed in this post.