
The call came in late February. A Hamilton Mill homeowner on Bailey Ridge Drive had a 1/2-acre back lot, three kids under ten, and a single sentence brief: “We want the pool, the patio, and the outdoor kitchen to feel like one thing — not three things bolted together.”
That phrasing matters. A lot of Dacula backyards that try to combine a pool, patio, and kitchen end up exactly like what the homeowner feared — three separate projects at three different elevations, with expansion joints where the vision was supposed to be seamless. The concrete settles at one rate, the patio moves at another, and the kitchen counter sits an inch out of level with the coping by summer three.
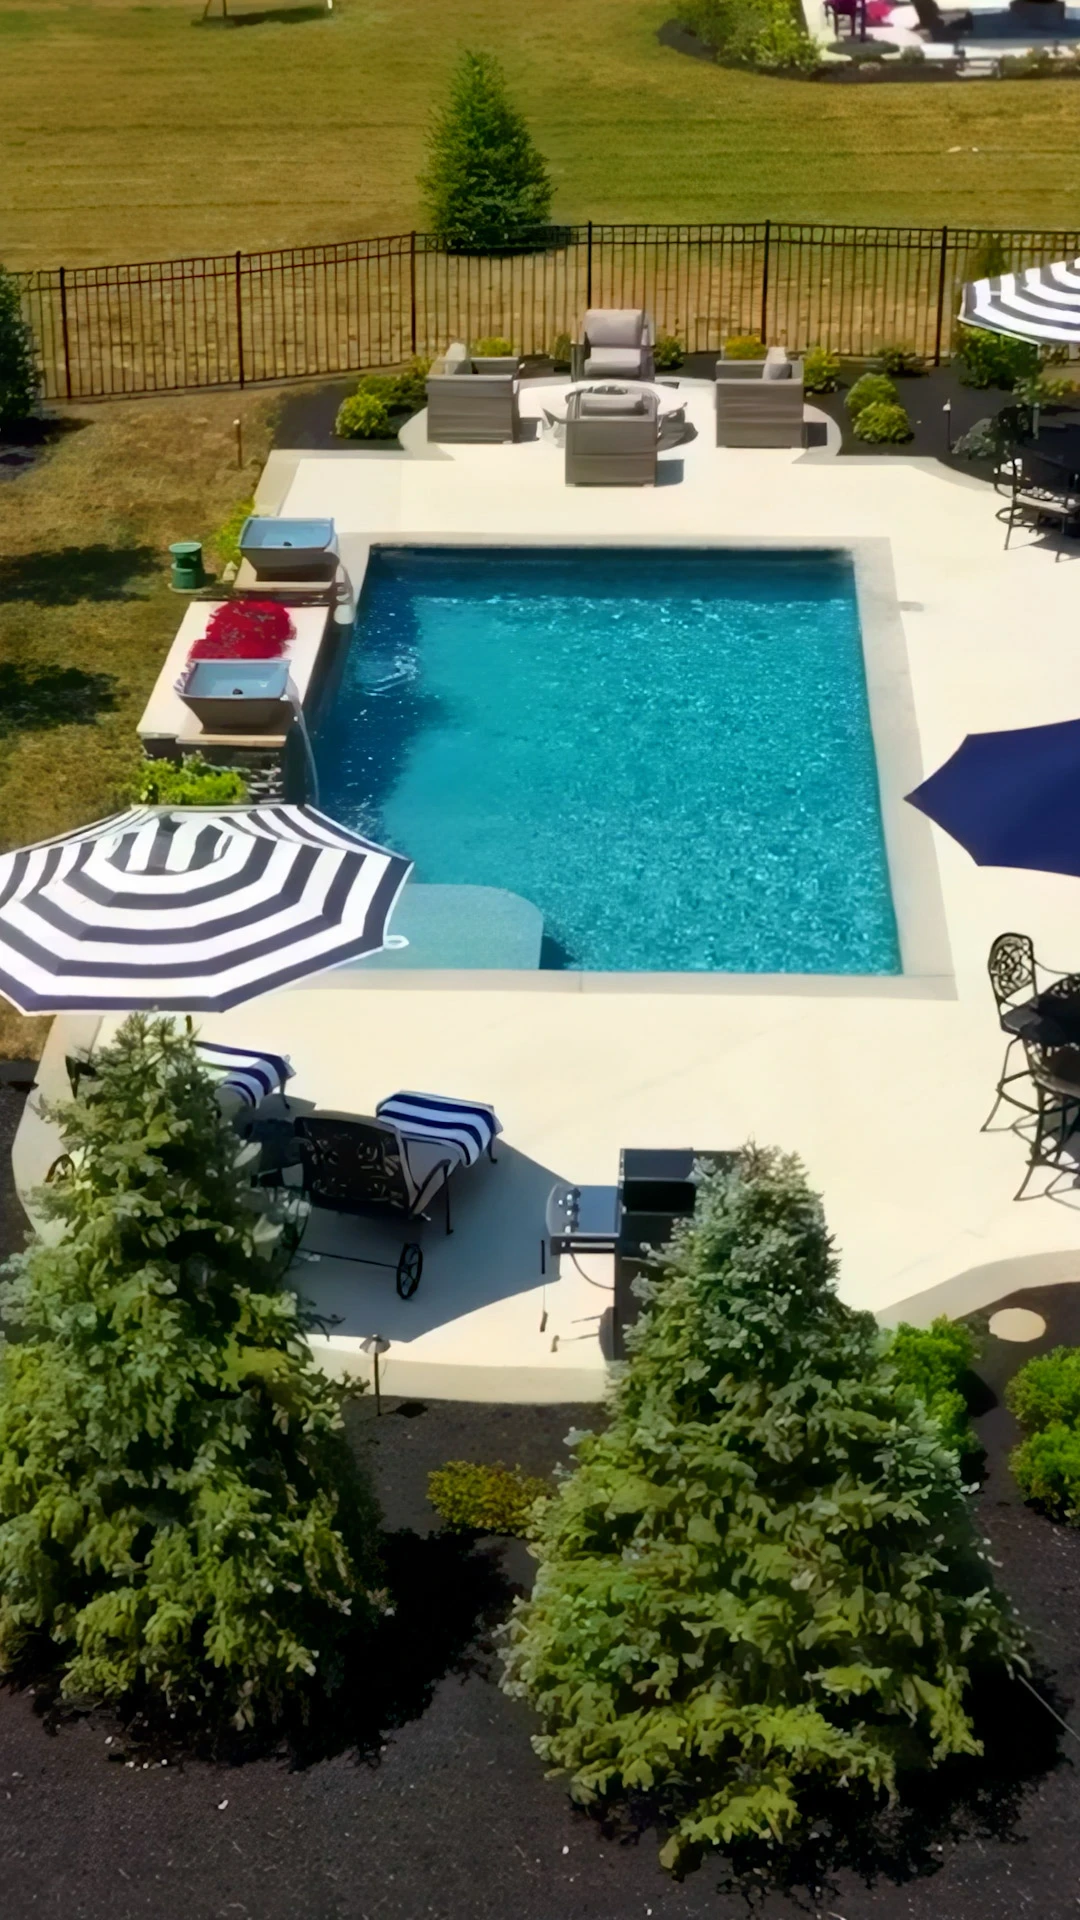
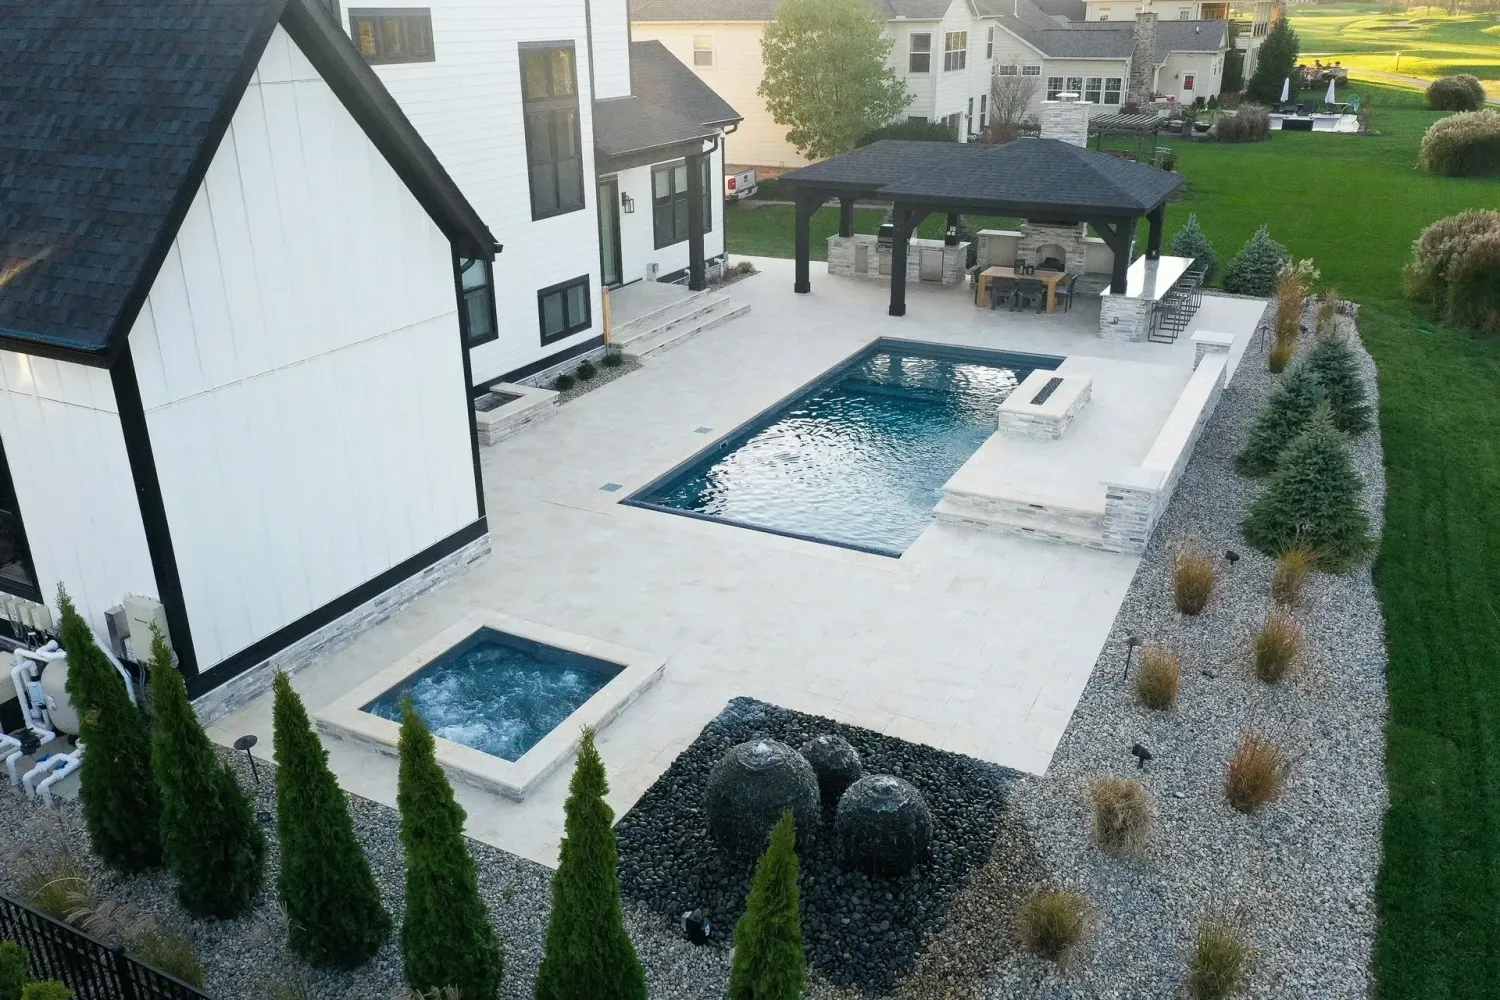
What follows is a phase walkthrough of that Hamilton Mill build — a 38-by-18 gunite pool, a 1,450-square-foot travertine deck, and a 14-foot L-shaped kitchen with a 36-inch Coyote grill, a 5-foot fridge bay, and a covered prep zone. Contract signed March 3. Keys handed back June 19. Final budget: $182,400. The decisions made in weeks one and two mattered more than any material choice later.
Phase One — Site Survey, Sight Lines, and the Budget Split
Before a stake went in the ground we spent two afternoons on the lot with the homeowners. Not measuring — just standing. Where does mom grill while the kids are in the shallow end? Where does dad sit when the sun drops behind the Hamilton Mill Ridge treeline? If a neighbor on Providence Club Drive ever adds a second story, what view changes? Hamilton Mill covenants allow second-story additions with board approval, and three houses on this block had already done it.
From that walk we built the sight-line rule that governed the whole design: the outdoor kitchen faces the pool from the house side, never the other way around. The cook stands between the back door and the water. The pool is what the cook sees. That single decision locked the kitchen’s position, which locked the patio’s shape, which locked where the deep end could go.
Budget allocation got the same clarity treatment. We broke the $182,400 into four buckets and refused to let any bucket creep into another without a written change order. For a full pool-plus-patio-plus-kitchen integration in Dacula, the split that actually works is:
Hamilton Mill Budget Split — What $182,400 Actually Bought:
Pool shell, equipment, plumbing, and interior finish — 45% ($82,080). Deck and patio including travertine, base, and drainage — 25% ($45,600). Outdoor kitchen structure, appliances, gas, water, electrical, and countertop — 20% ($36,480). Lighting package and gas firepit — 10% ($18,240).
That split is not arbitrary. We write it into the contract because every homeowner is tempted to slide money from the pool bucket into the kitchen bucket halfway through — and the pool is the bucket that punishes you for underfunding it.
We also laid out the shade math during phase one. Dacula is USDA Zone 8a. In mid-June, the sun drops west-southwest toward Hamilton Mill Ridge between 4:30 and 7:00 p.m. That late-afternoon sun cooks a grill zone out of usability. For this southeast-facing lot, a covered pavilion pitched at a 7-in-12 slope facing west, projecting 9 feet from the kitchen’s rear wall, blocks direct sun on the prep zone from 4:15 p.m. until sunset during grilling season. We sketched that shadow on the paper plan during the second site visit. The homeowners understood it before we quoted it.
Phase Two — Permits, Utilities, and the Gwinnett County Paperwork Reality
Permits in Dacula run through Gwinnett County’s Department of Planning & Development at 446 W. Crogan Street in Lawrenceville. The Bailey Ridge project required three separate permits running on overlapping timelines: a pool permit, a building permit for the covered pavilion (it exceeded 120 square feet and qualified as a roofed accessory structure), and an electrical permit for the 50-amp subpanel we added to the backyard equipment pad.
Dacula homes inside Hamilton Mill typically have a main electrical panel rated 200 amps. Daisy-chaining a full outdoor integration — pool pump, salt cell, heater, LED lighting, refrigerator, kitchen outlets, accent lighting — back to the main panel invites nuisance trips every time the pump and heater kick on together. So we planned a 50-amp subpanel inside the outdoor kitchen’s utility bay, fed with 6-gauge copper in 3/4-inch conduit, landing on a Square D QO load center with twelve spaces. The subpanel handles everything in the backyard on one disconnect. When something trips at 9:30 p.m., the homeowner walks 15 feet, not 40.
Gwinnett’s electrical permit requires any new subpanel to be inspected at rough-in before cover, and again at final. Both inspections scheduled within three business days and both passed first visit because we pulled proper feeder and honored the NEC 680 bonding grid around the pool before closing trenches.
The gas trench got its own treatment. Natural gas service was already run to the house from the Hamilton Mill Parkway feeder. We tapped a 1-inch CSST line off the regulator at the meter and trenched it 24 inches deep across the yard to the kitchen pad. County code permits 18 inches minimum for natural gas in residential yards, but we prefer 24 inches — it puts the line well below frost depth and below the kind of casual digging a homeowner does when they plant azaleas three years later. The trench ran parallel to, not on top of, the electrical feeder, with 12 inches of horizontal separation.
Gas Line Spec, Hamilton Mill Build: 1-inch CSST (Gastite brand), continuous run from meter to kitchen manifold — no underground splices. Trench depth 24 inches, 12-inch horizontal separation from electrical. Protected sleeve under the 36-inch concrete patio slab crossing. Pressure-tested at 15 psi for 30 minutes before backfill; Gwinnett inspector signed off before dirt went back in.
Water to the kitchen was a 3/4-inch PEX-A line inside a 2-inch conduit sleeve, feeding a frost-proof sillcock, a line to the icemaker, and a hand-wash bowl with hot and cold. Hot water came from a tankless unit mounted inside the utility bay and vented through the rear stone wall — the family didn’t want to wait 80 feet of pipe every time someone rinsed a marinade dish.
Phase Three — Excavation, the Slope Problem, and Pool Shell Pour
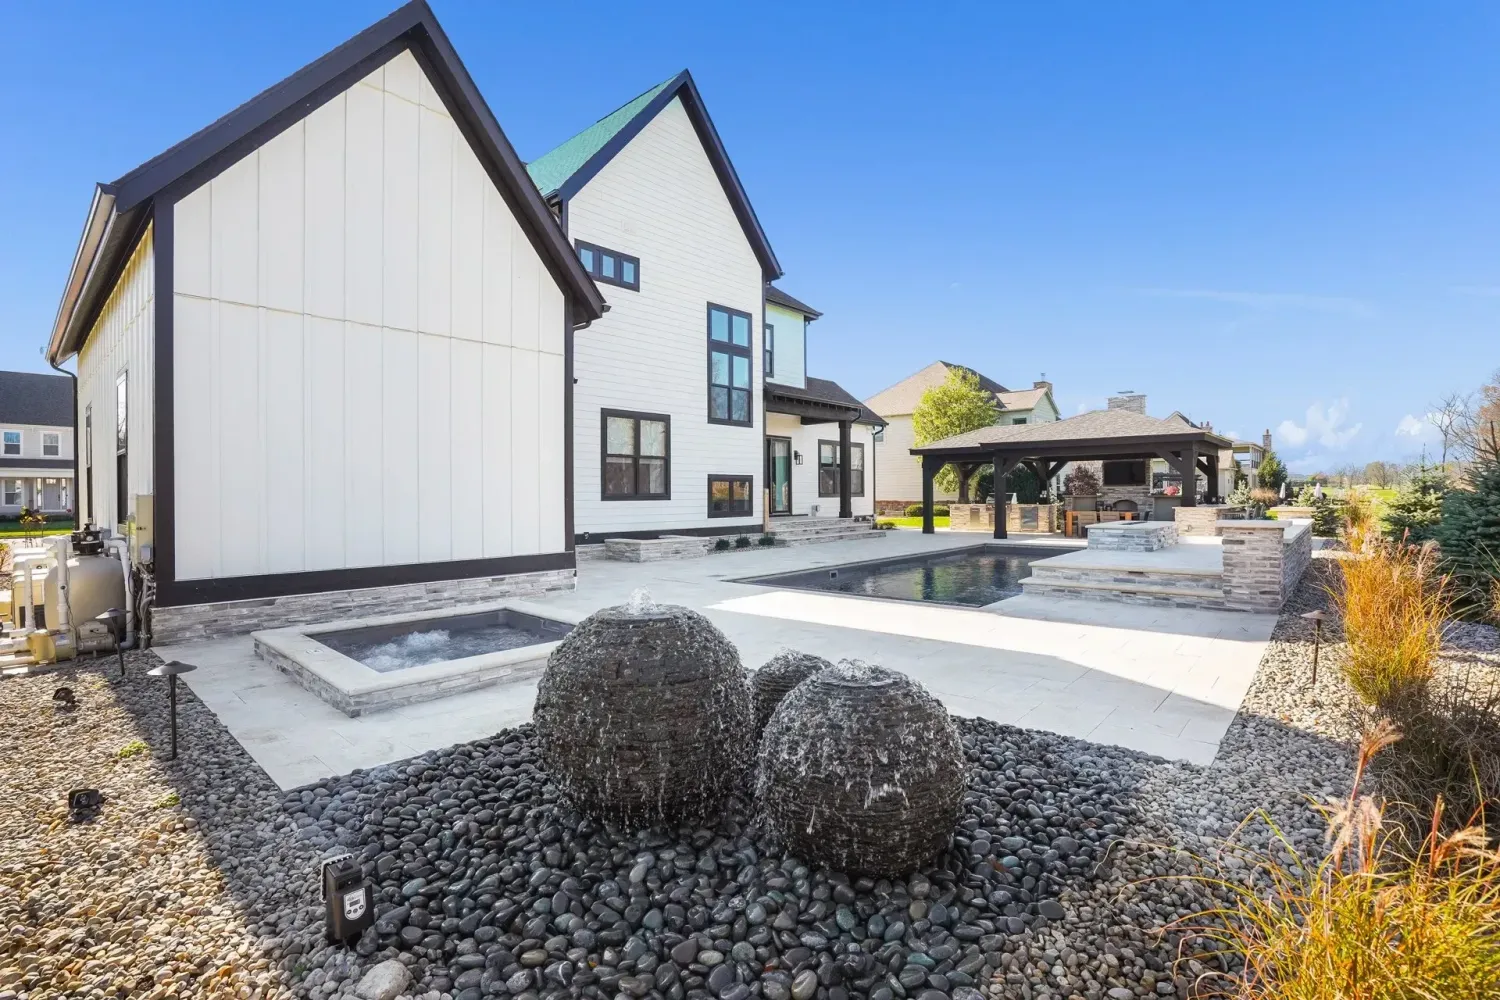
The Bailey Ridge lot has a working slope of about 4 feet from the back door to the rear property line — roughly 1 foot every 25 feet. That’s typical Hamilton Mill grade, gentler than some ridge lots on Chandler Ridge or Ivey Chase, steeper than the flatter Providence Club lots closer to the golf course. The drop meant three elevation choices: bring the pool up to finished floor, drop the house-side patio toward the pool, or split the difference with a pair of 6-inch steps between zones.
We split the difference. The pool deck sits 14 inches below the back door threshold. The kitchen/patio zone sits 8 inches below. A pair of 6-inch travertine steps transitions between the two. The homeowner gets a sensible drop away from the house for drainage (Gwinnett code minimum is 6 inches in the first 10 feet from any foundation), and the kitchen stays close enough to the back door that bringing food out isn’t a hike.
Excavation took four working days. The soil profile ran about 14 inches of Cecil-series topsoil, then saprolite — the weathered-granite subsoil NE Gwinnett builders know well — and at roughly 7 feet depth we hit partially-weathered rock that slowed progress. The deep end is 7 feet 2 inches, so we did not need to rock-hammer. A 9-foot dive well would have added three days and close to $4,200 in hammering time. The homeowners chose 7-2 at design phase for this reason.
Shotcrete went in over two days: 10 inches at the floor, 12 at the walls, #3 rebar on 10-inch centers both directions, and a doubled bond beam at the top to carry the coping load and resist the stress the travertine deck transfers back into the shell during freeze-thaw. Dacula sees around 20 freeze events a year — not enough to kill a properly-built shell, more than enough to find weaknesses in one that was short on steel or shot too thin at the step risers. We cured the shell under water spray for 28 days. The deep end held 18 inches through cure until the interior finish crew arrived in week nine.
Phase Four — Kitchen Footings, Deck Base, and the “Two Different Structures” Principle
This is the phase integrations get wrong, and it is where we spend the most explaining time. The pool deck and the outdoor kitchen are not the same structure. They look like one continuous surface when finished, but underneath they sit on two entirely different foundations, and they move independently. Building them as one structure is the #1 reason Hamilton Mill kitchens develop hairline cracks at the grill base around year three.
The pool deck base for travertine in Dacula clay follows a specific recipe. After excavating 12 inches of subgrade, we lay non-woven geotextile fabric to separate clay from aggregate. On top goes 8 inches of GAB — Georgia Aggregate Base, the graded crushed granite Gwinnett DOT specifies for road base — compacted in 4-inch lifts to 95% Proctor. Over the GAB: a 1-inch screeded bedding of ASTM C-33 concrete sand. Travertine pavers set on that sand, joints filled with polymeric sand, perimeter restrained by PVC edge restraint pinned into the GAB.
The outdoor kitchen sits on something different. Each load-bearing wall and each structural column lands on a poured concrete footing measuring 24 inches wide by 24 inches long by 36 inches deep. That footing extends well below any frost reach and any seasonal clay swelling, down into undisturbed saprolite where bearing capacity is predictable. We tie #4 rebar in a mat pattern, leave dowels projecting up into what becomes the CMU wall, and pour 3,000-psi mix.
Kitchen Footing vs. Patio Base — The Spec That Prevents Cracking:
Outdoor kitchen load-bearing points: 24″ × 24″ × 36″ deep poured concrete footings with #4 rebar mat, tied into CMU walls with dowel lap. Patio base: 8″ compacted GAB on geotextile fabric, 1″ sand setting bed, travertine. The patio can move with seasonal clay heave and resettle without damage — the kitchen cannot, so the kitchen walks on its own feet.
The grill base, prep island, and pavilion posts all land on those independent footings. The travertine deck flows around and past the kitchen — we miter the deck pieces tight against the stone veneer — but the deck is free to resettle seasonally while the kitchen holds rigid. Where they meet, we run a flexible polyurethane joint filler colored to match the deck. From three feet away the joint disappears. Underneath, it’s doing the real work.
Building the kitchen on concrete footings rather than a thickened slab edge adds roughly $2,400 at this scope. Homeowners who skip it save that money in year one and spend $8,000 repairing cracked stone and re-leveling an appliance bay in year four. We do not build kitchens on thickened slabs — it’s a line we draw at contract.
Phase Five — Travertine, Coping, and the Unified Visual Plane
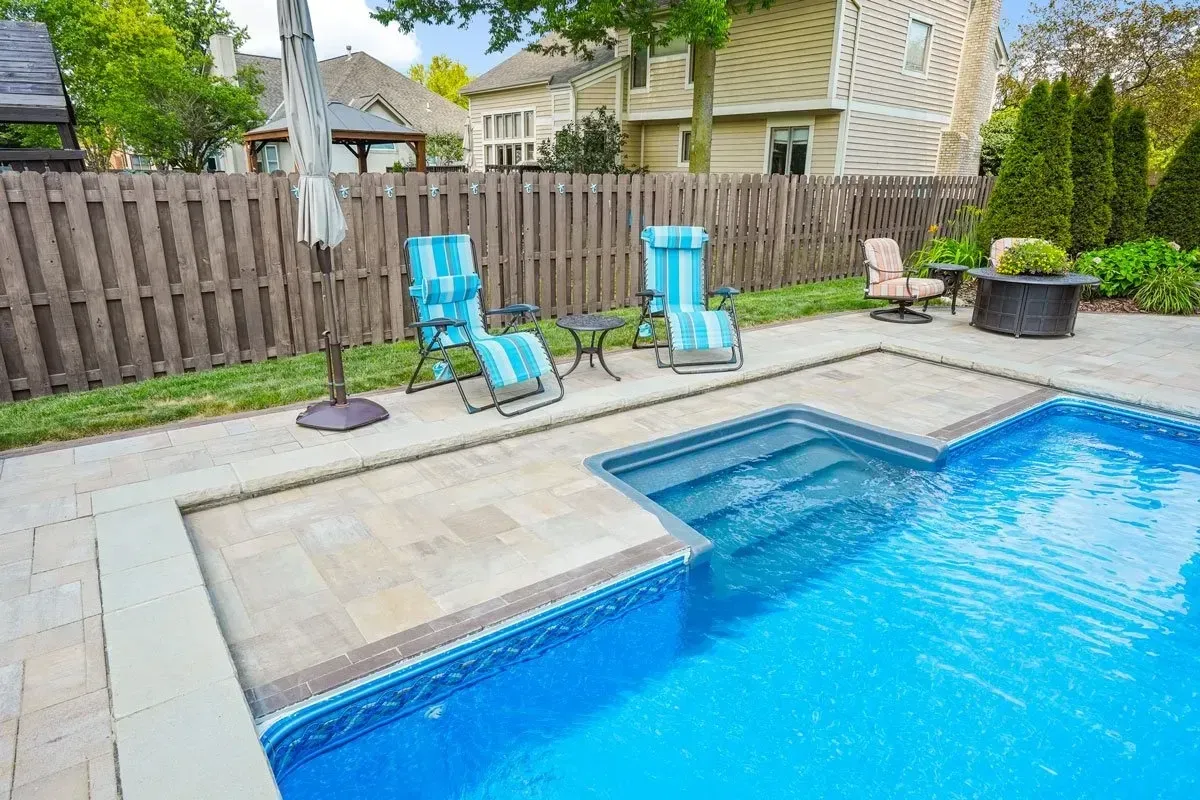
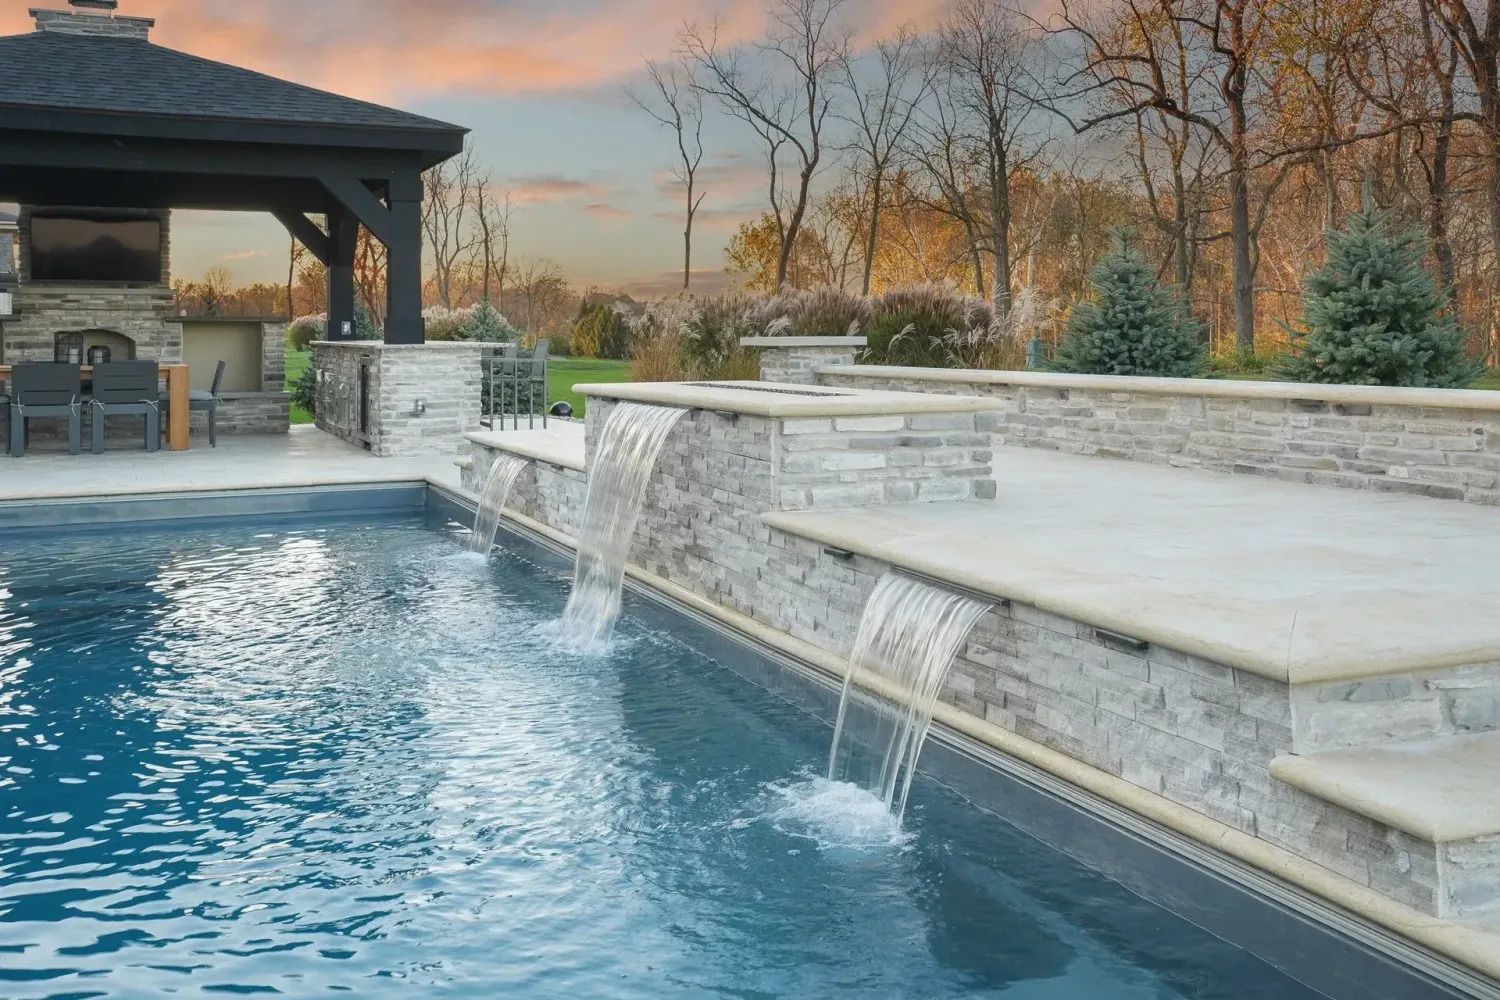
The integration reads as “one thing” when the travertine deck, the pool coping, and the kitchen’s surround stone share a coordinated material language. For Bailey Ridge we used French-pattern travertine in Ivory Classic — four sizes (8×8, 8×16, 16×16, 16×24) laid in a repeating pattern that avoids the forced regularity of single-size tile. The pool coping is the same travertine, 12-by-24 inches, with a 2-inch bullnose, installed as drop-face so the vertical edge sits flush with the bond beam and hangs slightly over the waterline tile.
The kitchen’s stone veneer is thin-set natural fieldstone from Oconee Stone’s Georgia line. Its color temperature — warm tan with grey shadows — was chosen to pick up the undertones of the Ivory Classic travertine. The two materials look like siblings, not strangers. That’s a five-minute conversation at the stoneyard in phase one, worth hours of design time later.
Laying the travertine took seven days with a three-person crew. Two challenges specific to this yard: the curve of the pool’s south end — a 6-foot-radius arc that required cutting travertine at a progressive miter so the joint lines radiate toward the pool’s center — and the tie-in at the kitchen’s footprint, where the deck has to land flush against fieldstone without bunching. We pre-cut the tie-in pieces on a wet saw in the side yard and staged them before laying adjacent field pieces. Once the field is down, you cannot adjust.
Polymeric sand went in last, in two applications spaced 10 days apart. The first pass fills the joint; the second tops off settling and activates the full polymer bond. Hamilton Mill gets enough summer rain that a single-pass polymeric installation is visibly depressed at the joints by August. Two passes lasts five-plus years.
Phase Six — Kitchen Build-Out, Appliance Drop-In, and Counter Templating
The kitchen is a 14-foot L. The long arm contains (left to right) a 24-inch side burner, the 36-inch Coyote grill, a 42-inch prep zone with storage below, and the sink with the frost-proof sillcock. The short arm carries a 24-inch Coyote beverage center, a 36-inch refrigerator bay, and a 24-inch pull-out trash. The covered pavilion extends over the entire long arm — that’s the shade math paying off — while the short arm stays open to the sky.
CMU walls rose over three days, tied into the footings with dowels. We filled the cavities of the grill wall and side burner wall with concrete for fire safety and thermal mass; the refrigerator bay walls stayed hollow to give the appliance breathing room. Stub-ups for gas, water, and electrical came up through pre-poured penetrations in each bay, centered to the quarter-inch per the appliance manufacturer’s install guide. Coyote publishes rough-in to the sixteenth — we build to those numbers because a drop-in grill that sits a half-inch off on either axis will not seat flush, and re-work after counter templating is expensive.
Countertops are a three-centimeter honed quartzite — Taj Mahal, from a remnant yard in Chamblee — chosen because quartzite handles direct sun and grill radiant heat better than most marbles, without the visual coldness of granite. Templating happens after the appliances are dropped in dry, confirmed for level and cutout fit. The template crew came on a Tuesday. The cut slab came back the following Monday. Installation took four hours.
The pavilion over the long arm is a cedar-framed structure with a bronze standing-seam roof. Galvanized brackets tie the 6-by-6 cedar posts into the concrete footings poured in phase four. Pitch is the 7-in-12 from the shade math. From the grill position, the roof’s west edge blocks direct sun until it drops below the Hamilton Mill Ridge treeline. The cook never squints while flipping burgers. That’s a design outcome, not an accident.
Phase Seven — Lighting, Gas Firepit, Commissioning, and Handoff
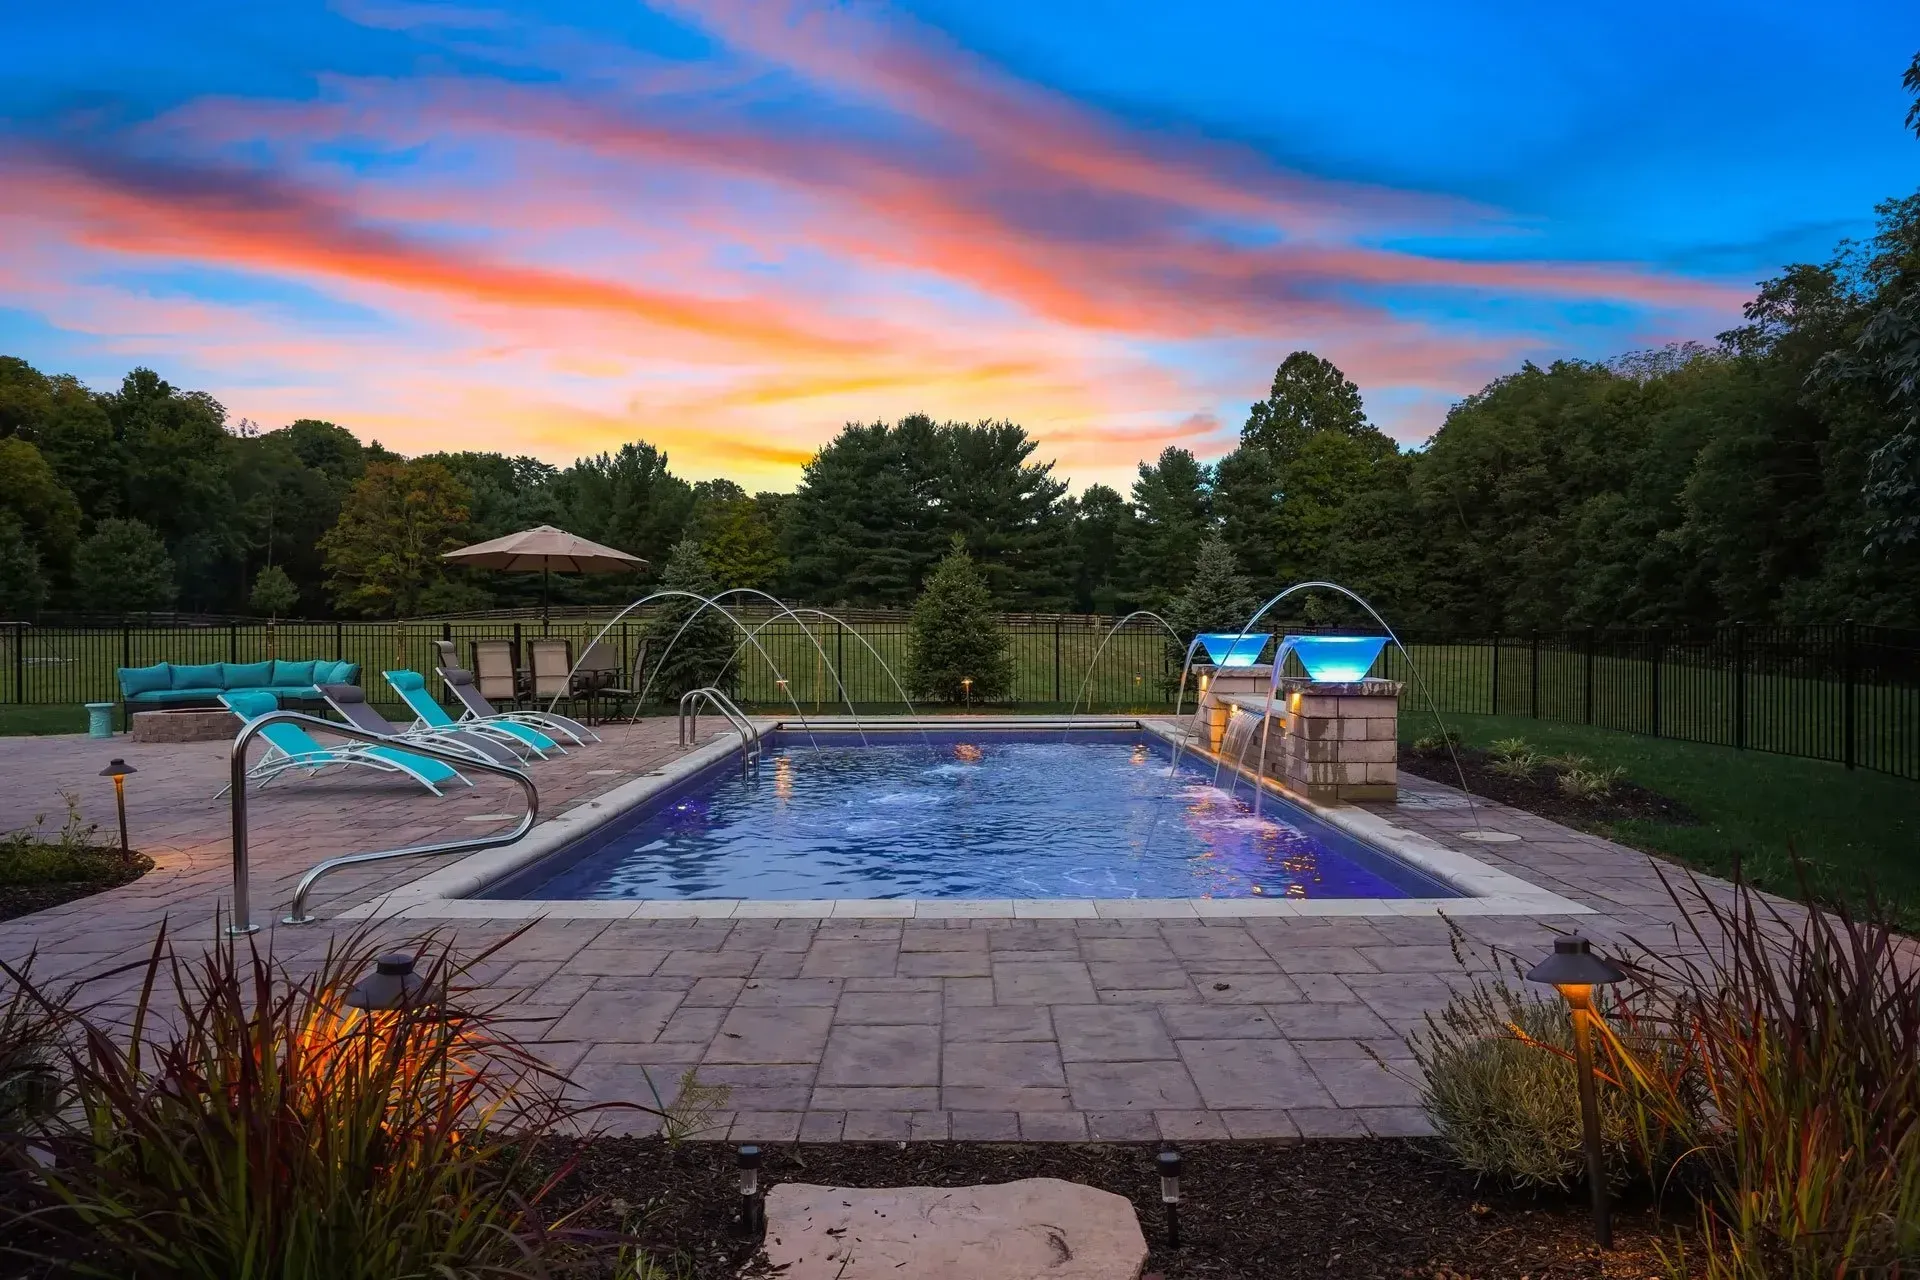
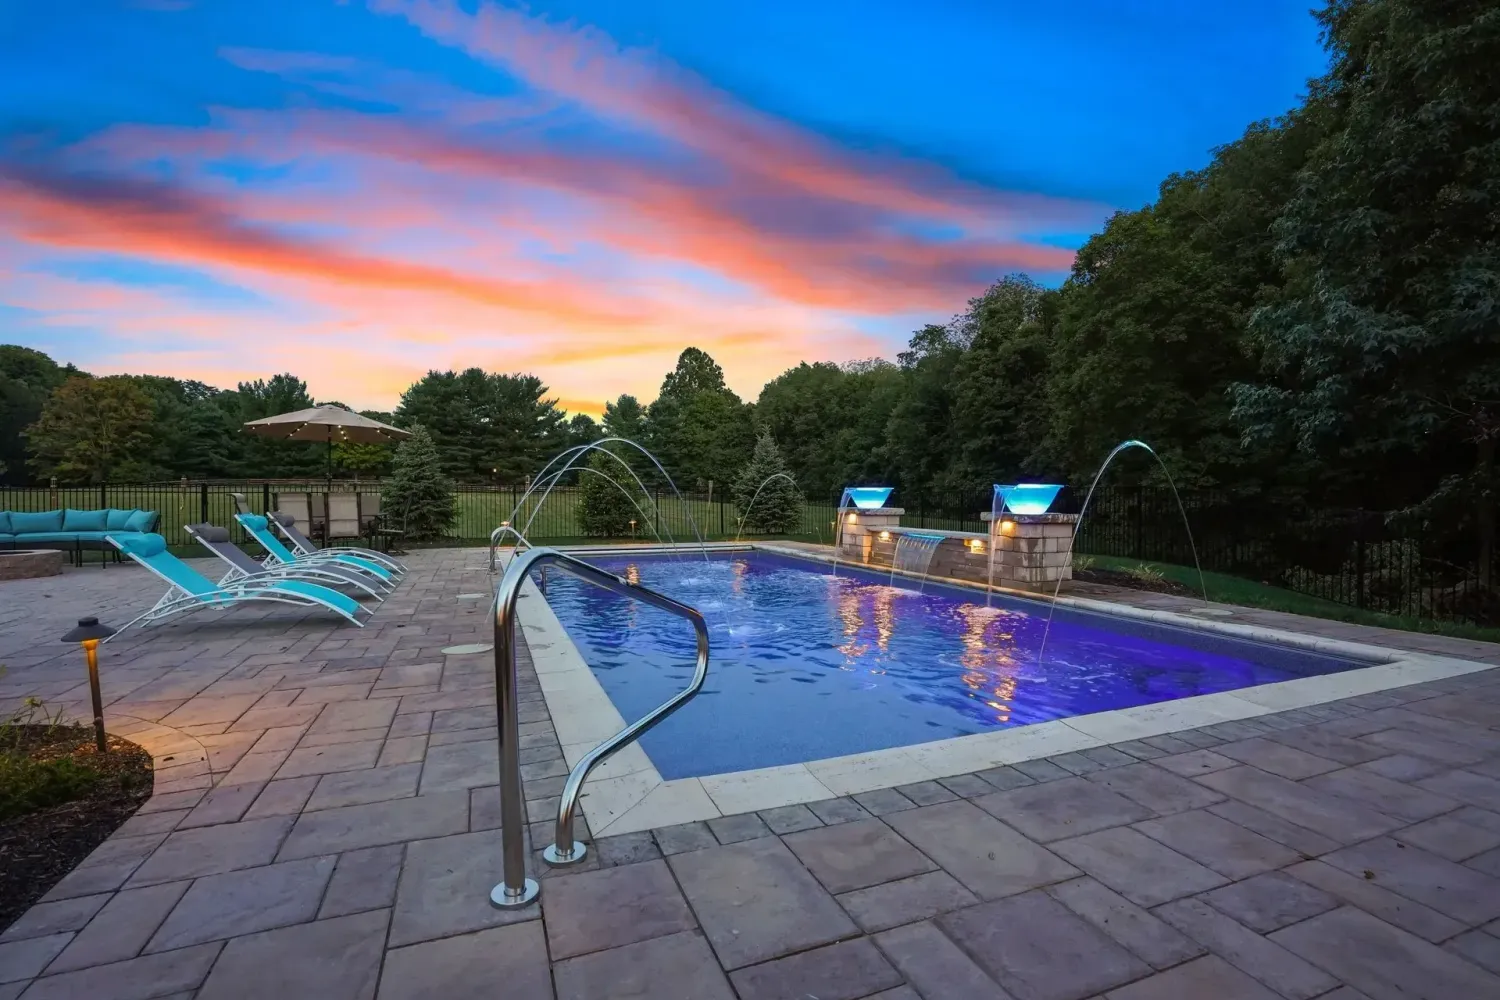
Phase seven is where the remaining 10% of the budget — $18,240 — buys the difference between “we have a pool and a kitchen and a patio” and “we have a resort-quality outdoor room we actually use at night.” The lighting package included:
- Six Pentair IntelliBrite 5G LED color-changing pool lights, on automation so the family can shift from warm white for evening gatherings to scene modes that match kitchen mood lighting.
- Fourteen FX Luminaire LED path lights ringing the patio edge and the step transition, running on a 150-watt transformer in the utility bay.
- Four recessed low-voltage lights in the pavilion ceiling, on their own dimmer, for task lighting over grill and prep.
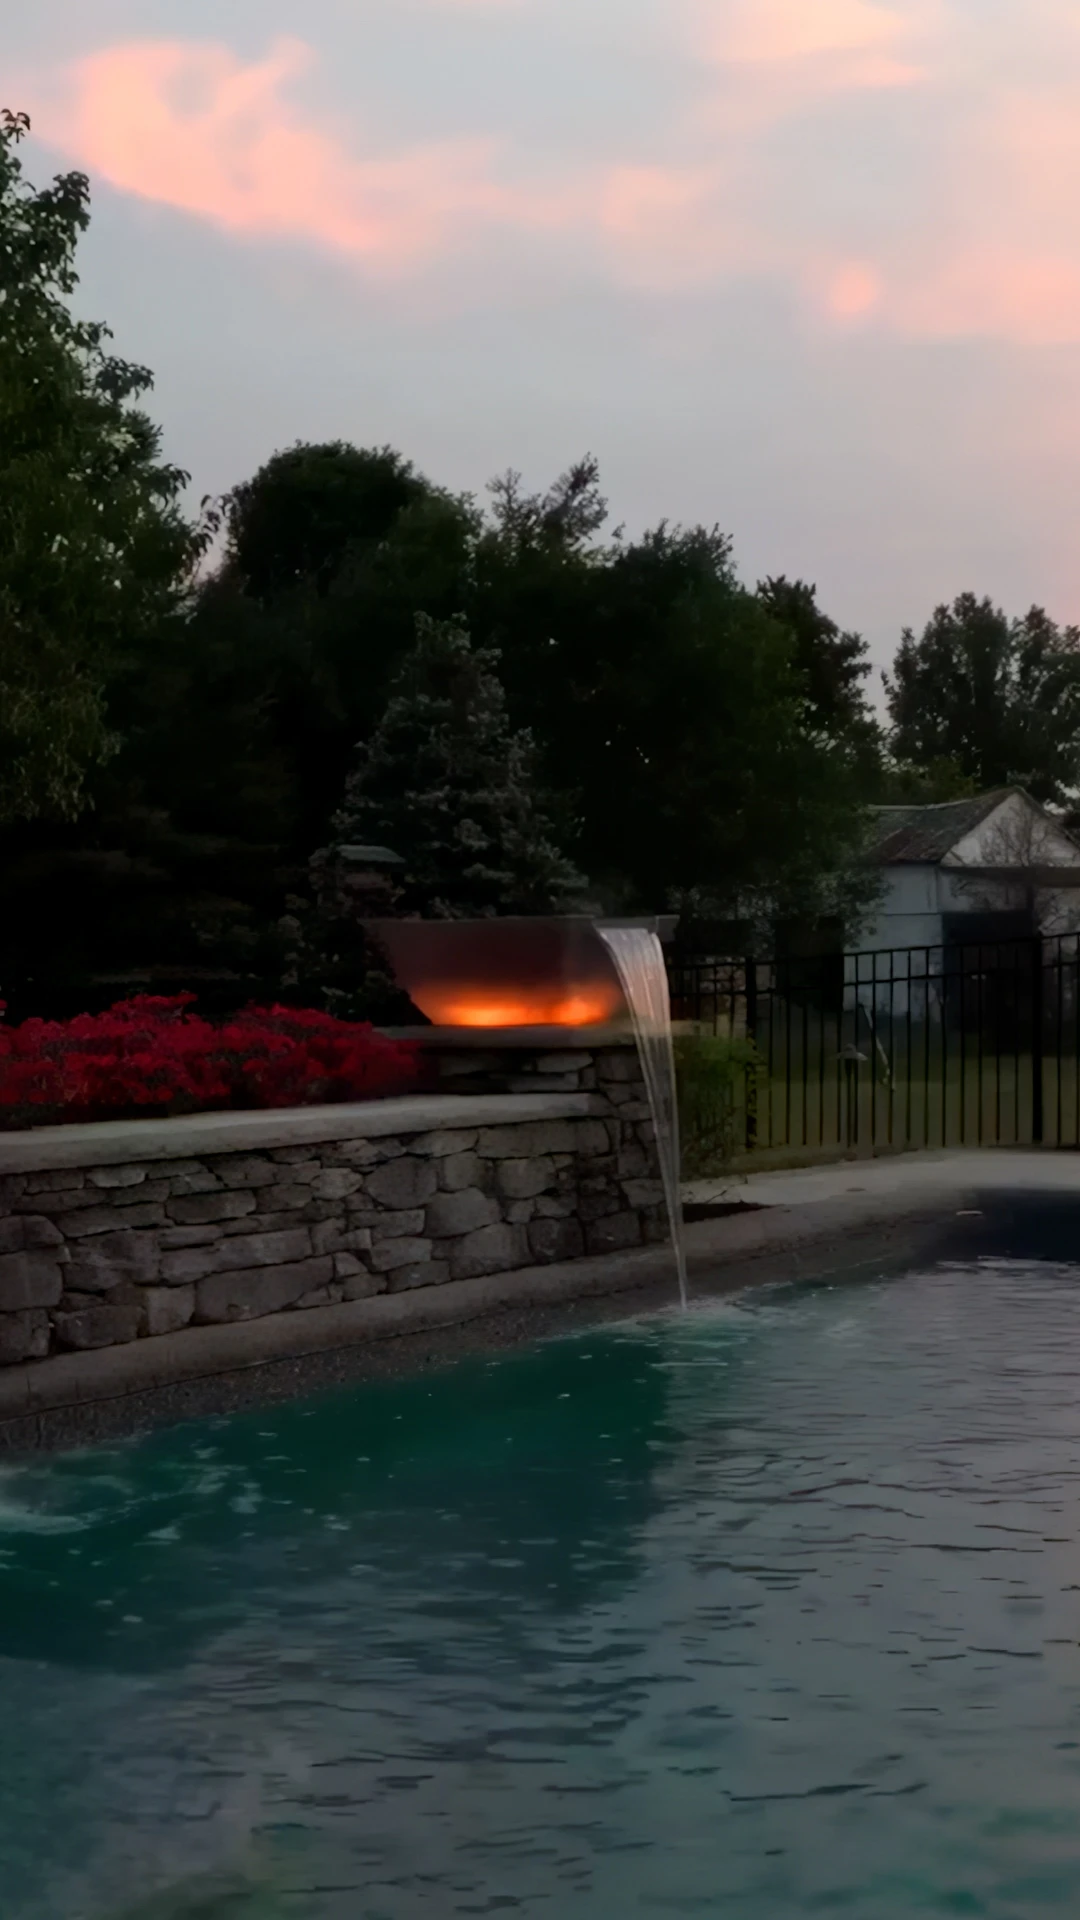
- Two wall-washer fixtures aimed at the kitchen’s fieldstone veneer — the wall becomes a featured architectural element after dark.
- A 42-inch linear gas firepit set into a raised travertine surround at the south end, plumbed off the same CSST trench that feeds the kitchen, with electronic ignition and a wall-mounted emergency shutoff.
The firepit sits 18 feet from the covered pavilion and 14 feet from the pool coping. Gwinnett County code requires gas-fired outdoor fire features to sit a minimum of 10 feet from any combustible overhead structure; we build to 15 feet for margin. Eighteen feet keeps the firepit in conversational range of the pool but well outside any fire marshal concern.
Commissioning took a day and a half. We pressure-tested the gas system again after final connections, ran the pump at every speed of the VSD while watching amp draw at the subpanel, cycled the heater through a full ignition sequence, ran every lighting scene on the automation controller, and ran the sink’s hot water until the tankless unit’s flow sensor held steady flame. We walked the family through everything — how to bypass automation, where the emergency gas shutoff is mounted, how the breaker panel is labeled, and what the first-year maintenance schedule looks like.
The keys — pool cover, kitchen utility-bay, automation controller login — got handed over on June 19. A hundred and seven working days from contract signature to first swim. The $182,400 came in $1,200 under the original contract because we avoided rock-hammering and passed first submission at every Gwinnett inspection.
Three weeks after handoff the homeowner texted a photo from the pavilion: the grill lit, three kids in the water, the firepit running, the fieldstone wall washed warm by the accent lights. One sentence: “You got the sight lines right.” That’s the only review that matters on this kind of project.
If you own a backyard in Hamilton Mill, Sycamore Ridge, Chandler Ridge, Providence Club, Ivey Chase, or Auburn Park and you are thinking about an integrated pool-plus-patio-plus-kitchen build, the playbook above is the one we run. Specific numbers change with lot, slope, and appliance list. The principles — sight lines first, budget split locked at contract, kitchen on its own footings, materials chosen as siblings, lighting built in rather than tacked on — do not change. Those are what make a Dacula integration feel like one thing instead of three.
Integrated pool, patio, and outdoor kitchen builds across 20+ cities within 30 miles of Snellville, GA
From Hamilton Mill’s sloped lots to Suwanee’s flatter builds, every integration starts with sight lines, ends with commissioning, and holds its level through Dacula’s freeze-thaw cycles.