
Three Dacula backyards. Three different firepit decisions. One sunken into a Techo-Bloc paver patio off Hamilton Mill Pkwy. One ringed by a U-shape seat wall in Sycamore Ridge. One pulled off the main patio in a newer infill on Harbins Rd. Same fire. Entirely different patio. The choice you make changes how the whole backyard feels on a 45-degree November night.
When a homeowner calls us about adding a firepit to a paver patio in Dacula, the question almost never comes in as a design question. It comes in as “we want a firepit.” The design gets figured out on site — standing in the backyard, looking at where the wind comes from, how the grade drops, and how many people typically end up out there on a fall evening.
After a decade of building these in 30019, we’ve settled into three approaches that cover roughly 90% of what homeowners want. Below: three real Dacula projects, one per approach, with the numbers, decisions, and what we’d do differently.
Before the Three Approaches — The Setup Work Every Dacula Firepit Needs
Every firepit-in-paver-patio project we do in Dacula shares the same foundation work before the design diverges. Skip any of these and your firepit either cracks the pavers around it, doesn’t draft, or lands in the wrong spot for how the family actually uses the space.
Site read, not showroom selection. We walk the backyard with the homeowner before any paver color is chosen. Where does the wind come from in October and November? In Hamilton Mill, almost always out of the northwest off the ridge. Where does smoke go if you sit on the downwind side? Where does the grade drop? Lots in 30019 frequently slope 3-8% toward Alcovy River tributaries, and you can’t build a firepit at the low point — water pools in the bottom ring every time it rains, and you lose winter use entirely.
Gas vs. wood decision, then supply routing. If the answer is gas, the underground trench to the firepit typically runs 20-30 linear feet from the existing gas meter or stub, which adds $600-$1,200 depending on whether we’re tunneling under existing hardscape or open-trenching through lawn. In new builds we run the line before base compaction and save about $300. Retrofits occasionally call for core-drilling through an existing slab — $180-$250 per core.
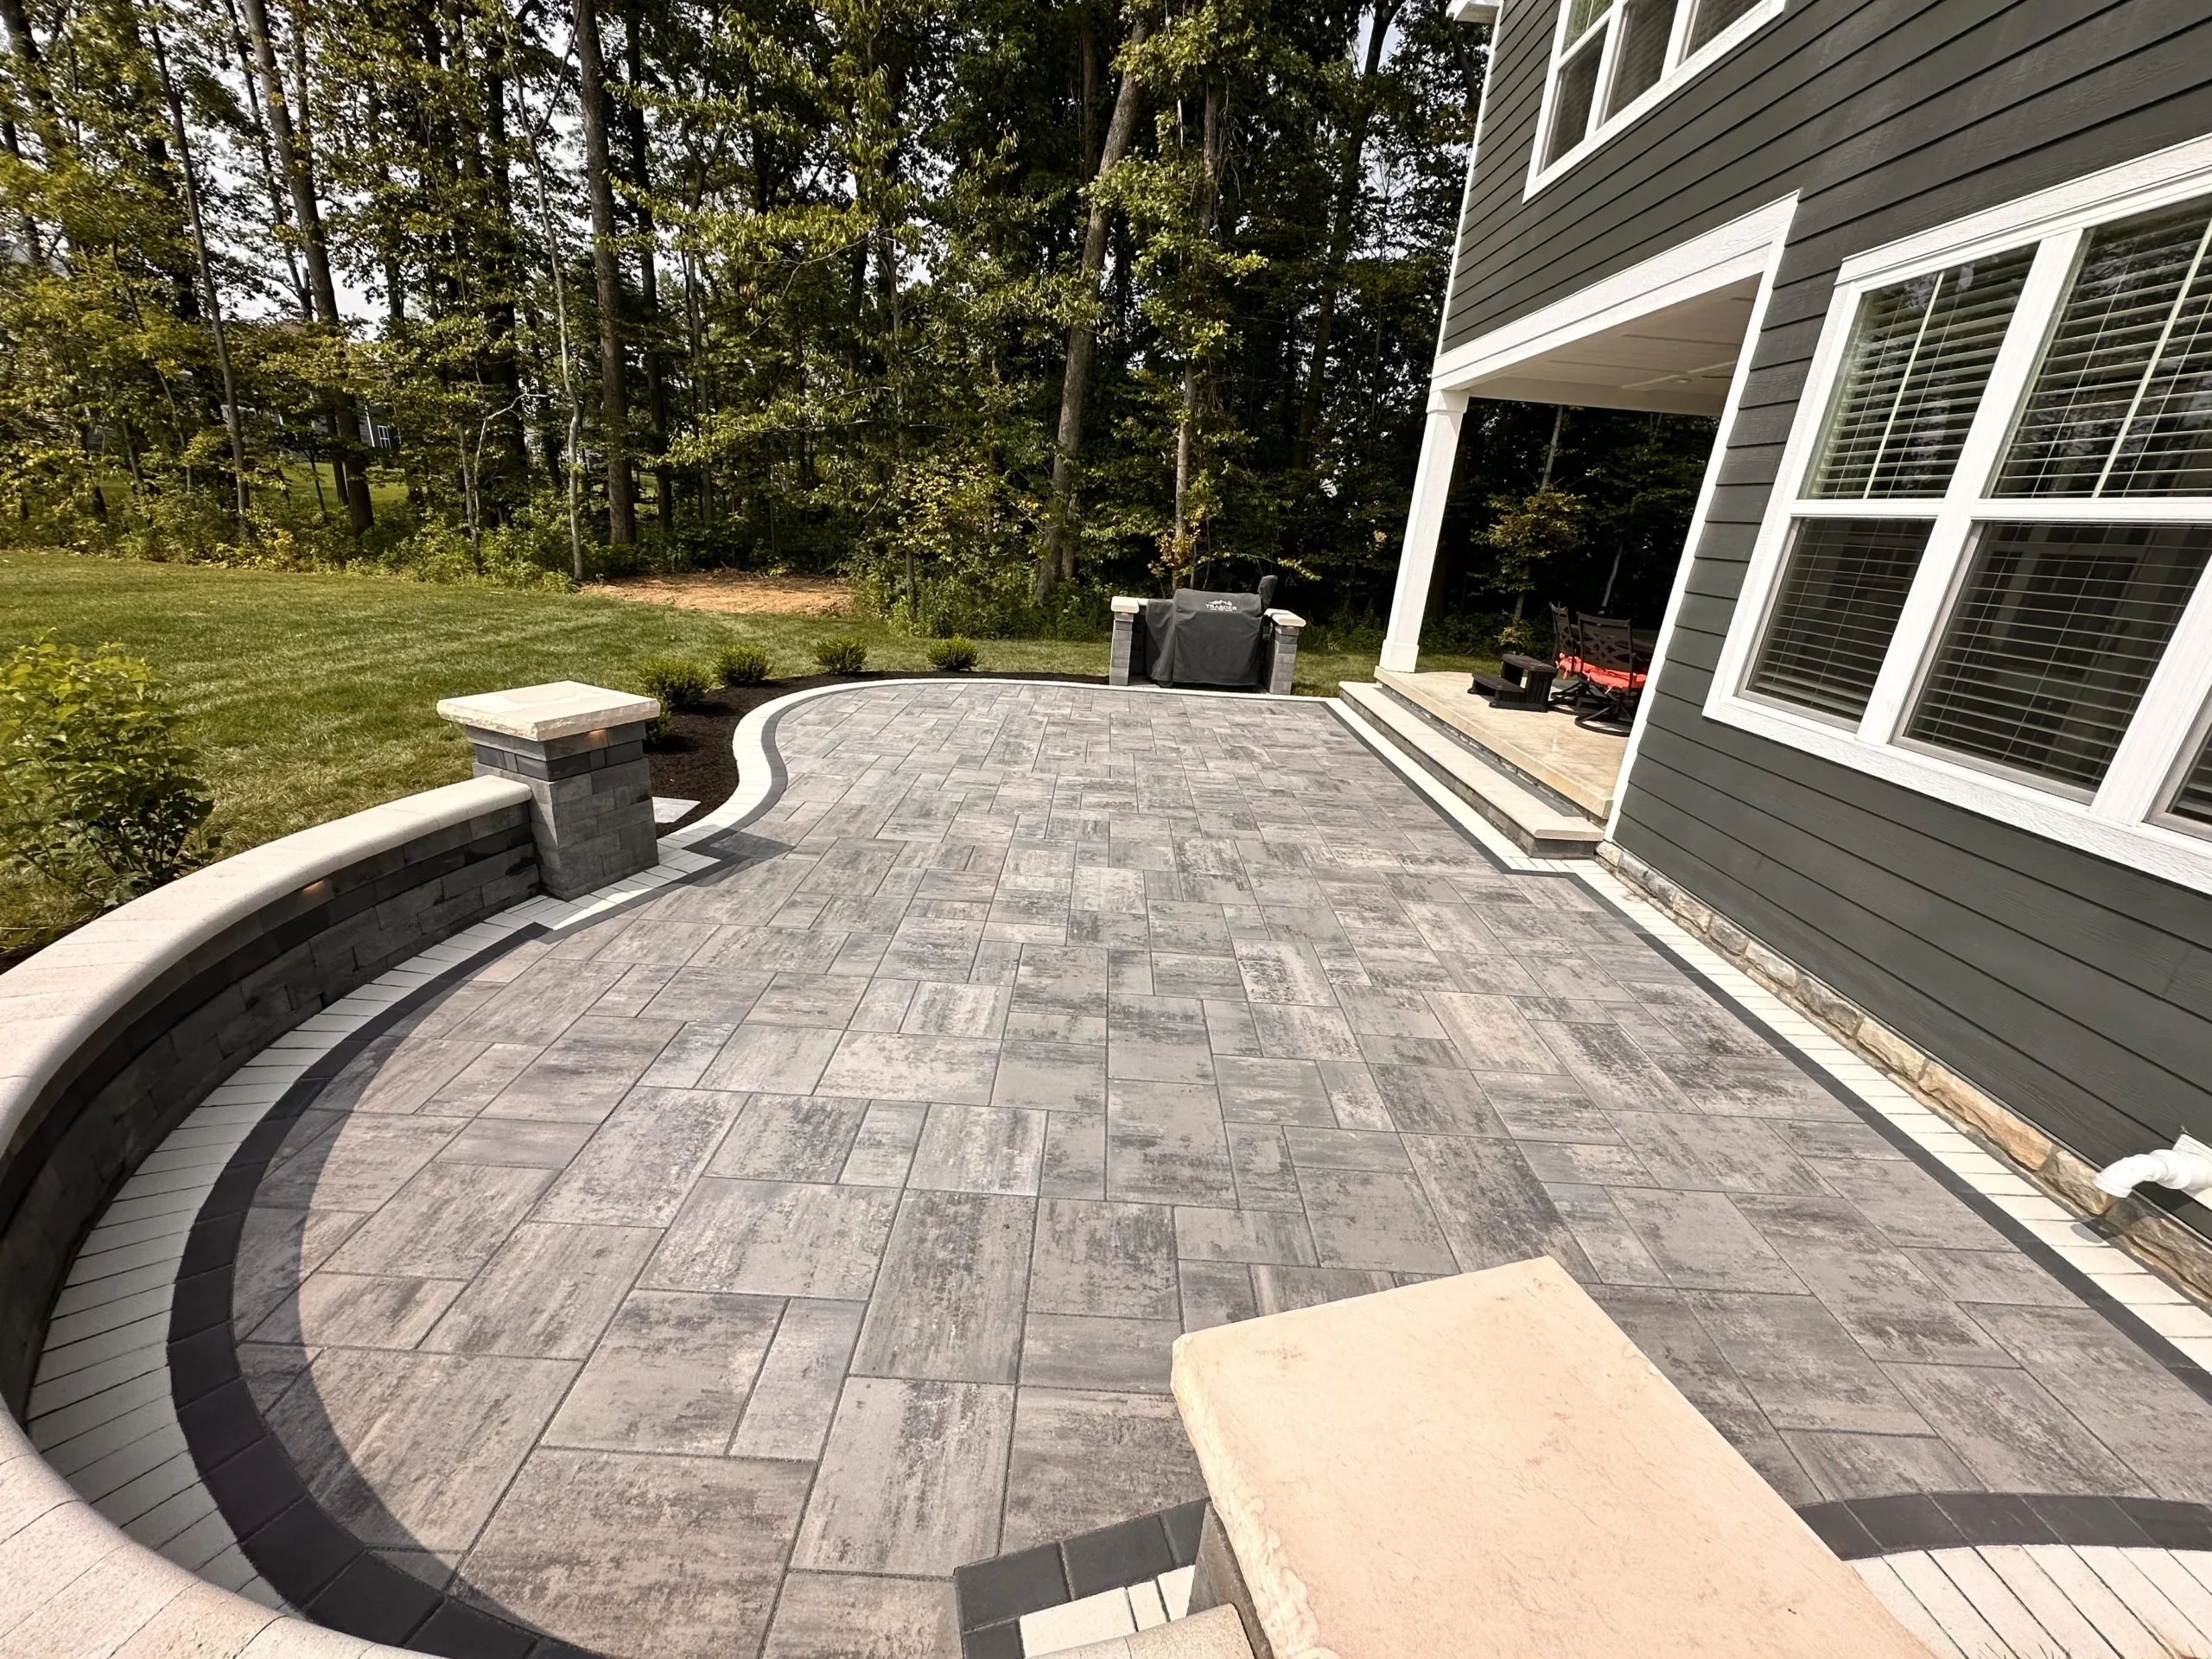
Full-bedding base, always. Every firepit-integrated patio we build in Dacula gets a full-bedding base — 6-8″ of compacted GAB #57 stone with 4″ of ASTM #8 chip as setting bed, then the pavers. The piedmont clay under these yards moves too much with moisture cycles for a sand-set paver system to stay flat around a heat source. A firepit on a poorly compacted base tilts within two winters.
Polymeric sand spec around the firepit. Standard joint width on a paver patio is 1/8″-3/16″. Around a firepit we open that to a wider 3/8″ joint on the ring of pavers closest to the heat source. Polymeric sand is cement-based and doesn’t love high, cycling heat. The wider joint gives it room to expand and contract without pulling the paver edges. Narrower joints around firepits look fine for two years, then crack and let fine material wash until the edge pavers start to rock.
Setup cost range (before the firepit itself): Gas trench and supply: $600-$1,200. Core drill (if needed): $180-$250. Wider-joint polymeric sand upgrade around the pit: $140-$220 on top of standard sand cost. These numbers are additive to whatever approach you pick below.
Kit vs. custom masonry. Two-thirds of our Dacula firepit installs are Techo-Bloc Nevado kits with a cast-stone cap. Kit cost runs $1,400-$2,200 plus $400-$800 in labor to set on the prepared pad and trim pavers cleanly around it. The remaining third are custom masonry builds — wet-stacked ledgestone, a specific cap profile, or an oversized pit above 48″ interior diameter. Custom masonry runs $3,800-$7,500 depending on stone and complexity. For most homeowners, the Nevado kit looks right and costs half as much.
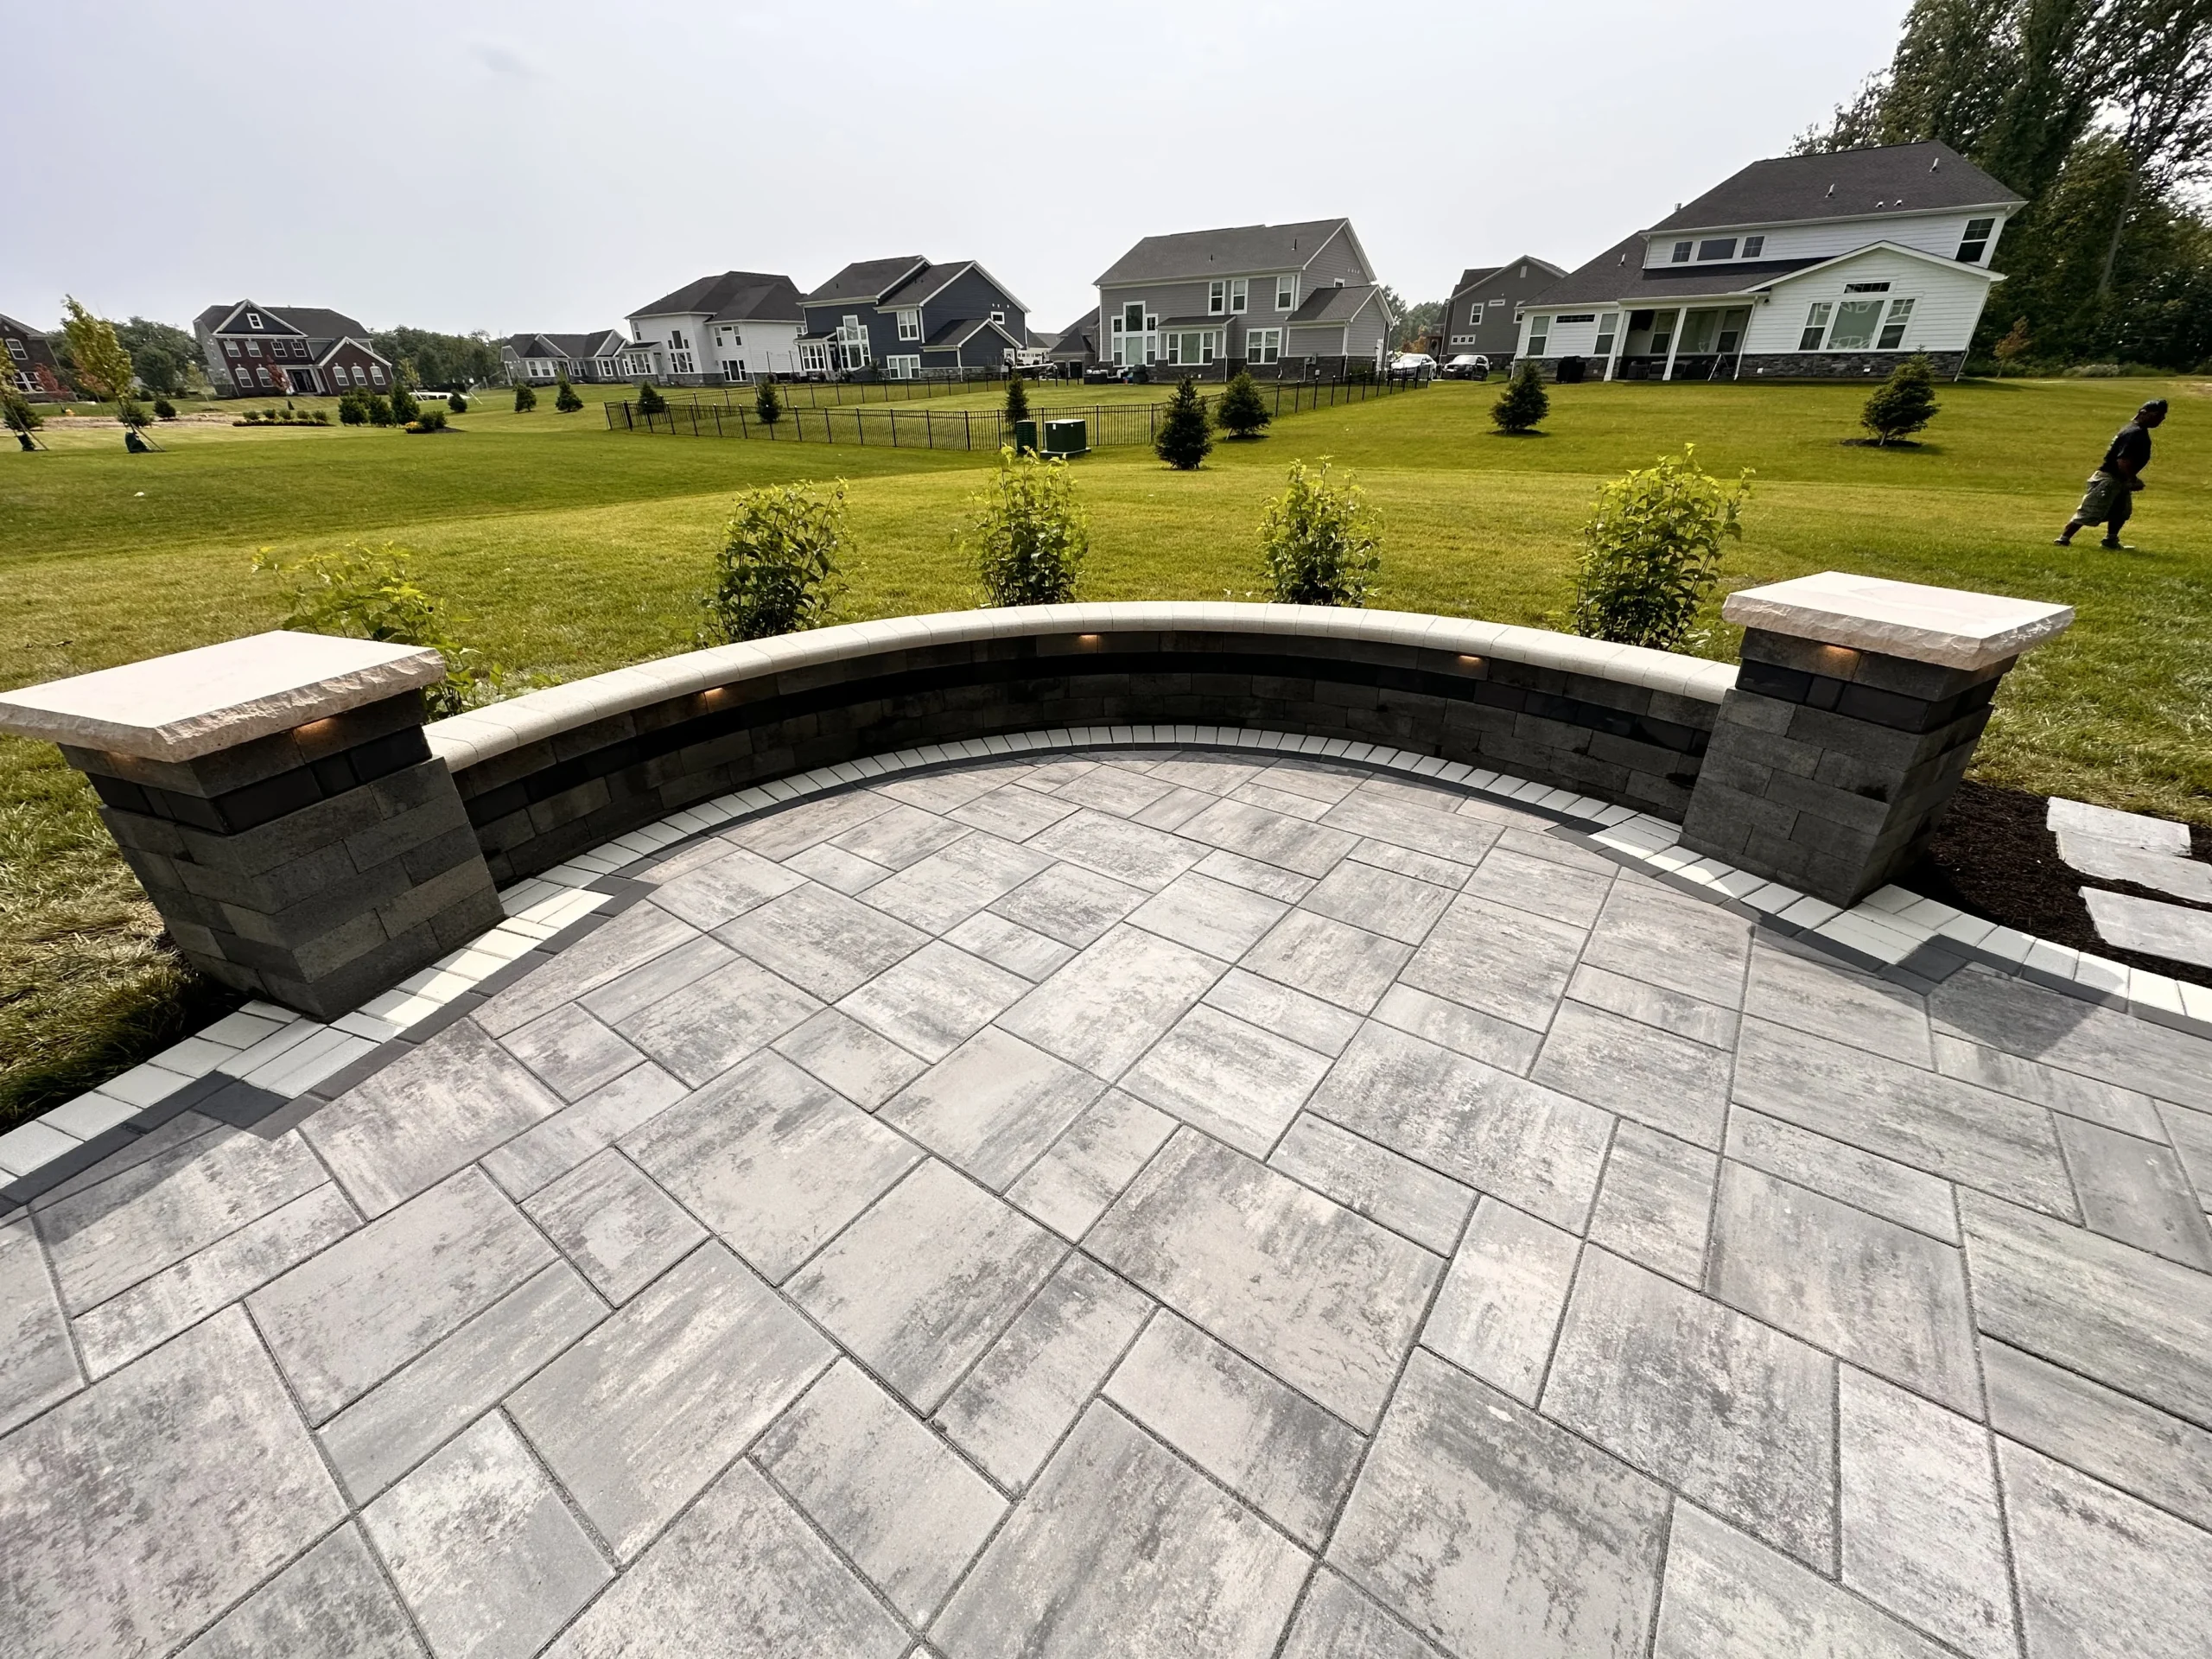
Approach 1 — The Recessed Firepit: A Sycamore Ridge Project
The homeowners had just finished a pool build with another contractor and decided the pool deck felt flat — literally. They wanted the firepit to feel like a destination, not furniture. They’d seen a sunken lounge around a gas firepit at a Colorado resort and wanted the Dacula version.
We recessed the firepit 18″ below the main patio grade with a three-stair step-down on the two approach sides. The pit itself is a 48″ Nevado kit with cast-stone cap; around it, a 13-foot-diameter circular “conversation pit” with seating built into the step walls. The top patio stayed at the original grade so the view from the house didn’t change.
The Numbers on This One
The recessed approach adds significant cost on top of the standard patio. For this Sycamore Ridge project, the recess and step work alone — not the firepit, not the patio — came to $8,400. That included excavation of the sunken area (roughly 28 cubic yards of piedmont red clay hauled off site), a secondary compacted base for the lower patio, two retaining rings of segmental wall block to hold the 18″ grade change, bench seating built into the step face, and ADA-compliant 11″ tread depth on the stairs leading down.
Recessed firepit cost range (on top of the patio): $6,400-$12,800 depending on depth, seating, and whether the excavation can be staged on site or has to be trucked off. The Sycamore Ridge project landed at $8,400 for the recess work because the excavation could be spread on the back of the lot — they had a 3/4-acre parcel with room to absorb it.
Why Recessed Works for Dacula Specifically
Three reasons this approach holds up well in 30019. First, wind reduction — sunken lounges cut wind velocity by about 60-70% at seat height. In Dacula, where October-November evenings get that steady 8-12 mph breeze off the Hamilton Mill Ridge, the recess turns a 55-degree night into a genuinely comfortable hour outdoors instead of a 20-minute obligation.
Second, drainage behaves when it’s designed for. Counterintuitively, you’d think digging a hole in piedmont clay creates a drainage problem. It would — if we didn’t tie it into the site drainage plan. On this project, we ran a 4″ perforated drain line from the lowest point of the recess out to daylight at the rear property line. The recess never pools.
Third, the seat walls doubled as retention. The same block wall that holds the 18″ grade change has a 16″ deep top cap that functions as a bench seat. Nothing wasted.
What We’d Do Differently
One change. We’d have insisted on gas instead of wood. The homeowners pushed for wood because “it smells like fall.” They’re right about the smell. They’re also now dealing with the reality that smoke in a sunken space accumulates at head height for the downwind seats — the recess does the same thing to smoke that it does to wind. On a still night with damp hardwood, the pit is unusable on the leeward side. We now ask the gas/wood question six different ways before agreeing to wood in a recess.
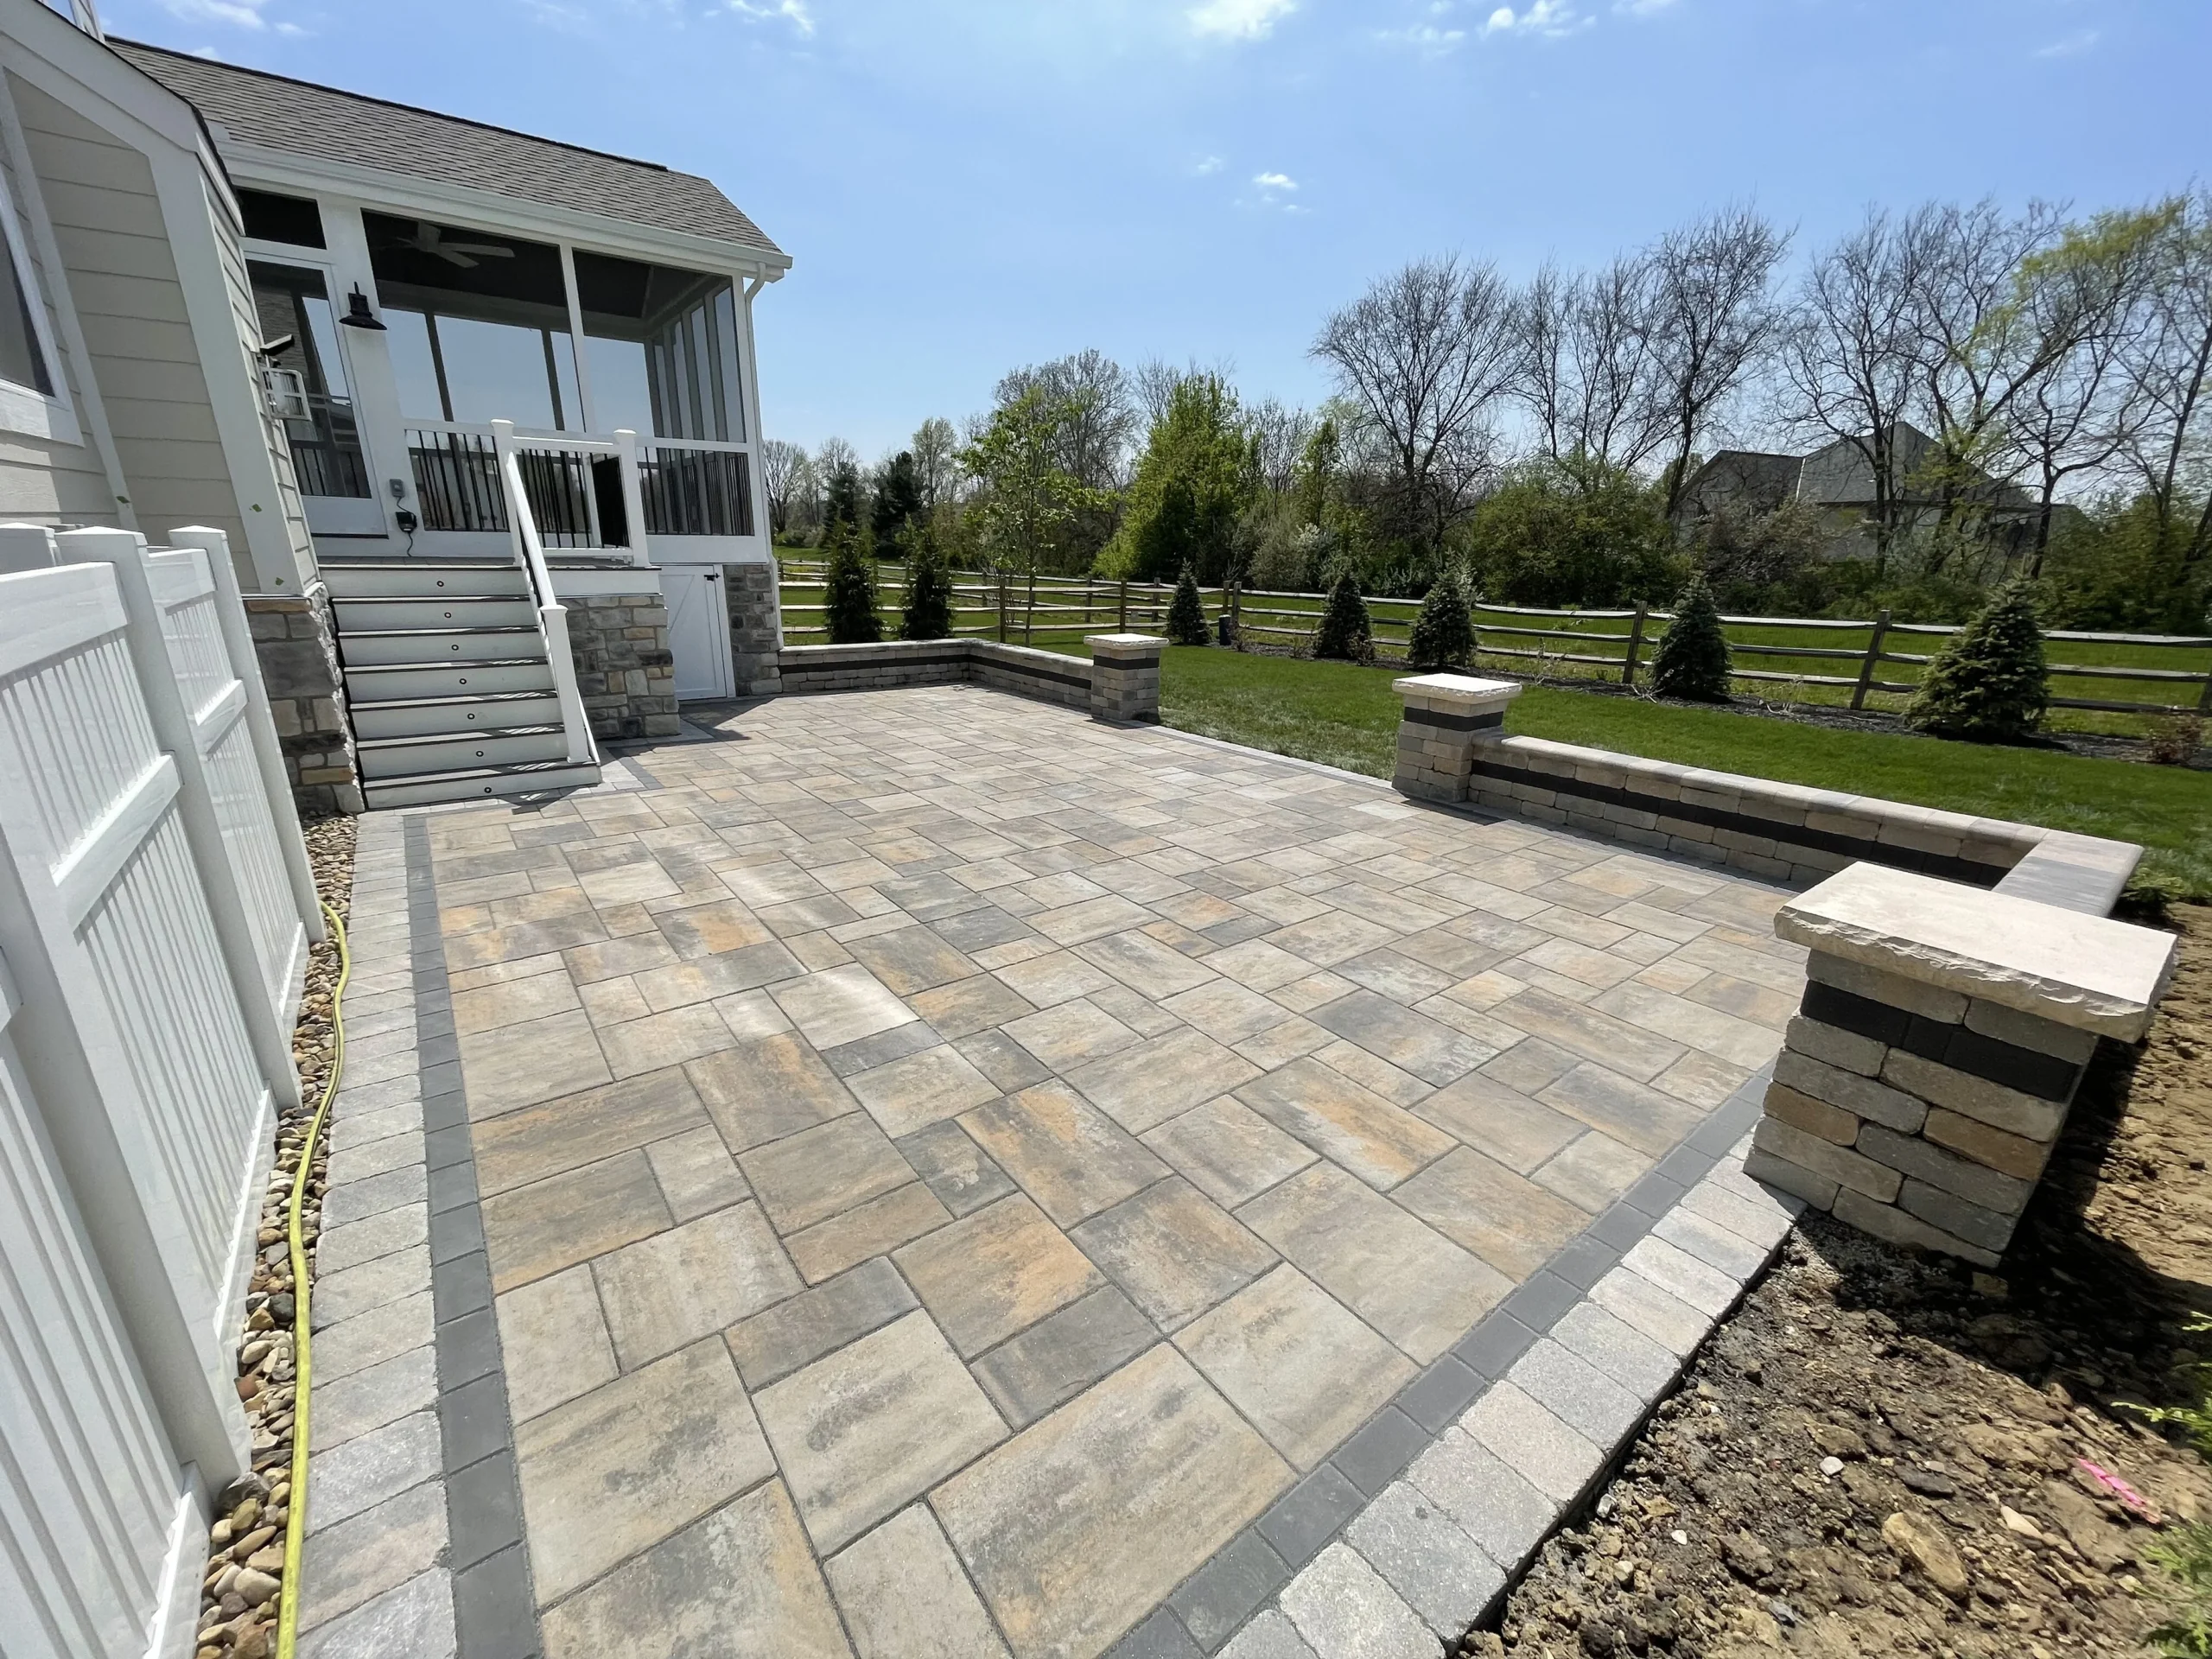
Approach 2 — The Integrated Seat-Wall Circle: A Hamilton Mill Project
Different homeowner, different problem. An existing paver patio, six years old, laid by the original builder when the home was finished around 2018. Good pavers, good base, just flat and undefined. The homeowners entertained a lot — 8-12 adults on a typical Saturday night — and the patio had no focal point. Kids on one side; adults around the grill; nobody sat down because there was nothing to sit on.
We put a 42″ Nevado firepit kit at the center and built a U-shaped seat wall around three sides, leaving the fourth open toward the house and grill. Wall height: 18″ (standard bench height) with a 14″ deep top cap. Seated capacity: 9 adults, 11 at the corners.
The Numbers on This One
Total cost excluding the existing patio (we reused 90% of the original paver surface): $6,200.
- Nevado 42″ kit with cast-stone cap: $1,680
- Setting labor and paver trim around the kit: $620
- U-shape seat wall — 18 linear ft segmental block, 18″ tall: $2,880
- Cast-stone wall cap on seat wall: $740
- Gas line trench (26 ft) with shutoff at the pit: $860
- Permit, inspection, cleanup: $420
Integrated seat-wall approach cost range: $4,200-$8,600 depending on seat wall length, cap selection, and whether you’re running gas or wood. The Hamilton Mill project came in at $6,200 because we were adding to an existing patio — no new base work, no new pavers, no re-grading.
The Wind-Break Advantage
The seat wall did something we didn’t initially pitch — it broke the prevailing NW wind at seated height. With the U opening toward the south-southeast (toward the kitchen and grill), the wall acts as a vertical shield on the upwind three sides. The 42″ fire at center produces a usable warm zone of roughly 8-10 feet radius, and the seat wall concentrates that heat by reducing convective losses. The homeowners later told us the patio is usable 6-8 weekends later into fall than it was before the wall went in.
There’s a design trade-off. The seat wall makes the patio feel smaller because it defines a room. If your existing patio is already tight, the wall can make it feel like you’ve built a small outdoor dining booth. We recommend this approach only when the existing patio is at least 400 square feet.
What We’d Do Differently
We’d have built a small gap in the seat wall on one side — maybe a 24″ break — for easier in-and-out on busy nights. With the full U, every guest walks around the same corner to get to a seat, which on a 12-person night creates a traffic snarl. Not a deal-breaker; the homeowners are happy. But we’d put a break in the middle of the downhill side of the U.
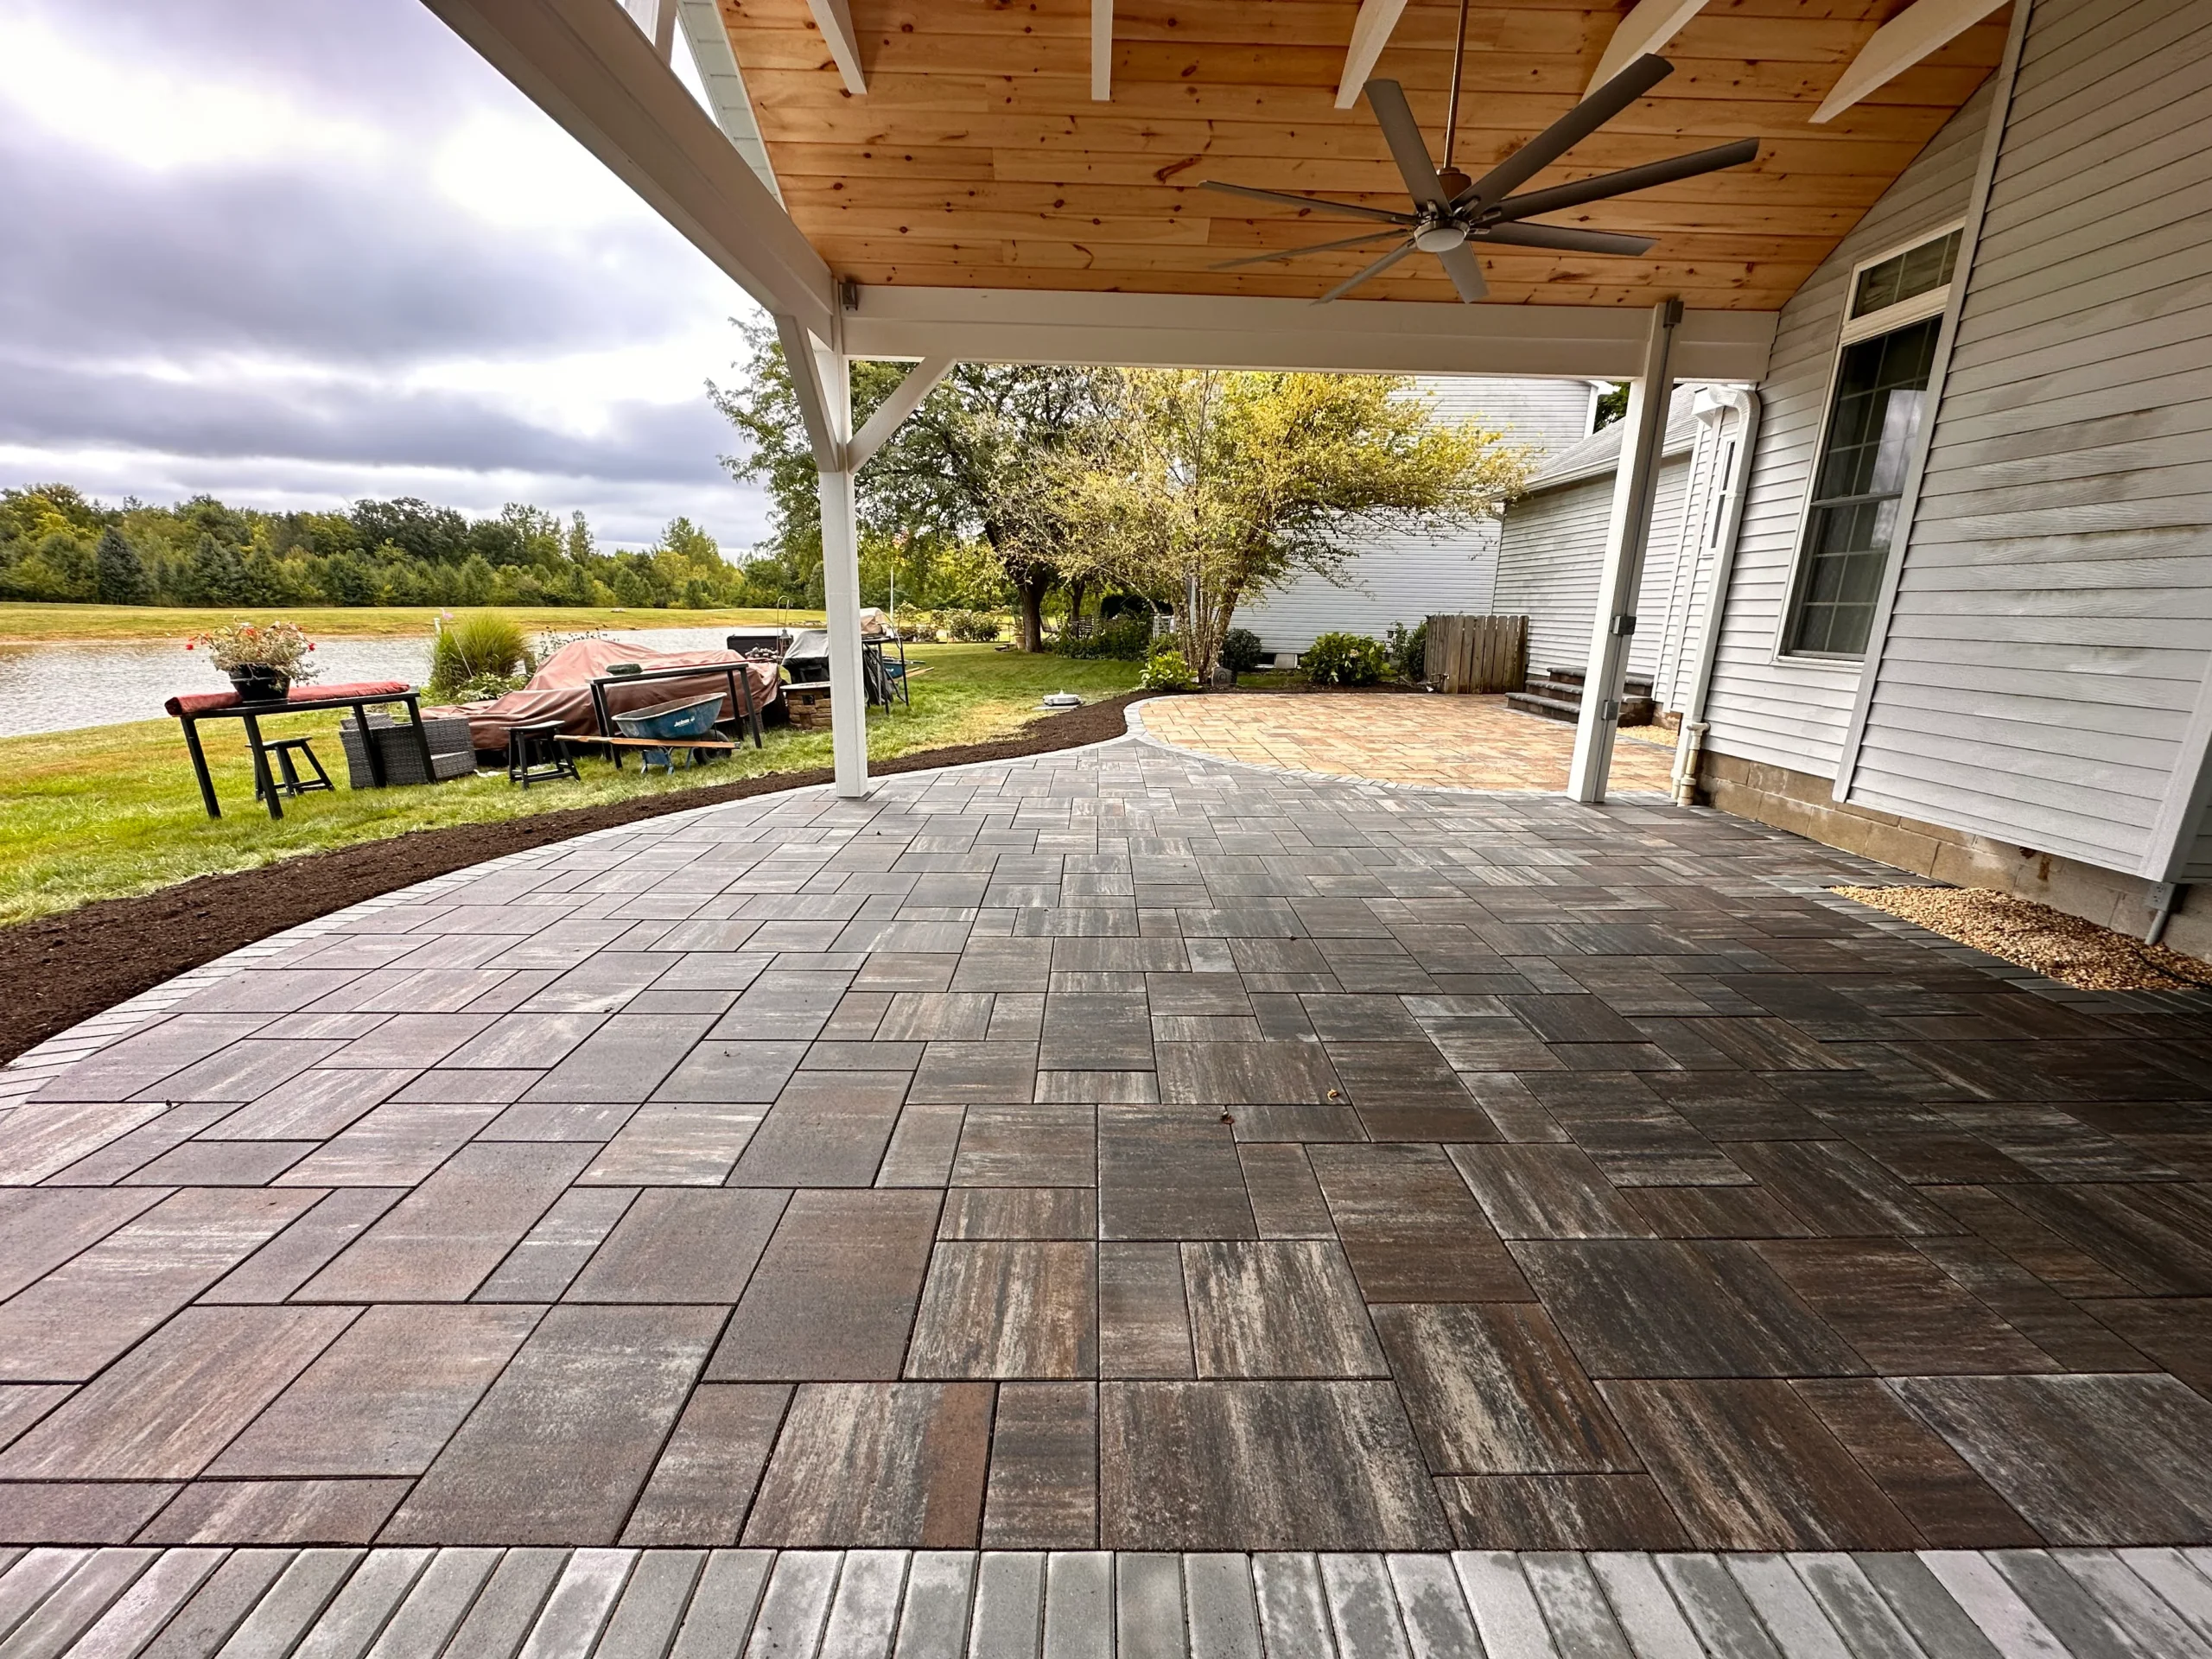
Approach 3 — Firepit Off-Patio, Near but Separate: A Harbins Rd Project
The third project is a newer infill home on a half-acre lot off Harbins Rd, closer to downtown Dacula than to Hamilton Mill. The homeowners were specific: they wanted an outdoor dining table on the paver patio, they wanted a firepit, and they did not want the firepit in the middle of the dining patio. They’d seen it done that way at a friend’s house in Lawrenceville and didn’t love it — the table felt like it was floating around a fire feature, and food smelled like smoke every meal.
We built the patio first — 480 square feet of Techo-Bloc Blu 60 in a charcoal blend — with an 84″ round dining table at one end. The firepit sits on its own smaller pad 9 feet off the main patio, connected by a 42″-wide paver walkway. Close enough to feel radiant heat if you turn toward the fire; far enough that dinner conversation isn’t shouted over crackling wood.
The Numbers on This One
The firepit element only (not counting the main dining patio): $3,400 standalone. Breakdown:
- Small dedicated firepit pad — 12′ diameter circular paver: $1,480
- Nevado 36″ kit with cast-stone cap: $1,520
- Setting labor and paver trim: $400
Firepit-off-patio cost range (standalone element, not counting the main patio): $2,400-$4,800. The Harbins Rd project was at the lower-middle of that range because the pad was simple and they stuck with wood, which saved the gas trenching cost entirely.
Why Off-Patio Is Underrated
This approach gets picked less often than the other two, which we think is a mistake. The dining area stays a dining area. Food doesn’t carry smoke. The table doesn’t compete with the fire for attention. You can host a 16-person dinner party without half the guests sitting at a 90-degree angle to the table to see the fire.
The fire area becomes its own destination — a shorter walk, 15-20 steps from the kitchen door, but a destination. That psychological distance makes the firepit feel like a second room rather than a centerpiece. Smaller groups gravitate there after dinner naturally. The homeowners told us they use the firepit more, not less, than they would have if it were in the middle of the patio. And the 9-foot offset keeps the pit close enough that a 36″ wood fire still throws perceptible warmth to the closest chairs at the dining table on a cool night.
What We’d Do Differently
We undersold the walkway. The 42″ paver path is functional but tight when two adults are walking from the house to the firepit at the same time. 48″ is the right width for a connector walkway; 42″ is what residential code minimums suggest and what fits on most lots without a redesign. On this particular lot, we had the room. We should have pushed the homeowners to the wider path.
Which Approach Fits Which Dacula Backyard
Three approaches, three pretty different homes, and three different outcomes. Here’s the decision framework we walk homeowners through in the first site visit.
Lot size and slope. Recessed firepits need room. If your usable backyard patio area is under 600 square feet of mostly level ground, the recess will eat too much space and feel forced. If you have room and a little slope to work with, a recess can resolve the firepit and a grade problem at the same time. Sycamore Ridge used the recess to absorb 14″ of awkward grade drop.
How you entertain. If your default is 4-6 people around a fire, the integrated seat-wall circle is usually the right call. If it’s 10+ people with half at a dining table and half at the fire, off-patio almost always wins. If you entertain rarely and the firepit is mostly for your own family on a weekend, the recess gives the best “destination” feeling.
Wind direction at your specific lot. Lots on the west side of Hamilton Mill Pkwy and up toward Little Mulberry Park tend to catch more consistent NW wind off the ridge in fall and winter. Recessed pits handle that wind best. Lots in the eastern part of 30019, closer to Harbins Rd and lower elevations, see less consistent wind, and any of the three approaches work.
Gas vs. wood, and budget. For recessed pits, gas is strongly recommended — smoke accumulates in sunken spaces. For seat-wall circles, both work. For off-patio, wood is often preferred because the space is open and smoke dissipates freely. On budget: off-patio is cheapest at $2,400-$4,800 standalone, seat-wall circle is middle at $4,200-$8,600 above the patio, recessed is most expensive at $6,400-$12,800 above the patio. That $8,000-$10,000 spread is enough to materially change the decision for most families — worth putting on the table early.
Permits in Gwinnett County: A standalone firepit installation — kit on a paver pad, no gas line — typically does not require a permit in Gwinnett County for residential use. Any gas line work (trench, supply, shutoff) triggers a mechanical permit through Gwinnett Dept. of Planning & Development at 446 W. Crogan St. in Lawrenceville. We pull that permit on every gas job; the inspection catches issues that cost more to fix after the fact than the permit does to obtain.
The Dacula Firepit Integration Checklist — What to Nail Down Before Demo
Whichever approach you pick, these are the decisions that need to be made before any excavation, paver lifting, or concrete pouring starts. In our experience, projects that go sideways in Dacula usually skipped one of these at the design stage.
1. Confirm firepit location against wind, view, and neighboring structures. Stand where the pit will go. Face the direction smoke will blow on an average October evening. Will the neighbor’s garage wall bounce smoke back at you? Is your kitchen window downwind? These are 90-second decisions with 10-year consequences.
2. Pick gas or wood and commit. Retrofitting a gas line to an existing firepit later costs $1,400-$2,400 because we’re demoing a section of existing patio to run the supply. Decide before the patio is installed, not after.
3. Confirm gas supply capacity. Dacula homes built post-1995 typically have sufficient meter capacity for a 90,000-110,000 BTU firepit plus existing appliances. Propane homes need a tank size and regulator check. Two projects we’ve done had undersized propane tanks, adding $600-$900 for an upgrade.
4. Specify the polymeric sand joint width. Standard 1/8″-3/16″ joints around a firepit crack within three years under heat cycles. Specify 3/8″ joints on the inner ring and use a polymeric product rated for high-temperature applications.
5. Decide on the cap material. Cast-stone caps (standard with Techo-Bloc Nevado kits) handle heat cycles well but stain more than natural bluestone. Natural bluestone caps are worth the $280-$420 upcharge if longevity of look matters.
6. Plan firewood storage or gas shutoff access. Wood fires need a covered woodpile within 10-15 feet. Gas pits need a visible, accessible shutoff — we install it 36-48″ off the pit so the homeowner doesn’t reach across the fire.
7. Confirm utility locations before excavation. Call 811 at least 3 business days before digging. Hamilton Mill and Sycamore Ridge have fiber, electrical, and irrigation at shallow depths in rear yards.
8. Decide on lighting. A firepit with no surrounding lighting is a hazard when guests walk away toward the house before their eyes adjust. Low-voltage step lights along connecting walkways run $380-$640 and are one of the highest-return small upgrades we make.
Get these eight things decided before a shovel hits the ground, and whichever of the three approaches you pick will work. Skip any of them and you’re calling us a year later for a fix.
The three Dacula projects landed at different price points — $8,400 in recess work on top of the patio in Sycamore Ridge, $6,200 for the seat-wall circle in Hamilton Mill, $3,400 for the off-patio element on Harbins Rd — and all three homeowners are still using those spaces in year three and four. That’s the real measure: does the firepit still get used in November, or has it become decoration? The design decision is made long before the first paver gets laid.
Firepits & Fireplaces across 20+ cities within 30 miles of Snellville, GA
If you’re weighing a recessed, seat-wall, or off-patio firepit for a Dacula backyard, we’ll walk your yard, read your wind, and spec the approach that actually fits how you use the space.