
Q: Can you lag-bolt a 14-foot cedar pergola to the back of a 2019 Hutchinson Farm build and call it a day? A: Only if you want a stamped letter from Alpharetta Community Development stapled to your permit rejection. Attaching a pergola to a modern home is a structural connection — flashed, engineered, and sealed — not a weekend carpentry problem.
This is the single most common question we field from homeowners in Avalon-adjacent townhomes and the 2018+ infill streets off Academy Street: we want the outdoor kitchen or the spa seating area under a pergola, and we want the pergola tied to the house so the roofline feels continuous. Good instinct. Modern architecture rewards the continuous line. But the three ways to actually make that connection happen are not equally clean, not equally cheap, and not equally likely to survive their first real Piedmont thunderstorm.
What follows is the playbook we use on every attached-pergola project between GA-400 exits 9 and 12 — the structural options, the permit reality at 2 Park Plaza, the dollar figures on the engineer stamp, and the one connection detail every contractor wants to skip because it costs them a day of labor.
The Three Ways to Connect — and Why Only One Is Clean
There are really only three connection strategies for tying a pergola back to a Piedmont-built modern home, and each one makes a different set of tradeoffs with waterproofing, structural load, and how much of the house envelope you are willing to open up.
The first option is the ledger-board-through-rim-joist approach. A pressure-treated ledger — typically a 2×10 or 2×12 — gets lag-screwed or through-bolted into the home’s rim joist, which is the band of lumber that sits on top of the foundation and carries the floor system. The pergola rafters then seat into joist hangers or notched ends on the ledger. This is the strongest, most common, and most-commonly-miscontracted of the three.
The second is the steel bracket through brick veneer. On 1990s-era Windward and Country Club of the South homes with full brick wraps, you cannot just bolt into veneer — veneer is a cladding, not a structural skin. The bracket has to pass through the brick, through the air gap, and land in the structural member behind it (usually the rim or a doubled stud). Steel brackets cap the feasible projection of the pergola — in our experience, a clean 24-inch maximum projection before the moment load exceeds what the bracket-and-stud combo wants to carry.
The third is freestanding but pergola-adjacent-to-house — the pergola gets its own set of four or six posts on proper footings, set two to six inches away from the home’s wall with no physical connection. This is the cleanest for waterproofing because nothing penetrates the envelope, but you lose the continuous roofline look that drove most of our clients to want an attached pergola in the first place.
Within those three strategies, the subtler choice is the beam-to-ledger junction itself. A pergola rafter can seat onto the top of the ledger (a simple-span sitting connection), hang off the face of the ledger in joist hangers (a shear connection with Simpson LUS or HUC hardware), or pass through a notched pocket in the ledger (a moment connection that’s almost always overkill for residential pergolas). The sitting connection is what 95% of modern Alpharetta pergolas we build use — it’s serviceable, it resists uplift with hurricane ties, and a future homeowner can actually replace a rotted rafter without disassembling the whole structure. Face-hung with joist hangers becomes necessary only when the pergola beam height needs to align with the underside of a second-floor overhang or a specific interior ceiling line.
When freestanding wins: If the home is less than six years old, still under builder warranty, and the builder’s warranty language excludes future penetrations of the rear wall — go freestanding. We’ve seen warranty claims voided over a 3/8-inch lag hole.
The Ledger-Board Connection, Done Correctly
A correctly executed ledger connection has six elements, and in our experience, at least two of them get skipped on maybe half the retrofit jobs we inspect in North Fulton. The six elements: a pressure-treated ledger sized to the span, flashing above the ledger turning up behind the siding or veneer, flashing below the ledger turning out over the face, proper fastener spacing and type, structural attachment to framing (not sheathing), and a weep gap or standoff between the ledger and the wall so trapped water drains.
The fastener question alone kills a lot of projects. A 1/2-inch lag screw driven into a rim joist has a published shear value — but only if it lands in wood, at the specified penetration depth, at the specified spacing. GRK RSS structural screws are what we typically spec at 16-inch on-center staggered, because they carry a published ICC evaluation report number that permit reviewers recognize on sight. A 3/8-inch lag at 24-inch spacing will not pass plan review on any pergola over 100 square feet.
The flashing detail is where most DIY and low-bid jobs fail in year two or three. Piedmont rain events routinely deliver two inches in 45 minutes. That water is moving sideways as much as it is moving down. A ledger mounted flat against a home’s sheathing with no flashing behind it is a wick — water runs off the pergola’s beam, tracks back along the top of the ledger, and follows gravity into whatever wall cavity is behind it. Six years later, the homeowner pulls the ledger off to investigate a musty smell and finds blackened sheathing and rotted studs. The fix is a structural re-side and costs more than the original pergola.
The correct detail is a two-piece flashing. The first piece — typically aluminum or copper — slides up behind the existing siding or behind the house wrap on a brand-new build, then bends out and over the top of the ledger at a slight downslope. The second piece is a kick-out flashing at the termination of the ledger, which throws water out away from the wall at the corners rather than letting it wick back into the adjacent wall cavity. Kick-outs are the detail that even experienced deck contractors forget, because pergola ledgers historically haven’t required them. On modern Alpharetta homes — with their tight-eave detailing and their wall-mounted HVAC condensate lines often running just below the ledger zone — skipping the kick-out is the single most common cause of the mystery wet spot that shows up on the interior drywall the following spring.
The weep-gap standoff is the sixth element, and the one that gets argued about most on jobsites. A standoff — typically 1/2-inch PVC or Trex spacers, or a dedicated product like Maine Deck Brackets — holds the ledger off the wall by a half inch so that any water that does get behind the flashing has a path to drain down and out rather than pooling. Old-school carpenters call this unnecessary because “the flashing handles it.” It doesn’t, always. The flashing handles most of it. The standoff handles the rest. On any attached-pergola job where the homeowner expects the structure to last more than 10 years, we install the standoff every time.

Brick Veneer Homes — Why 24 Inches Is the Ceiling
The brick-clad ranches and two-story colonials that make up most of Windward and the established sections of Country Club of the South require a different approach. You cannot bolt a ledger flat to brick veneer. Brick veneer is not a structural element — it is tied to the actual structural wall with small corrugated metal ties every few courses, and those ties are engineered to resist lateral wind loads on the brick itself, not to carry a cantilevered pergola trying to pull the top out of the wall.
The only code-compliant way to attach is a through-bolt or lag that passes through the brick, through the air gap, and lands meaningfully into the structural wall behind — typically the rim joist on a first-floor attachment or a doubled stud at a second-floor one. You seal the brick penetration with a non-sag polyurethane or silyl-terminated polymer sealant around the fastener head, and you use a galvanized or stainless sleeve through the brick to prevent the fastener from crushing the brick around it.
Because the load path now runs through a relatively small cross-section of wood behind the veneer, the moment arm of an attached pergola has to be short. Our rule of thumb for brick-veneer attachments in Alpharetta homes of this era: cap the projection — the distance from the home wall out to the outboard beam — at 24 inches. Beyond that, you are effectively asking the brick-to-stud connection to resist a prying load it was never engineered for. For anything deeper than 24 inches, the outboard half of the pergola gets its own footings and posts, and the home connection becomes a tie rather than a cantilever support.
The brick-face repair clause: Any attached-pergola contract we write for a Windward or Country Club of the South home includes a clause that if the homeowner ever detaches the pergola, brick face repair is $28 to $65 per penetration — and needs a mason with a matching-brick-source inventory. 1990s brick runs don’t match 2026 production runs on color alone.
The Alpharetta Permit Reality — What 2 Park Plaza Actually Wants
Here is the point most homeowners don’t find out until they’re three weeks into design and the permit counter hands back their application: Alpharetta Community Development — in-city jobs, addressed through 2 Park Plaza rather than unincorporated Fulton County — requires stamped structural drawings for any attached pergola over 100 square feet. Not just any drawings. Stamped by a Georgia-licensed structural or architectural engineer, with calculations showing the connection loads, the fastener schedule, and the lateral resistance of the connection to the home’s framing.
This is the fork in the road. A small freestanding pergola — an 8-by-12 over a grill station — can run through permit on a homeowner-drawn set in a week. The same 8-by-12 attached to the house rim joist requires an engineer stamp, a revised plan set, and a plan-review turnaround that typically runs two to three weeks.
The engineer stamp itself runs $480 to $1,400 in current Atlanta-metro rates, depending on complexity. A standard ledger-to-rim-joist attachment on a cookie-cutter two-story with clear access runs toward the low end. A brick-veneer attachment on a home with no as-built drawings, where the engineer has to verify framing in the field before issuing a stamp, runs toward the high end — and sometimes past it if the framing inspection requires opening a small interior wall panel to confirm rim-joist species and depth.
The net of this: in-city Alpharetta permits through the Community Development office are actually faster than the surrounding unincorporated Fulton County process, which routes through the county offices downtown with a different review calendar. The tradeoff is the stamp requirement. A pergola built in unincorporated Fulton just off the Alpharetta line might skate through with a less rigorous structural review. The same pergola three blocks south — inside city limits — gets the stamp treatment every time.
The HOA Architectural Review — Windward and Country Club of the South
Separate from the city permit, separate from the structural engineer, the two strictest architectural review boards in our coverage area run in Windward and Country Club of the South. Their ARBs enforce a three-to-four-week architectural review on any structure that changes the rear elevation of a home — and an attached pergola absolutely changes the rear elevation. Both boards require material samples, stain or paint chips, a site plan with setbacks, and an elevation drawing showing the pergola’s relationship to the home’s existing rooflines and windows.
Two specific details trip clients up. First, stain color. Both Windward and Country Club of the South maintain approved stain palettes for exterior wood, and “natural cedar” is not always one of them — some sections require a darker Sikkens Cetol or Olympic WoodGuard charcoal or walnut tone to match existing trim. Second, roofline angles. If your pergola’s top chord projects above the first-floor rear window head height — or crosses the roofline of an existing covered porch — expect a resubmission request.
The ARB calendar is also not on your side. Windward’s board meets twice a month. Country Club of the South’s meets monthly. If you submit two days after a meeting, you are effectively waiting three and a half weeks just to get in front of the board. Our standing advice: get the ARB submission in parallel with the city permit application, not after. The engineer stamp and the ARB packet use largely the same elevation drawings.
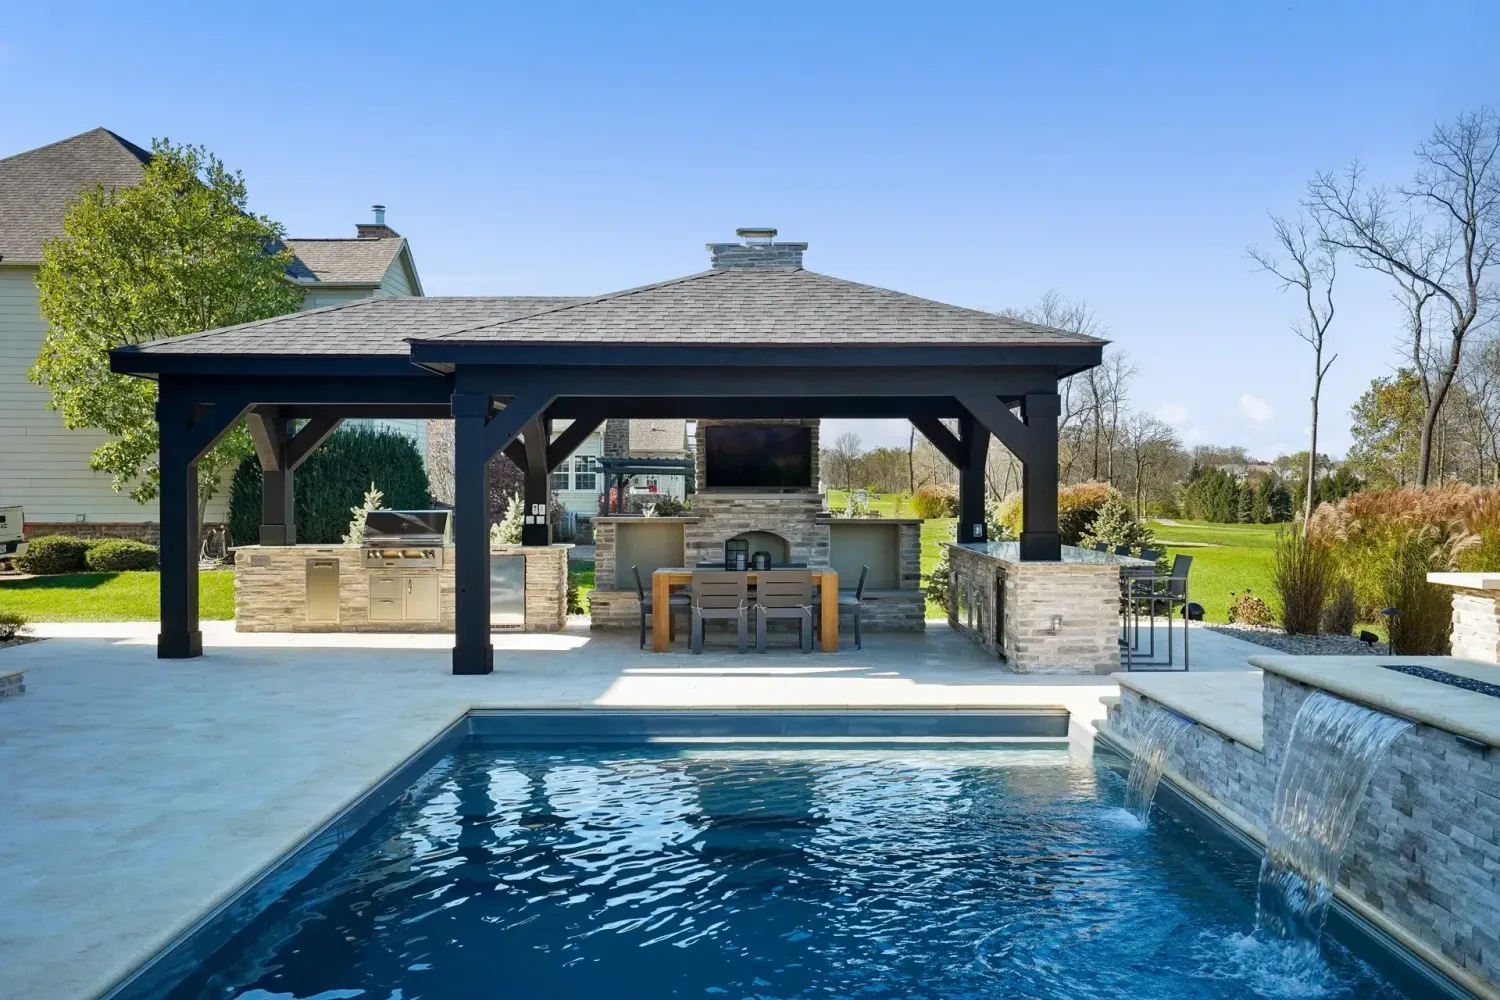
One more ARB-specific detail worth naming: both boards look at how the pergola integrates with the existing hardscape and pool envelope. A pergola that appears as a freestanding architectural afterthought — one that doesn’t visually anchor to an existing patio line, deck material, or planted bed — gets more revision requests than one that’s clearly drawn as part of a coordinated rear-yard plan. If the pergola is going over an outdoor kitchen and the kitchen counter material is a Dekton or a honed bluestone, showing the ARB board the material samples for the counter, the paver deck, and the pergola stain as one palette dramatically shortens the review loop. The reviewers are looking for cohesion, not individual structure approval.
Finally, on smaller subdivisions outside Windward and CCS — the Ashebrooke, Haynes Manor, and Brookhollow scale neighborhoods — the ARB process is typically lighter but still exists. A single architectural committee chair usually signs off within a week, as long as stain color and general massing match the neighborhood pattern. The homes near Avalon and Alpharetta’s downtown historic district, however, sometimes fall under city-level design overlay standards that go beyond HOA review — which is a separate conversation with Community Development, not the HOA.
Utility, Drainage, and the Details That Trip Up Year Two
Two Alpharetta-specific conditions drive details most out-of-state design templates miss. The first is the utility service split. Georgia Power serves most of in-city Alpharetta; the northern neighborhoods bleeding into Milton sit on Sawnee EMC. The inspection calendars are not the same, and if your attached pergola includes any ceiling fans, low-voltage landscape transformers, or integrated lighting that touches the home’s electrical panel, the coordination depends on which utility holds the service drop. Sawnee EMC’s inspection window runs 3-5 business days longer than Georgia Power’s on average — plan accordingly.
The second is drainage. Alpharetta sits on Cecil-series red Piedmont clay with pockets of Appling sandy loam in the older farm-conversion tracts. The Cecil soils have moderately high shrink-swell behavior, which means the ground under the pergola’s outboard posts expands when wet and contracts when dry. If your post footings are shallow — anything less than 24 inches below grade — that seasonal movement will rack the pergola frame relative to the ledger over a four-to-six-year window. The ledger holds, the outboard posts walk, and by year five the pergola has a visible lean.
Most of Alpharetta’s backyards run a gentle ridge-and-valley grade — typical 3 to 6 feet of drop across a residential lot along the GA-400 corridor. An attached pergola off a rear wall on the upslope side of the house often wants to sit over a natural drainage swale. If you build over a swale, you have to either redirect the drainage around the pergola posts with a French drain or accept that the posts are going to sit in wet soil half the year. We redirect every time. A French drain with 4-inch perforated SDR pipe in 3/4-inch washed stone runs $18 to $26 per linear foot installed, and it adds ten years to the post-footing life.
Budget — What an Attached Pergola Actually Costs in Alpharetta in 2026
The all-in number for an attached pergola in Alpharetta, done right and permitted, runs a wide range because the variables are real. A starter spec — 10-by-12 cedar, ledger connection to a frame-backed wall, no lights, no fans — lands in the $11,500 to $16,800 range installed. A finished spec — 14-by-18, brick-veneer attachment with dedicated outboard footings, charcoal-stained rough-sawn cedar, integrated downlighting on a low-voltage transformer, with structural engineer stamp and city plan review — runs $24,000 to $38,500.
That range includes the engineer stamp ($480-$1,400), the Alpharetta city permit fee, the HOA architectural review fee where applicable (Windward runs $125, Country Club of the South runs $250-$400 depending on scope), any brick-face drilling and sealant work for veneer attachment, the pergola material itself, dedicated footings for outboard posts, hardware, stain, and the labor to coordinate between the engineer, the city, the HOA, and the utility service inspection.
What’s not in that range: electrical work on a fan or ceiling outlet that requires opening the house wall to run conductors back to the panel. That’s a separate trade, separate permit, and adds $900 to $2,400 depending on how far the home run is and whether you’re pulling new conduit through a finished ceiling. And roof tie-ins — where the pergola connects not just to the rim joist but up under an existing soffit or fascia — add another $1,800 to $4,200 for the flashing reconfiguration and soffit repair.
The decision point for most Alpharetta clients is not whether they can afford the attached pergola — it’s whether the marginal cost of going attached rather than freestanding is worth the continuous-roofline aesthetic. Our rough rule: the premium for attached-versus-freestanding on an otherwise identical spec is $3,500 to $6,500, driven almost entirely by engineer stamp, permit delta, and flashing labor. On a 2018+ modern home where the continuous sight line actually changes how the backyard reads from the primary interior view — the great-room window, the kitchen breakfast nook — the premium is almost always worth it. On an older Windward brick colonial where the pergola is going to read as a distinct structure anyway, the freestanding route usually wins.
Timeline reality check: From signed contract to pergola-ready-for-use on an attached build in Alpharetta: 9 to 14 weeks. That’s 2-3 weeks engineer stamp + revised plans, 2-3 weeks city plan review, 3-4 weeks ARB review (can run parallel), 4-6 weeks material lead time on kiln-dried rough-sawn cedar, and 6-9 build days. Nobody gets this done in a month.
Pergola design and pool integration across 20+ cities within 30 miles of Snellville, GA
If you are planning an attached pergola on an Alpharetta modern home — Windward, Country Club of the South, Hutchinson Farm, or any 2018+ Avalon-adjacent build — we coordinate the structural engineer, the city permit, the HOA submittal, and the hardscape footings as one sequence rather than four fragmented ones.